Conversations Auto-Assignment in Reflys
It’s essential to distribute all the types of conversations to the right support team member on the platform. With Reflys Auto-Assignment, you can automatically assign conversations to team members. Auto-Assignment allows support teams to streamline their workflows to the optimum level by providing proper coverage of all queries while ensuring no agents are overworked.
Let’s discuss the various modes of auto-assignments in Reflys.
What is Auto-Assignment?
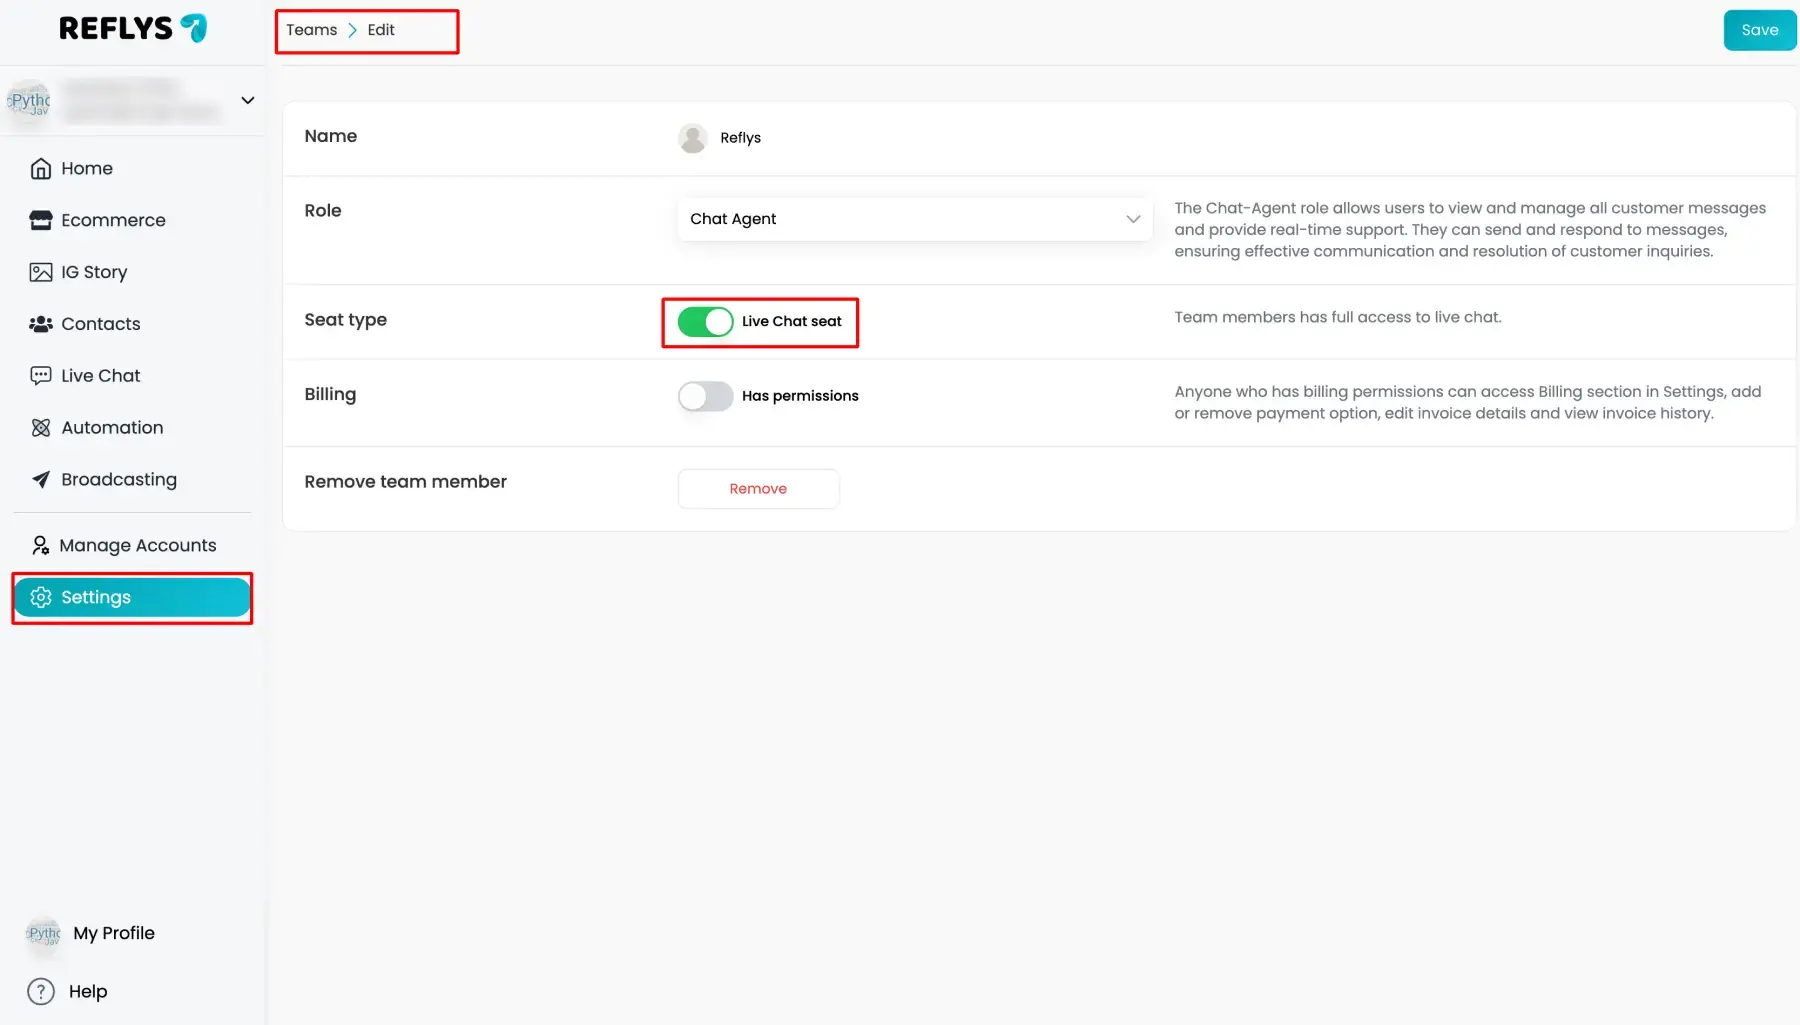
Auto Assignment is a feature that assigns new conversations to team members on a first-come, first-served basis, based on their availability and priority. As compared to team members manually retrieving conversations from the “Unassigned” folders, Auto-Assignment distributes conversations according to specific customer support settings. Before setting auto-assignment, ensure that the team member has enabled Live Chat Seat from
Reflys Dashboard > Settings > Main > Team Member > Edit
This ensures:
- Faster response times for customers.
- A balanced workload for team members.
- A more organized support workflow.
Auto-Assignment settings are available at Settings → Inbox → Auto-Assignment.

Modes in the Auto-Assignment Feature
Auto-assignments in Reflys are of three types
1. Off
- Auto-Assignment is disabled.
- All new messages are posted in the unassigned folder.
- Conversations have to be manually picked and assigned by agents.

When the toggle is off, the conversations have to be manually picked and assigned by agents.
2. Basic Auto-Assignment
In Basic mode, Reflys will automatically assign conversations equally to all available team members.
Key features
- Auto-assigned chats can only be accepted by Agents who are using a Live Chat seat.
- You choose what team members should be auto-assigned.
- You can set an Assignment Limit for each member to determine how many simultaneous conversations they are going to manage.
- Once a member hits their limit, Reflys won’t allocate any new chats to them until they close or resolve the ones that already exist.
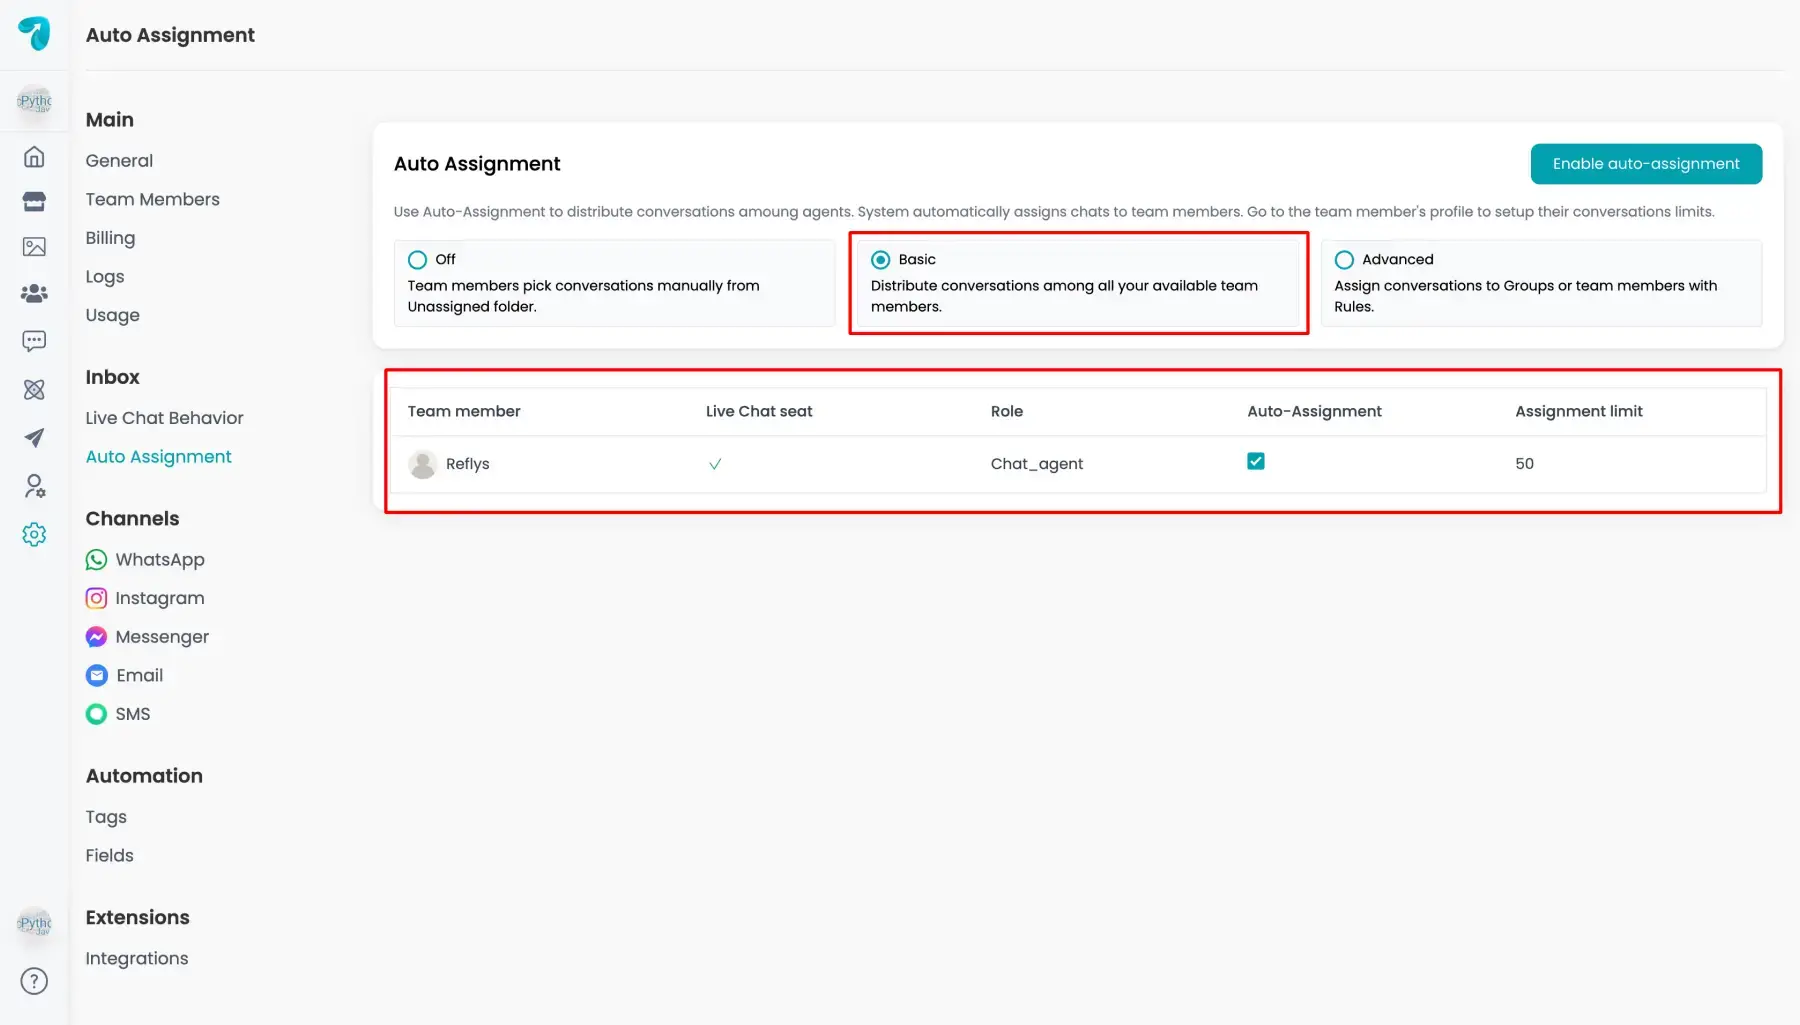
If no limit is specified, the agent can receive as many conversations as needed.
Note: Conversations may not be auto-assigned to teammates with any defined limit.
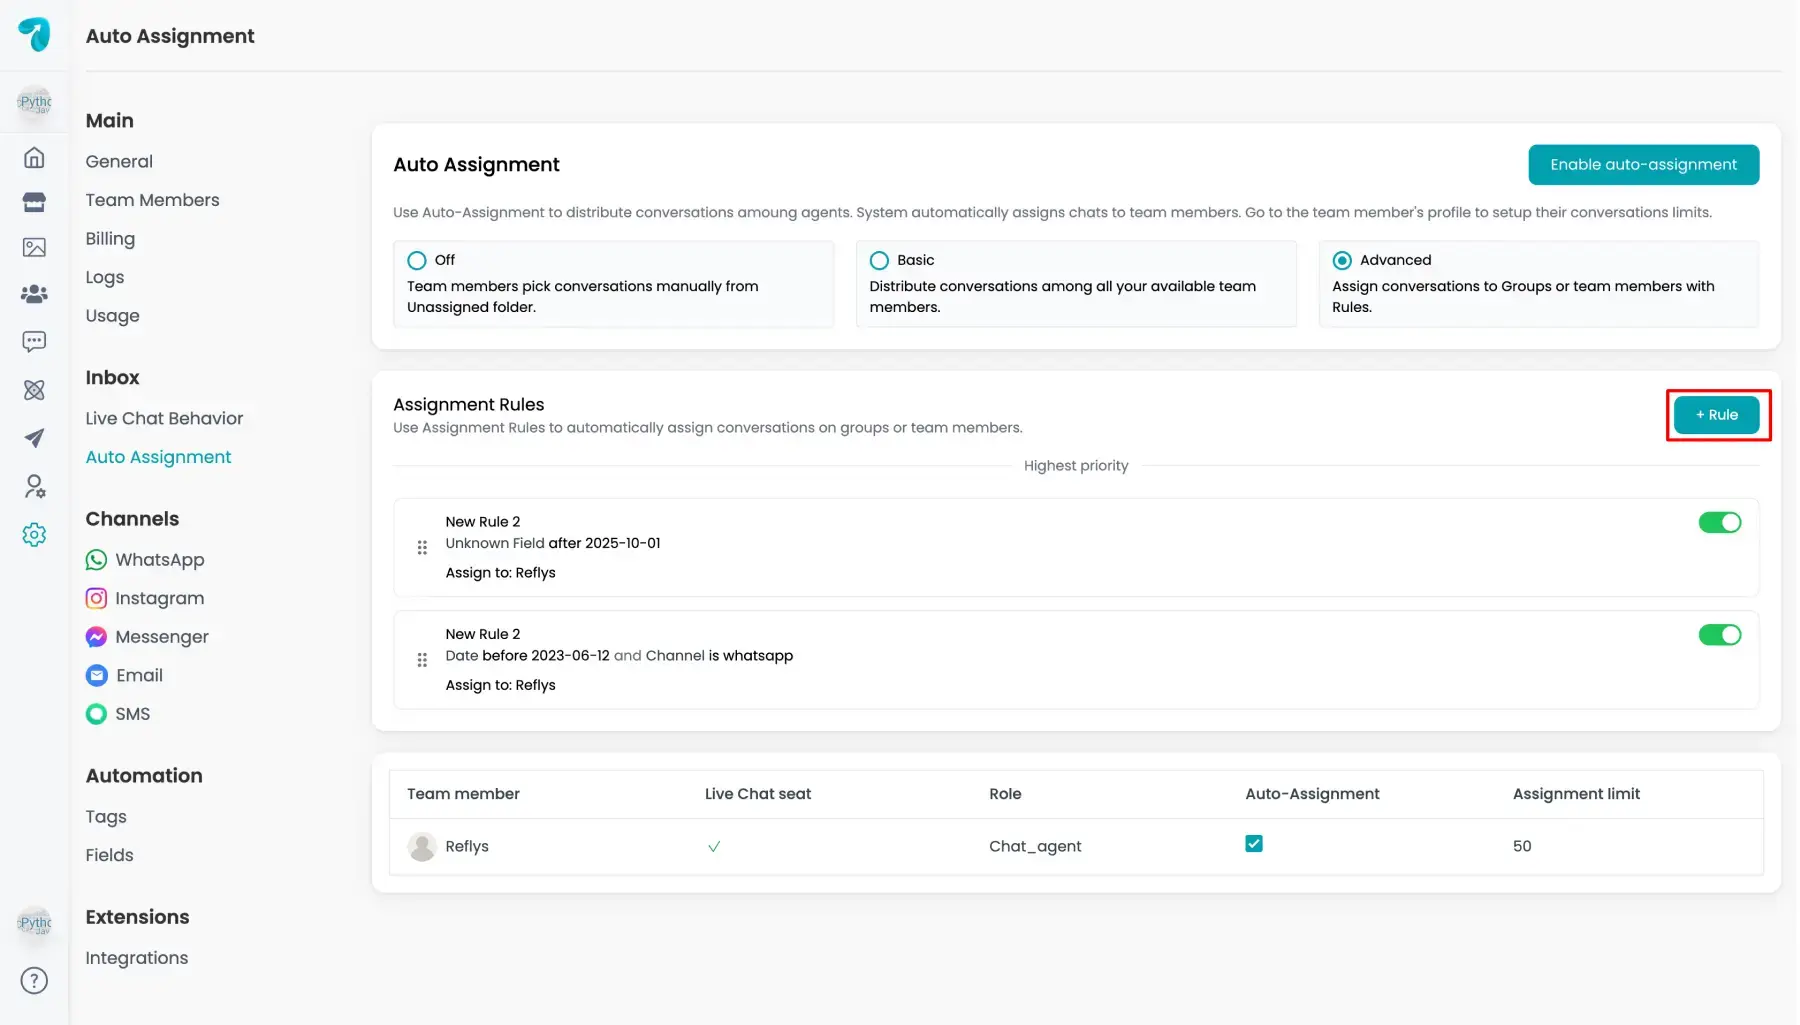
3. Advanced Auto-Assignment
In Advanced mode, you can set the conversations as rules, which lets you define the rules for whom such a conversation should be assigned.
This allows you to better control chat distribution.
How it works
- Rules are formed out of conditions and priorities.
- You can categorize conversations for the specific team members according to different fields.
- Supported fields include:
- Tags conversations (e.g., tagged as “Sales” go to a sales agent)
- Channel (WhatsApp, Instagram, Messenger, etc.).
- Custom field including (“Date,” “Sale amount,” or a new custom field you build)
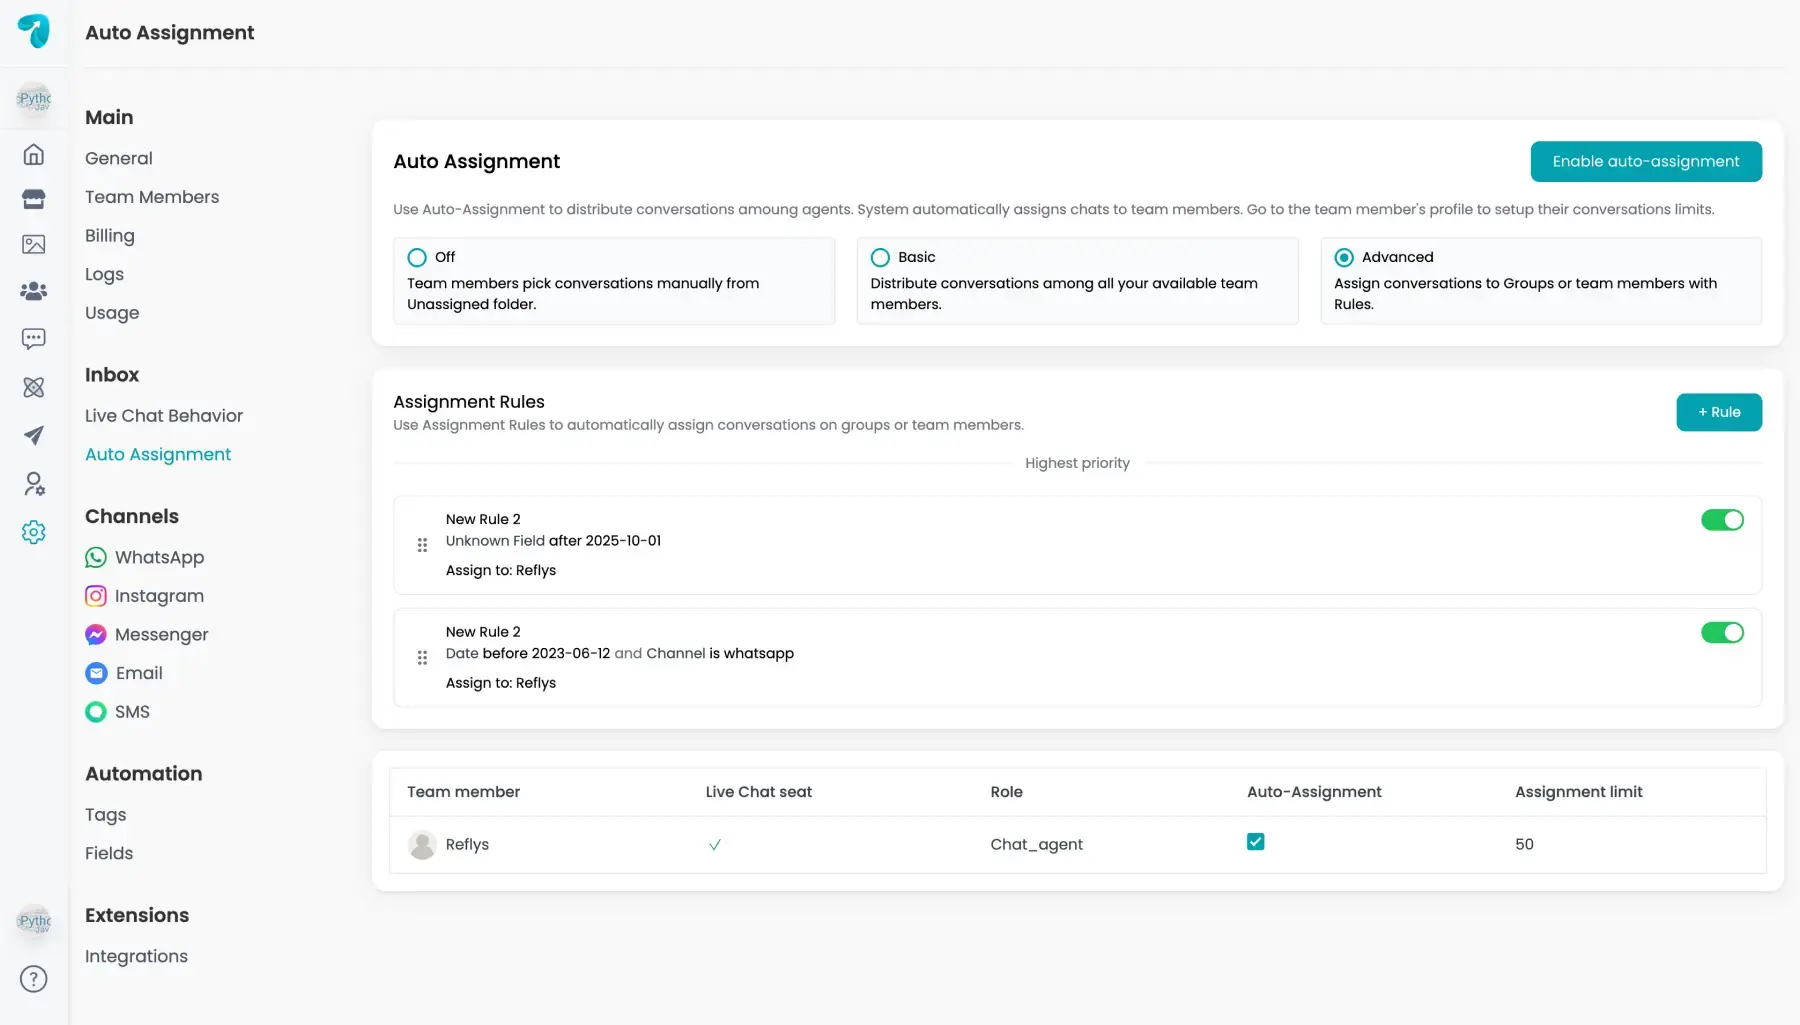
This flexibility helps direct conversations toward the appropriate person from the beginning. For example:
- WhatsApp requests → routed to your support agent.
- Sales-tagged questions→ routed to your sales rep.
- High-priority tickets → assigned to a senior member.
Note: Ensure agent limits are defined before enabling rules. Otherwise, the rule won’t activate
How to Set Up Auto-Assignment in Reflys
To enable and configure Auto-Assignment, follow the following details
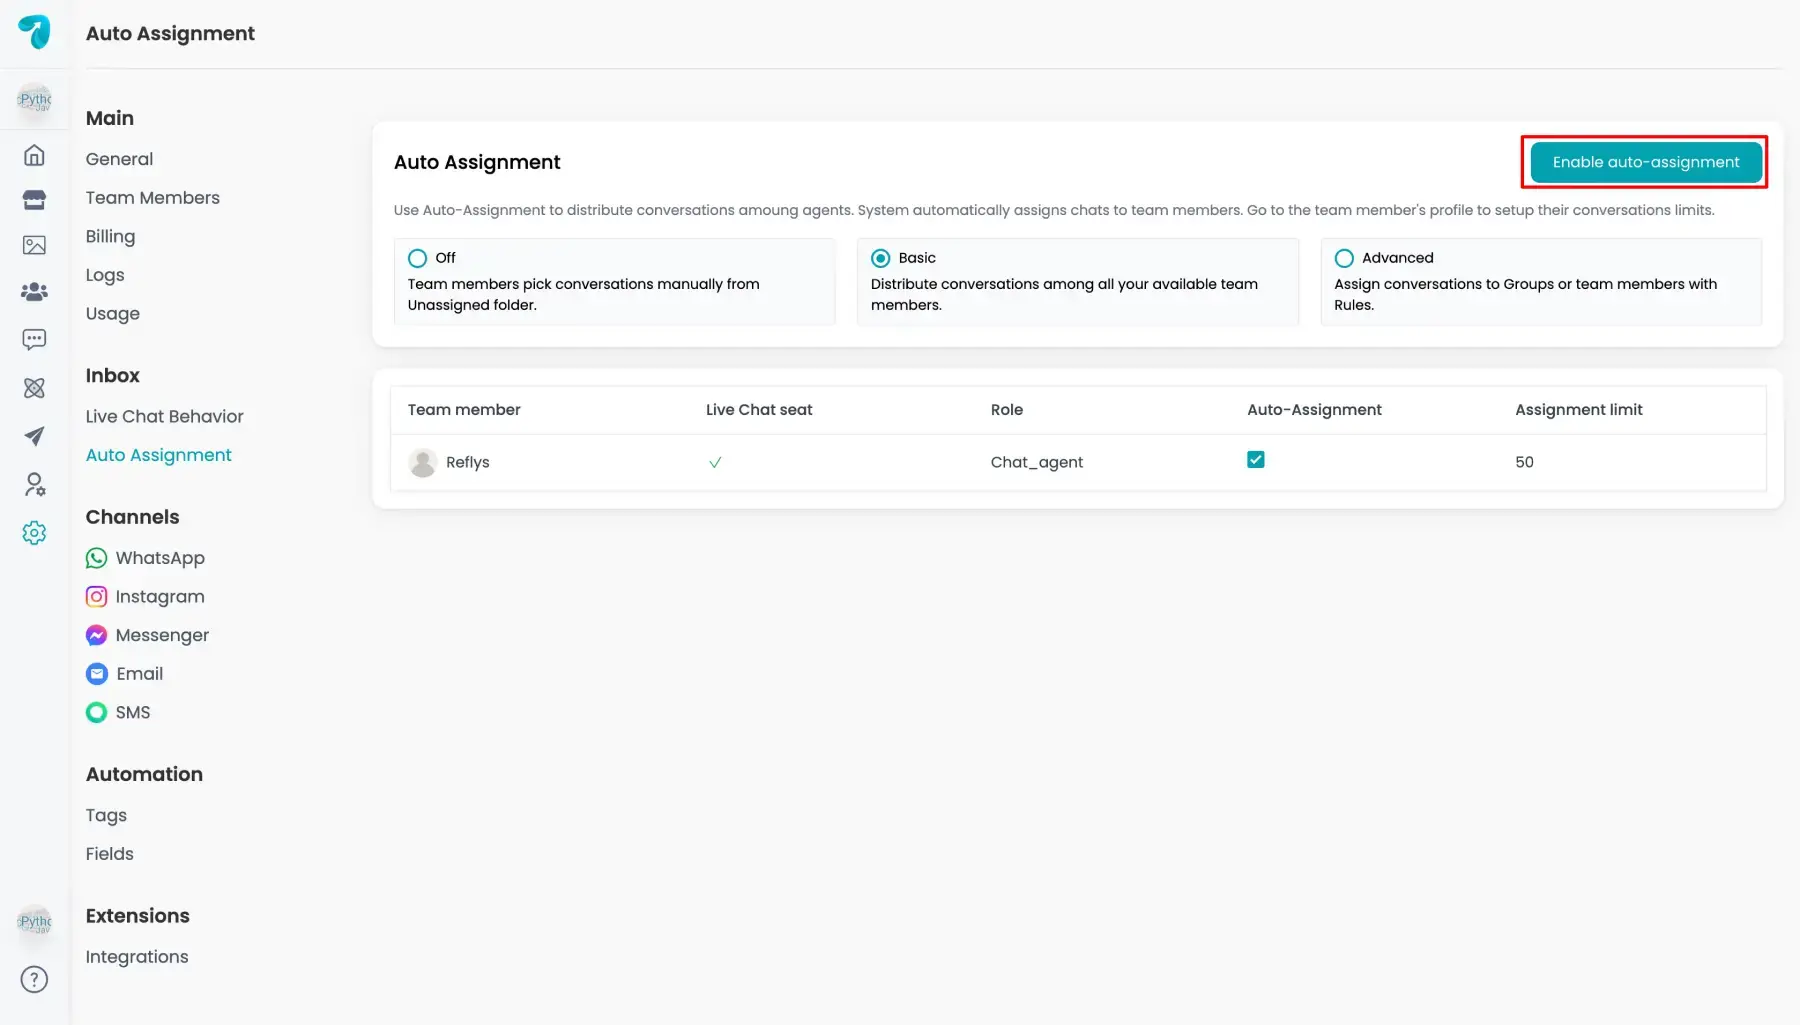
Step 1: Enable Auto-Assignment
- Go to Settings → Inbox → Auto-Assignment.
- Select the mode: Off, Basic, or Advanced.
- Click the top right and enable Auto-Assignment.
Step 2: Configure Basic Auto-Assignment
- Select Basic mode.
- Decide which team members should be included.
- Go to Settings → Team Members, click Edit on a member profile.
- Ensure they have enabled a Live Chat seat.
- Determine their Assignment Limit (e.g., max 10 conversations at a time).
- Save the changes.
Now, Reflys will automatically distribute the conversations based on your team’s availability and restrictions.
Step 3: Configure Advanced Auto-Assignment
- Select Advanced mode.
- Click + Rule to add a new assignment rule.
- Include Conditions (e.g., Channel = WhatsApp, or Tag = Sales).
- Select the team member the conversation should be directed to.
- Specify rules if you have several rules (higher-priority rules run first).
- Save and activate the rule.
Thus, you can set up several rules of your own to build that perfect flow for your team.
Important Notes
- Only team members with Live Chat seats can enable auto-assignment.
- New chats will stay Unassigned if all agents have reached the conversation limit.
- Rules can be edited, duplicated, or eliminated at any time.
- Be sure to consider workload balance frequently to avoid any difficulty.
When to Use Each Mode
- Off: For small teams who want to control it manually.
- Basic: For Customer Support teams, who want equal distribution.
- Advanced: For structured teams with multiple channels, tags, or sales processes.