How to Connect Facebook with Reflys
If you want to use Reflys to automate your Facebook Messenger replies, handle page inboxes, or run Messenger ad campaigns, the first step is to connect your Facebook account with Reflys.
This guide will show you, step by step, how to integrate your Facebook Page with Reflys without a technical background.
Why Connect Facebook to Reflys?
When you connect your Facebook Page to Reflys, you’ll be able to:
- Send and receive messages using Reflys automation tools.
- Set up automated replies on Messenger.
- Run click-to-Messenger ads.
- Create chat flows to reply to users 24/7.
- Track message performance and engagement.
Before You Start
Here are a few things to check before connecting:
- You must have a Facebook account.
- You should be an Admin of the Facebook Page you want to connect.
- The Facebook Page should be published (not in draft or unpublished state).
Make sure your browser is not blocking pop-ups
Step 1: Go to Facebook Settings in Reflys
- Log in to your Relys dashboard.
- In the left-hand menu, click on Settings.
- Then, choose Facebook Integration.
You’ll see a button, Connect Facebook Page or Login with Facebook.
Click this button to begin the process.

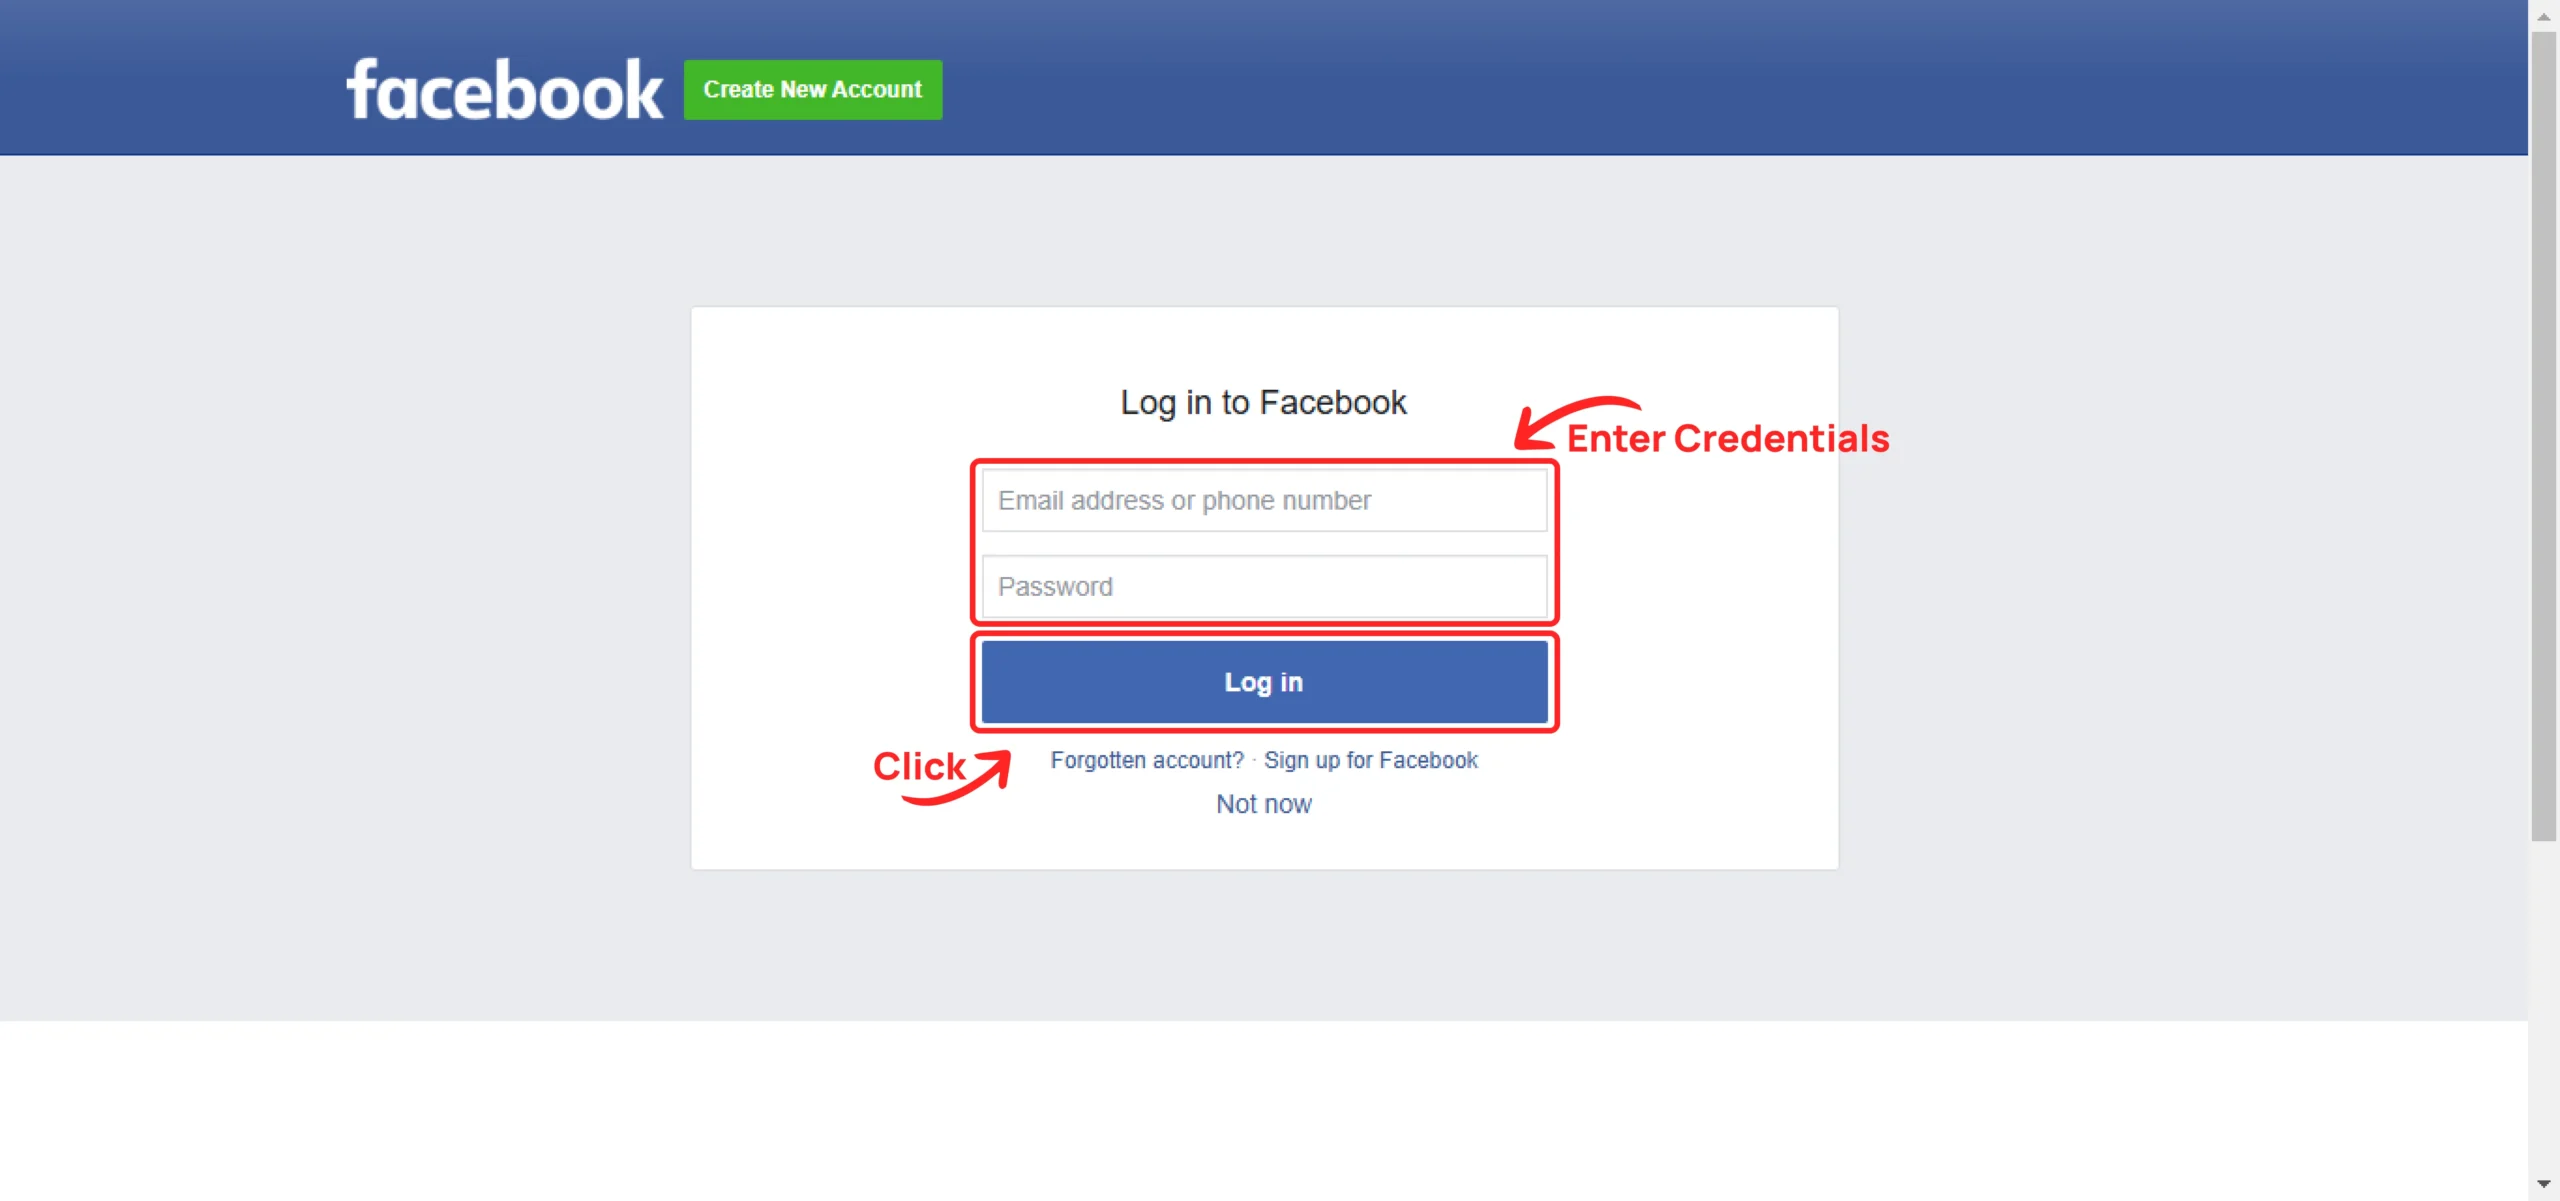
Step 2: Log in to Facebook
If you’re not already logged in to Facebook in your browser, a Facebook login window will pop up. Enter your Facebook email and password to continue.
If you’re already logged in, Reflys will skip this step and move forward automatically.
Step 3: Grant Permissions to Reflys
Once logged in, Facebook will ask you to approve permissions for Reflys to access your Pages. You’ll see a list of Facebook Pages associated with your account.
Important: Make sure you select the correct Facebook Page that you want to connect.
After selecting the page, Facebook will show a list of permissions. These may include:
- Managing Pages
- Reading content posted to the Page
- Sending messages on behalf of the Page
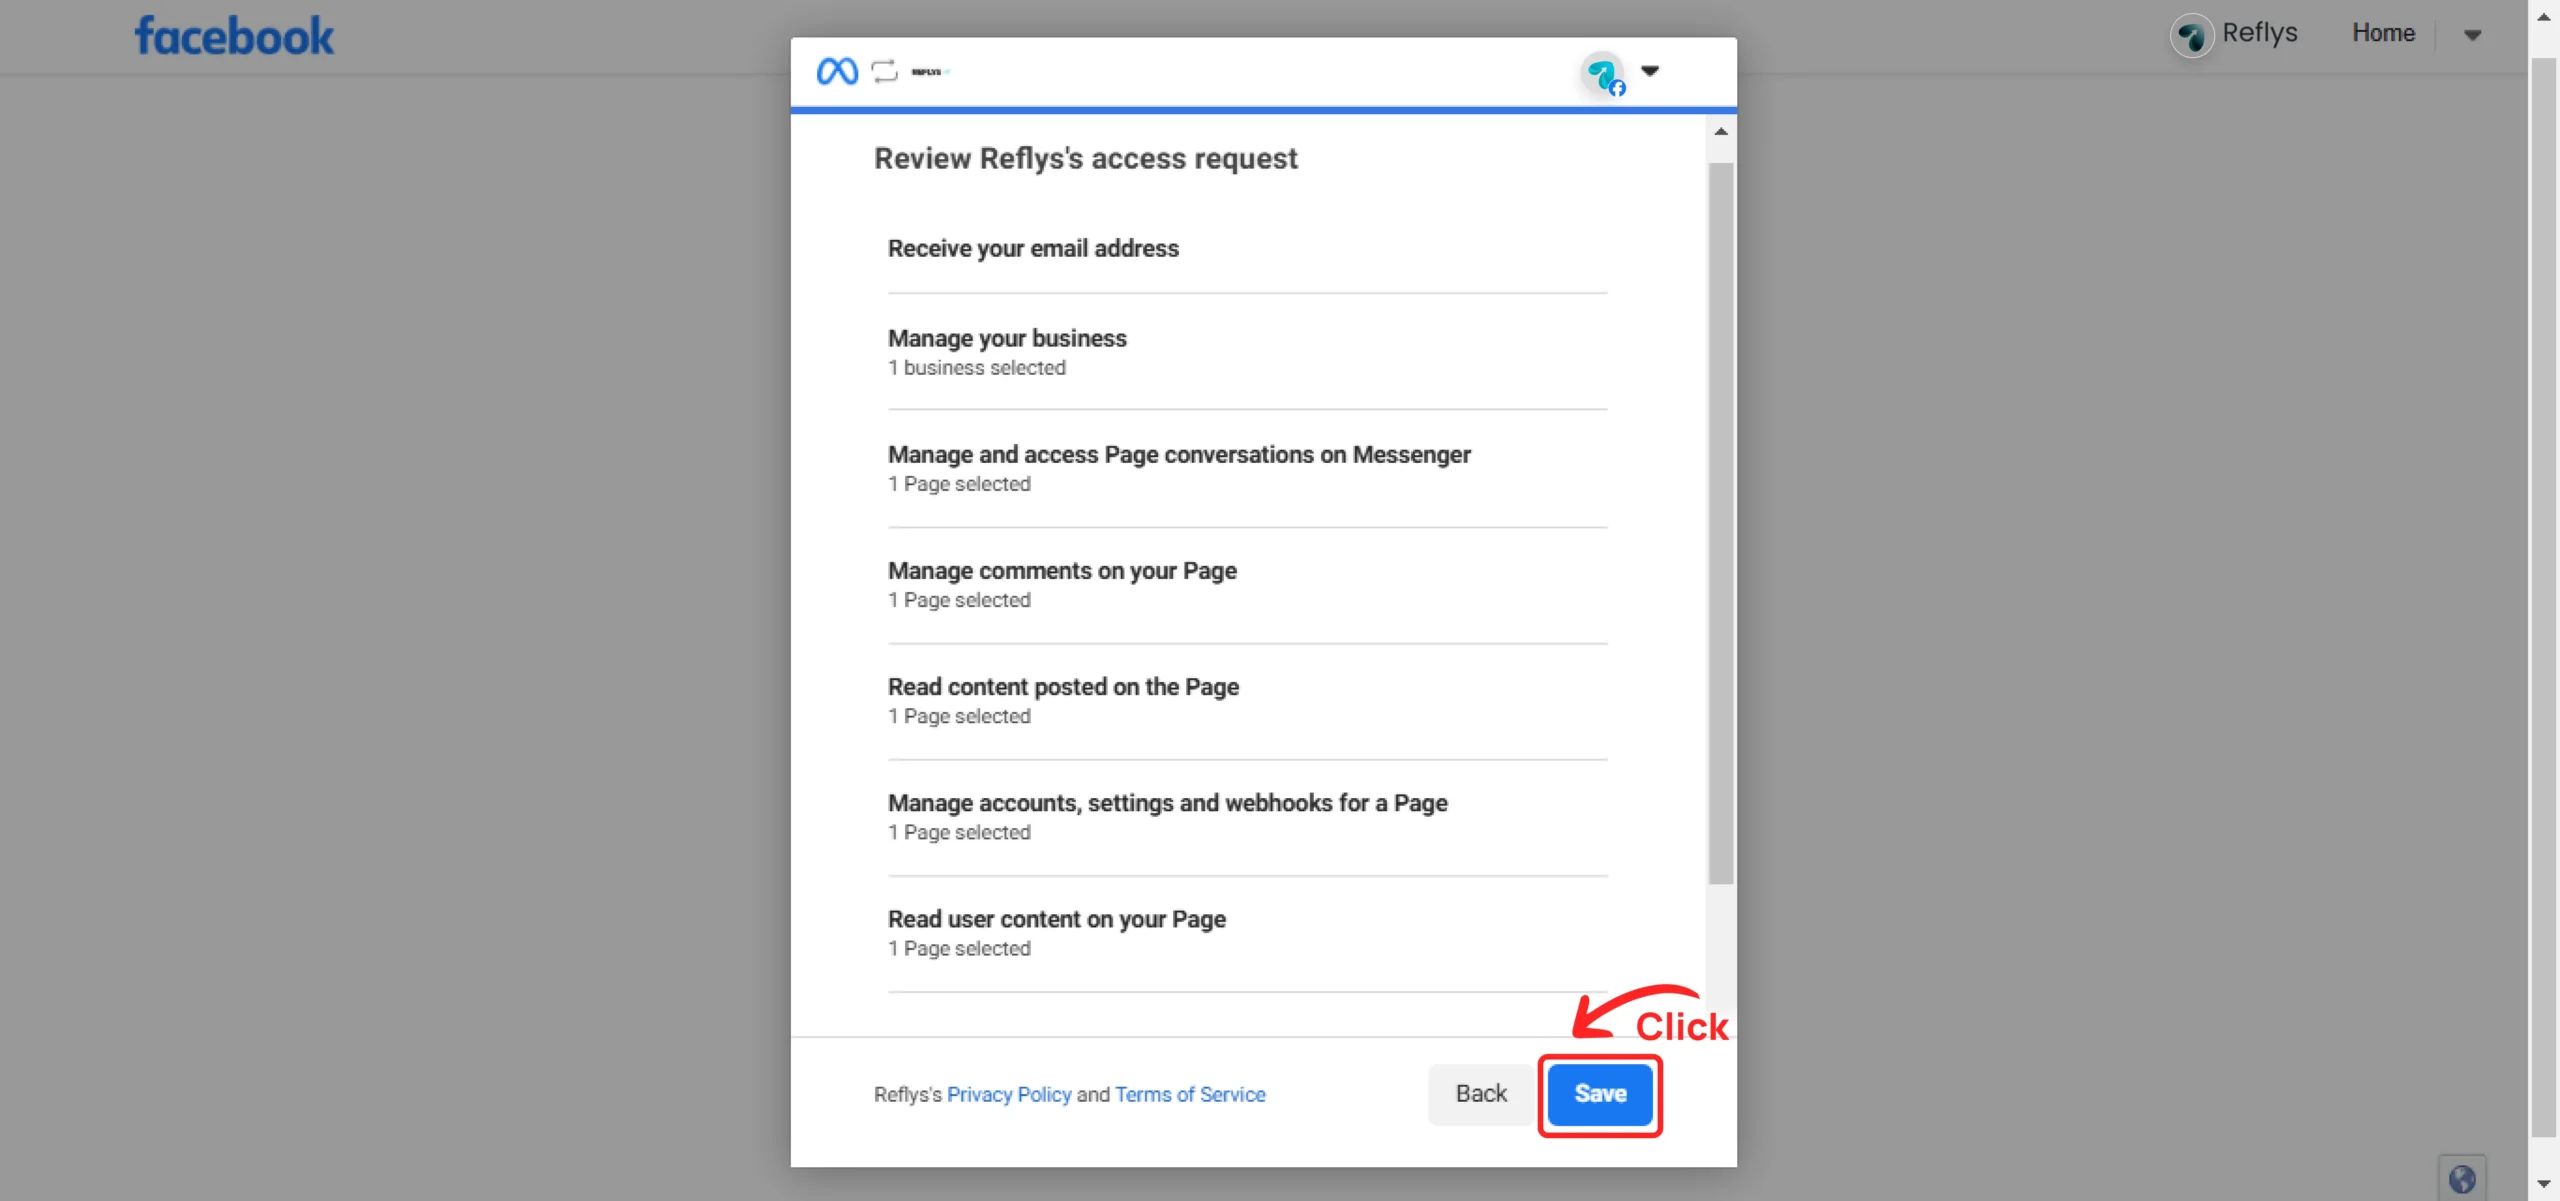
Leave all permissions enabled. These are needed for Reflys to work properly.
Click Save to Continue
Step 4: Choose a Page to Connect
After you give permission, Reflys will show you a list of your Facebook Pages. Pick the one you want to use with Reflys by clicking Connect or Select
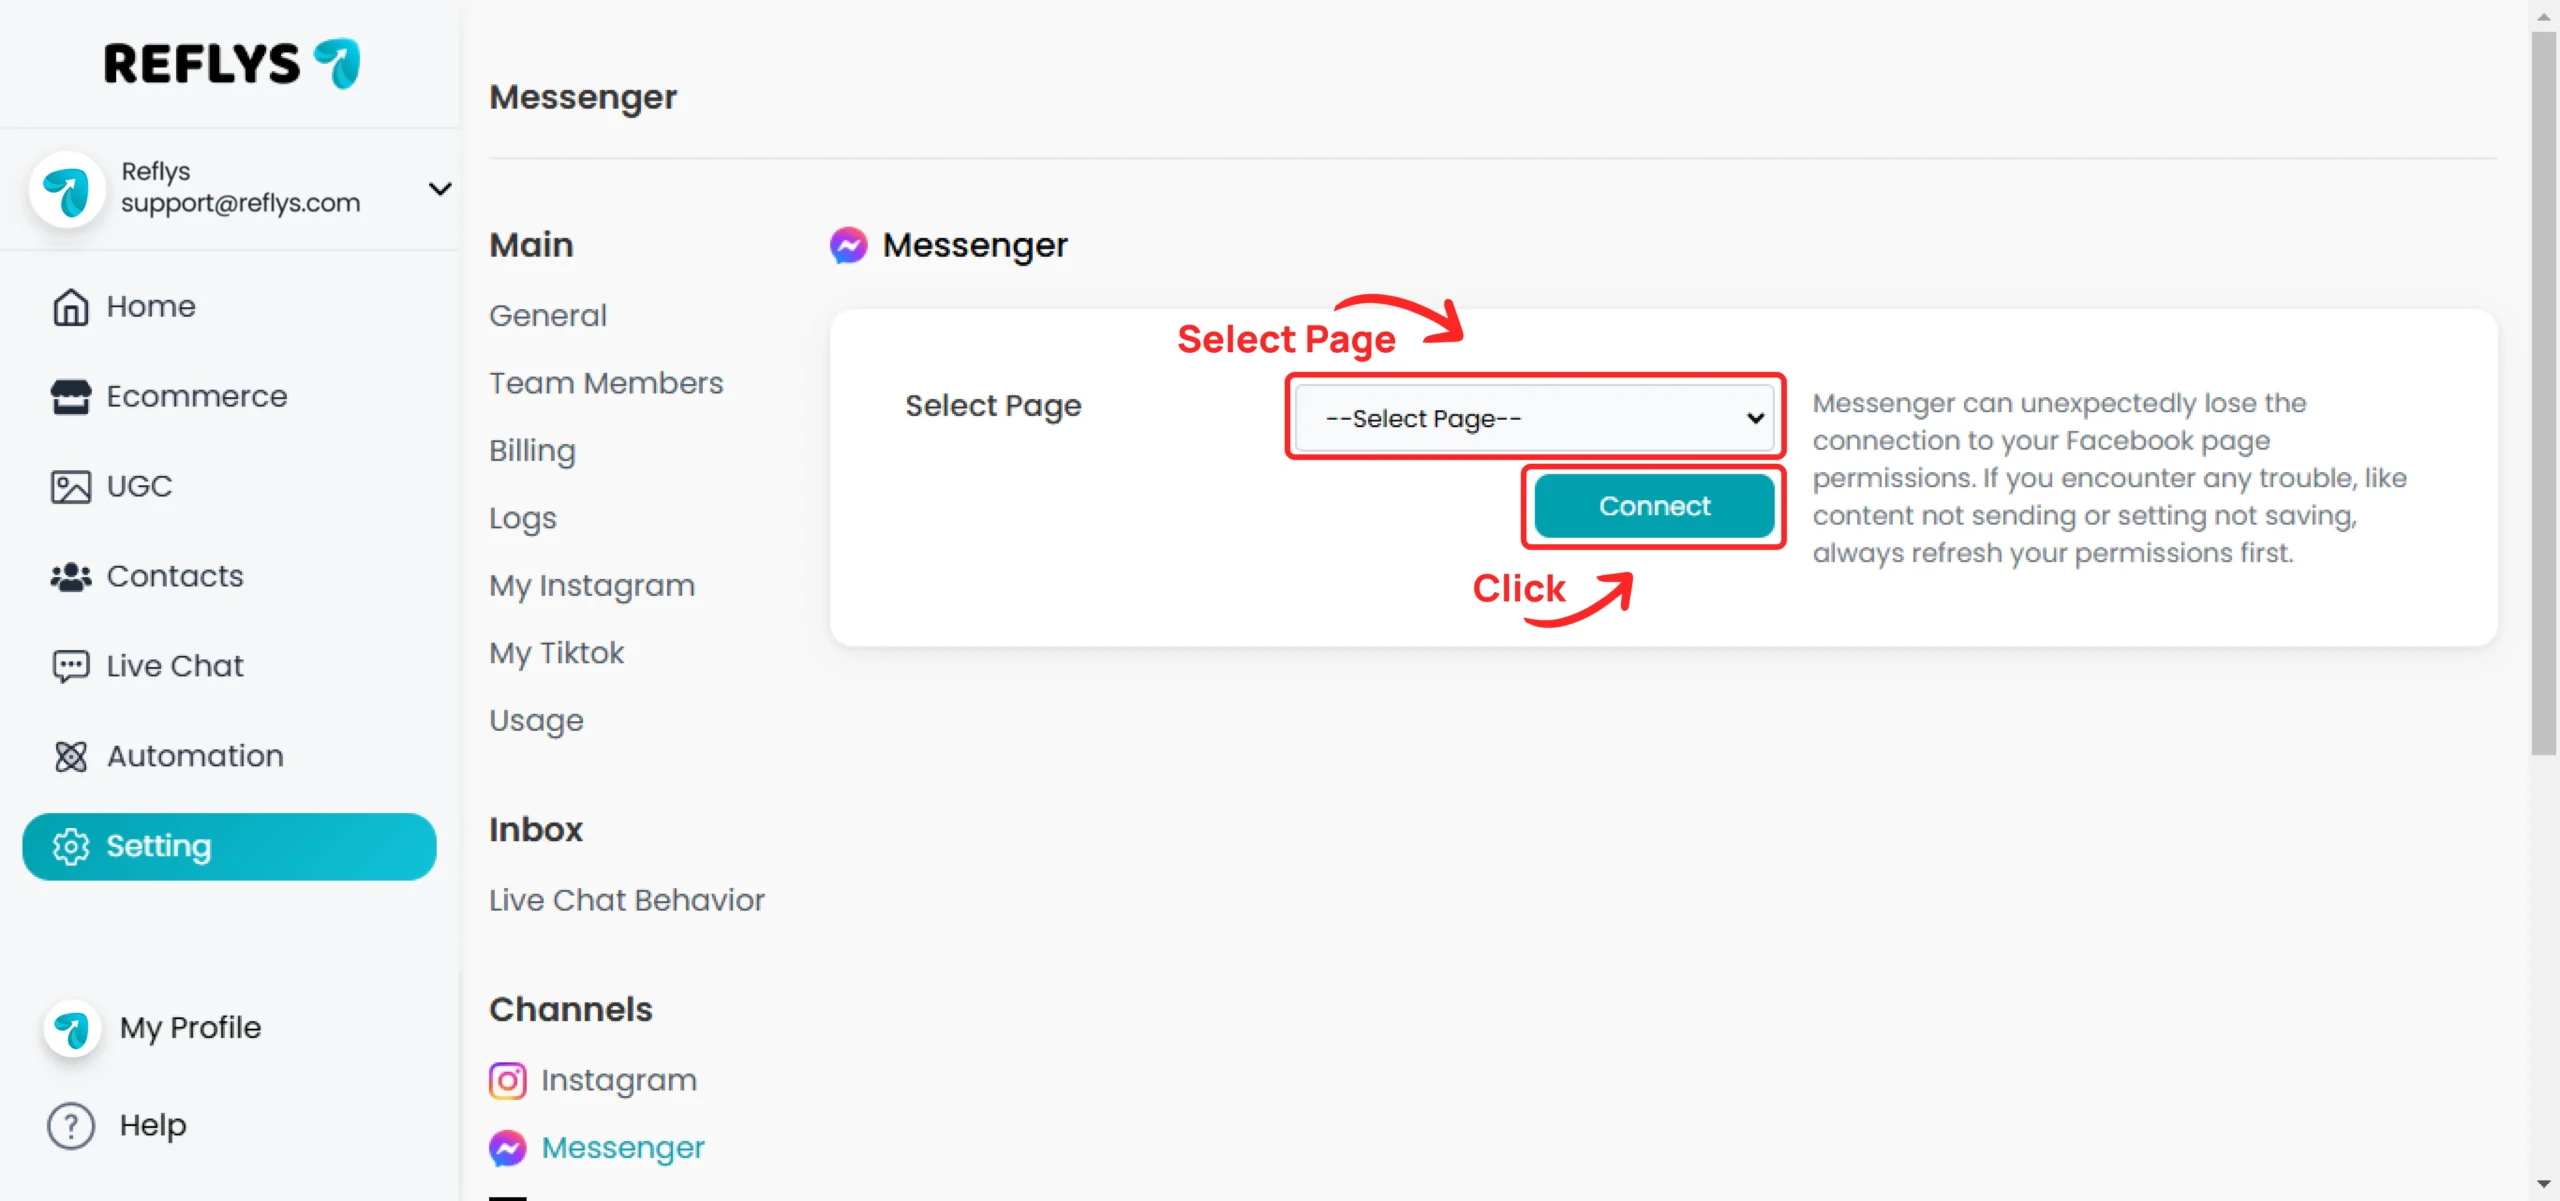
Once selected, Reflys will start linking your Page with its system.
This may take a few seconds.
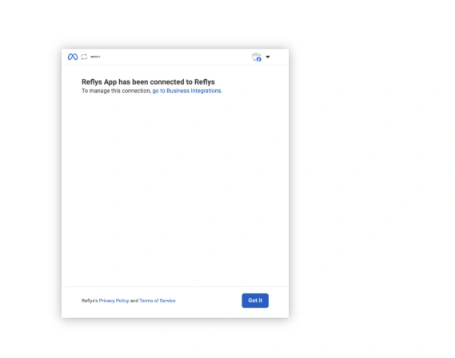
Step 5: Confirm Connection
Once the process is complete, you’ll see a confirmation message saying your Facebook Page is now connected to Reflys.
Now you can start creating automation flows for Messenger and set up keyword replies.
What Happens After Connection?
Once your Facebook Page is linked:
- Reflys will start receiving messages from that Page.
- You can start building Messenger workflows using Reflys Flow Builder.
- You’ll be able to reply to messages in Reflys.
- You can set auto-replies and welcome messages that open Messenger conversations.
If you run into any issues or have questions, you can always contact the Reflys support team for help.