User Roles and Team Management in Reflys
The user roles and team access management by Reflys ensure easy collaboration and secure account handling. As your business grows, you can involve team members to manage the process of automating tasks, handling customer chats, and reviewing reports. With Reflys, it is easy to assign different roles with specific permissions, ensuring everyone on your team is aware of their access rights.
In this article, you will find all important information about user roles, permissions, and team management within Reflys.
- Understand different user roles in Reflys
- Change user roles and billing permissions
- Invite or request access to a Reflys account
- Join using an invitation link
- Remove yourself from an account
- Learn about plan limitations (Free, Pro and Business subscriptions)
User Roles in Reflys
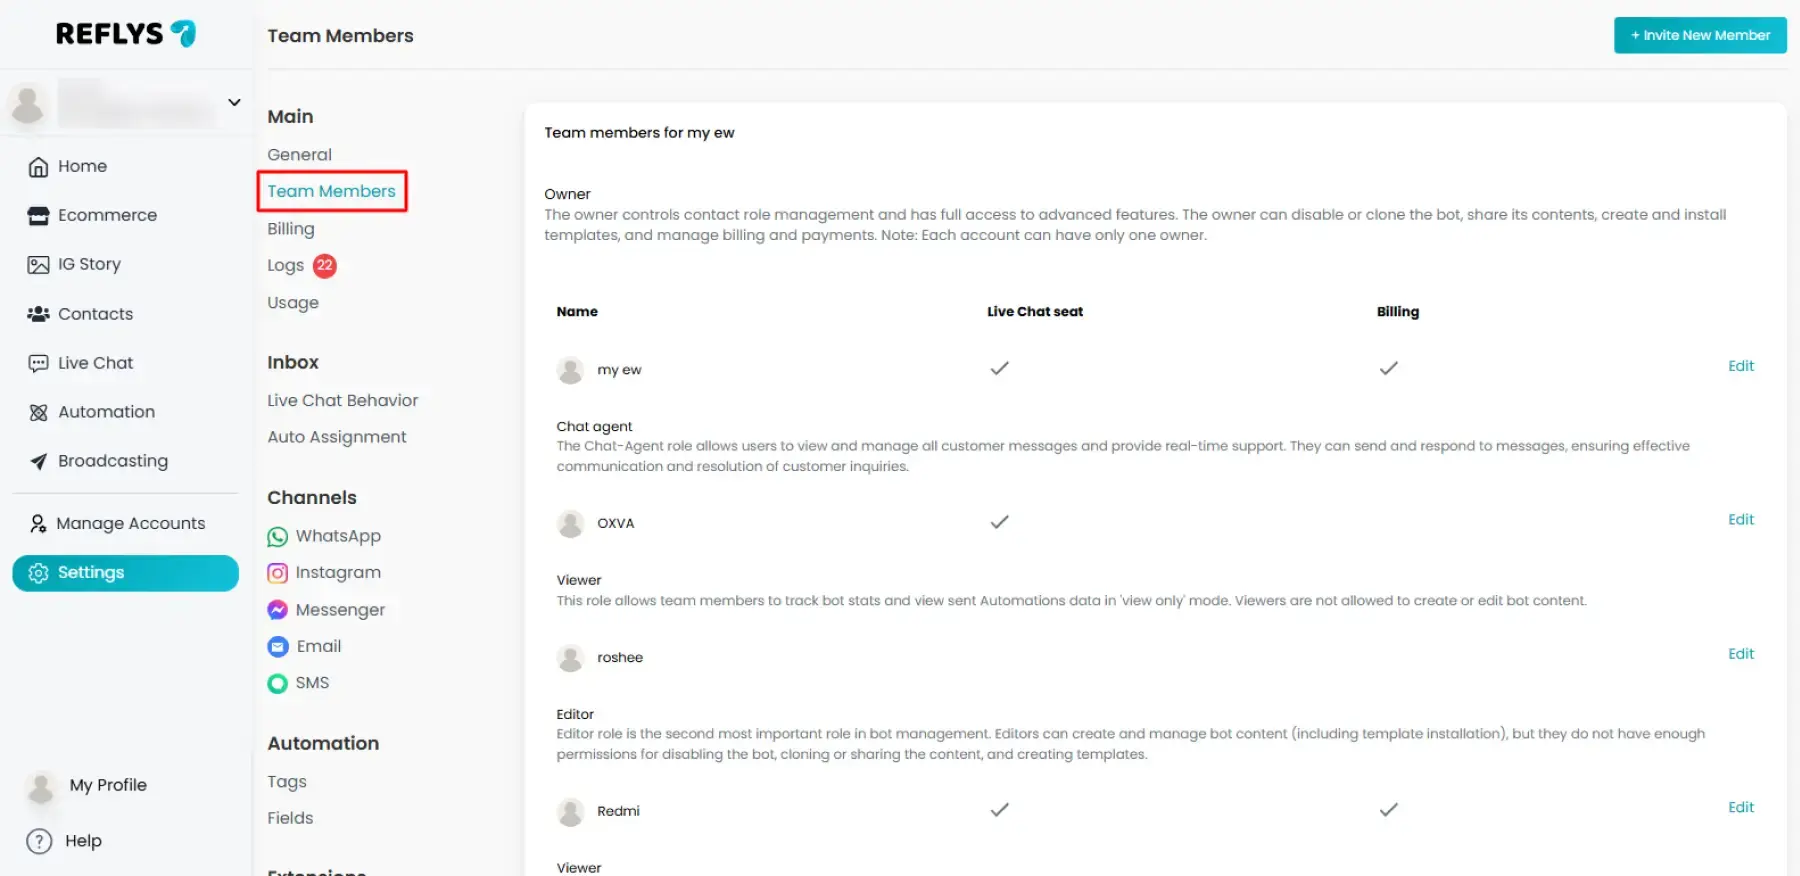
Every Reflys account comes with five distinct roles, each with a clear set of permissions. You can view and manage them inside your dashboard:
In Refly’s dashboard, go to Settings → Team Members.
Below is an overview of each role:
- Owner:
- Has complete control over the account.
- Can manage user roles, transfer ownership, handle billing & payments, and control automation.
- Each account can only have one ‘Owner.’
- Admin:
- Can manage roles and perform everything the owner can, except transferring ownership.
- Can manage billing, install templates, and clone accounts.
- Editor:
- Focused on content creation and management.
- Can build and edit automations, upload content, and install templates.
- Cannot manage billing or account-level settings.
- Live Chat Agent:
- Works with customer conversations in ‘Live Chat.’
- Can add/update user fields, assign tags, and reply directly to users.
- Cannot edit or build automation flows.
- Send and respond to messages.
- Viewer:
- Read-only role.
- Can view analytics, statistics, and flows, but cannot edit anything.
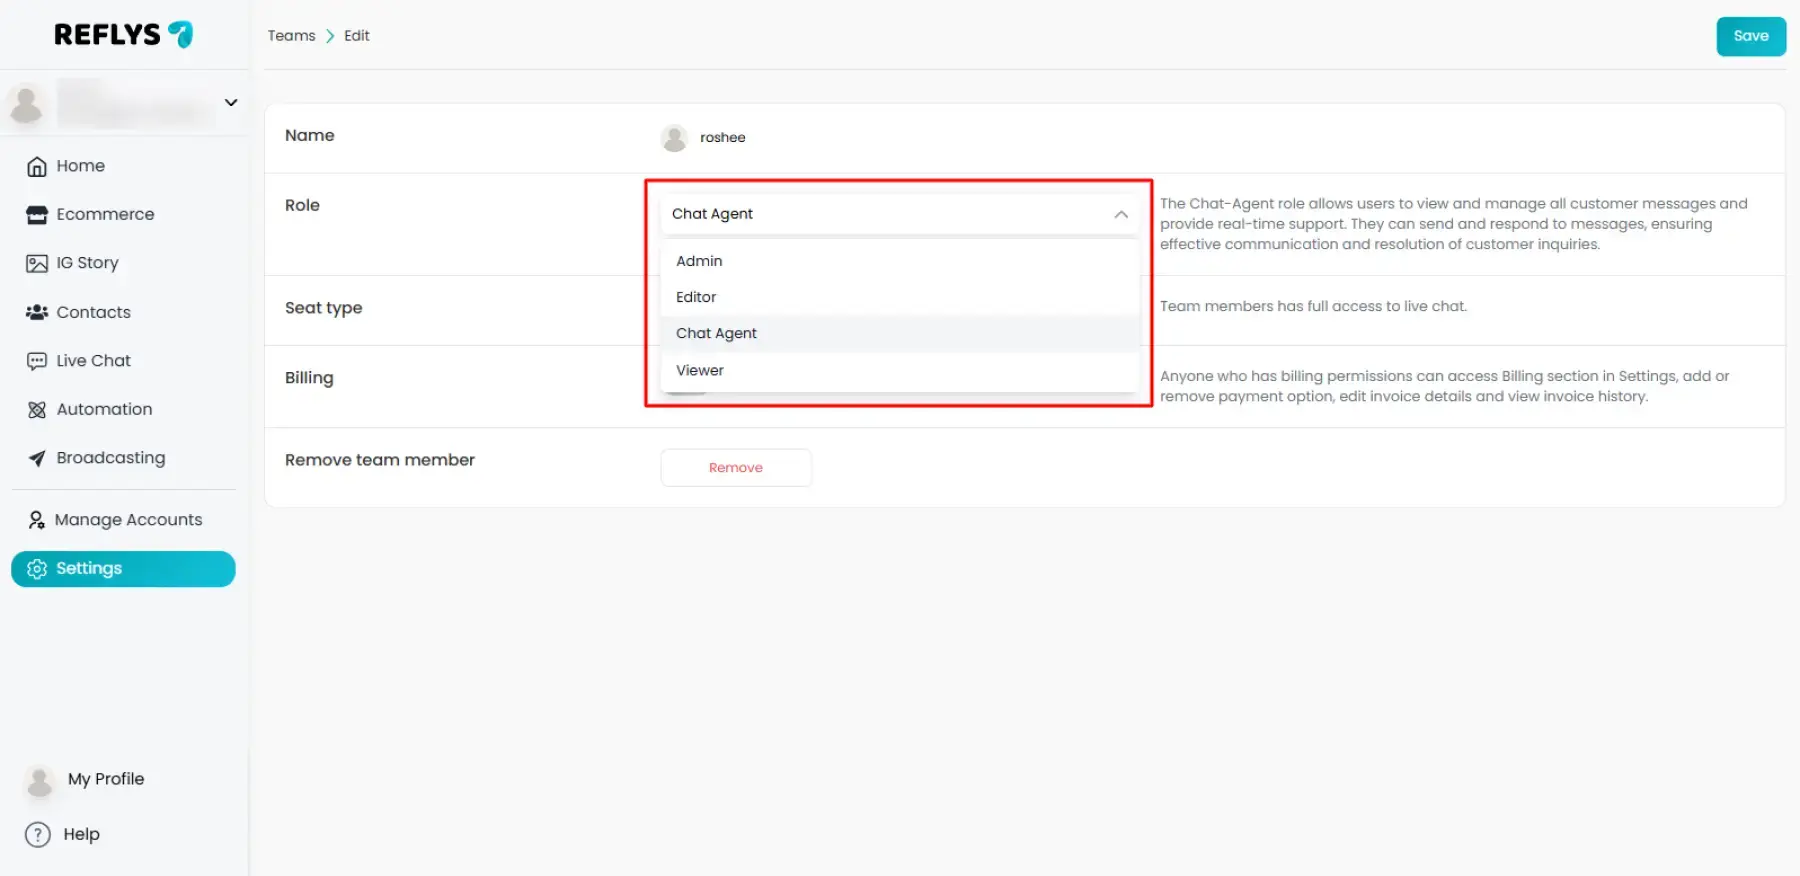
Changing User Roles and Billing Permissions
Only the Owner and Admins can change the role of another team member.
- Go to Settings → Team Members.
- Find the person you want to edit.
- Click Edit next to their name.
- Choose a new role from the dropdown list.
- Save changes.
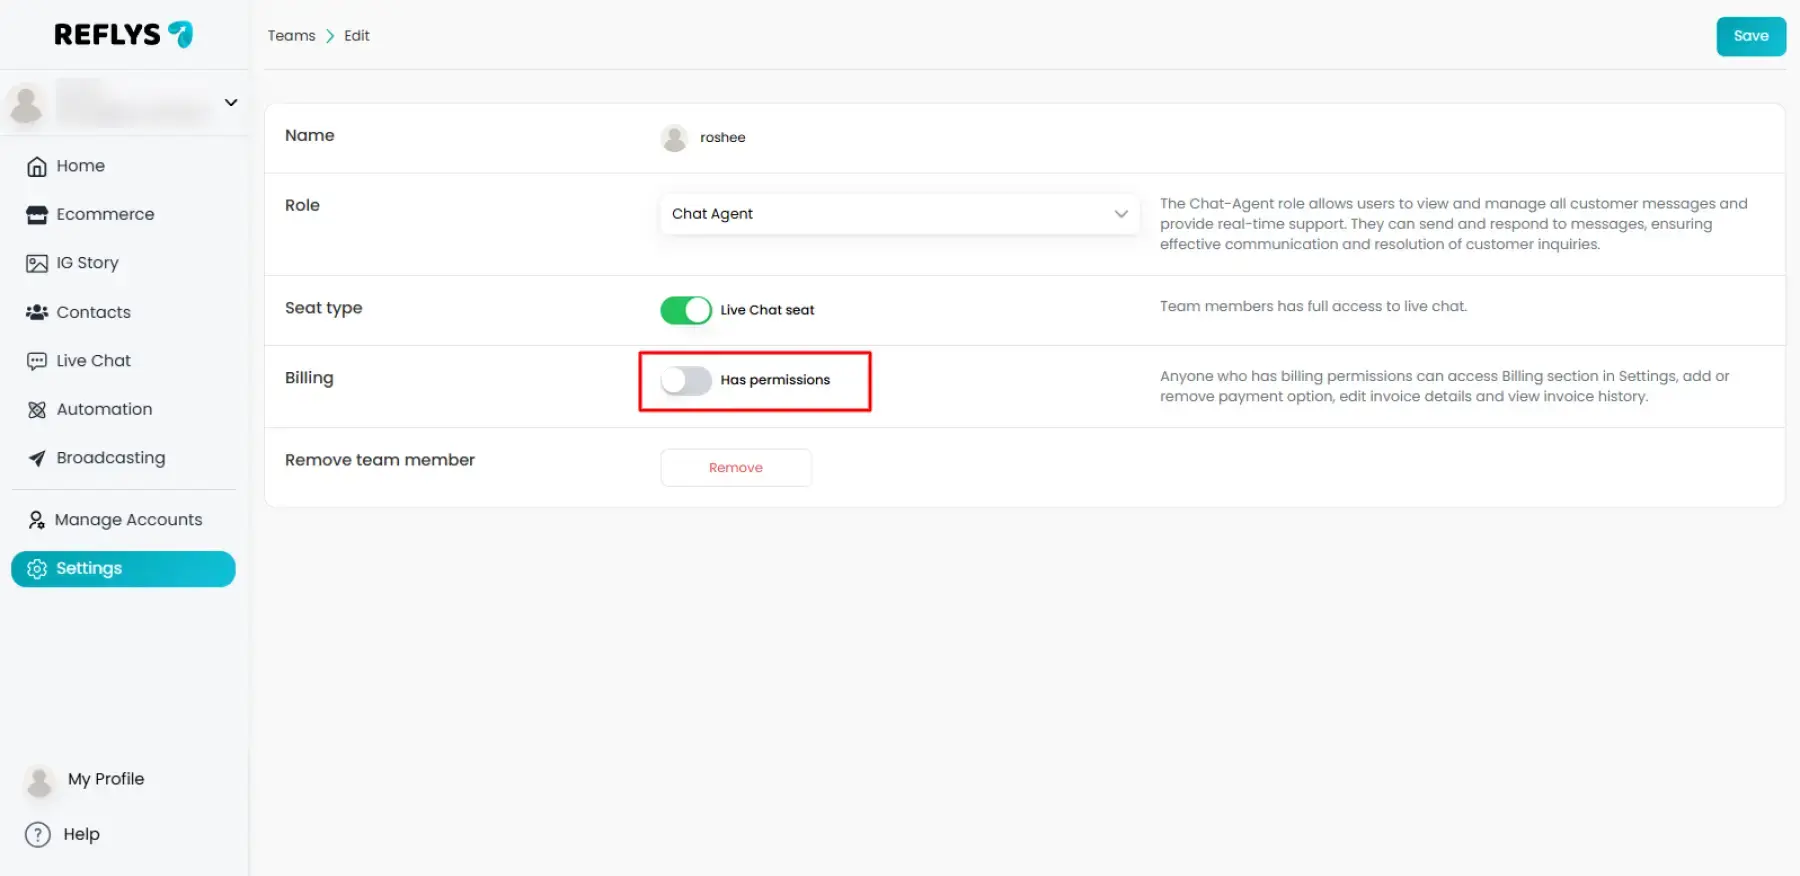
On the same page, you’ll also find Billing Permissions.
- Toggle Has Billing Access ON or OFF.
- Users with billing access can add/remove payment methods, edit invoice details, and view billing history.
Joining a Reflys Account
You can join someone else’s Reflys account in two ways:
1. Requesting Access
- From your Reflys dashboard, click Create new account in the left-hand menu.
- Connect your channel (WhatsApp, Instagram, Messenger, Telegram).
- Click Request Access.
- Once submitted, the button will show Request Sent.
The account Owner will then need to approve your request under Settings → Team Members.
2. Joining via Invitation Link
Owners and Admins can generate an invitation link to add new members.
Important: Invitation links expire after 24 hours and can be used only once.
Steps to generate:
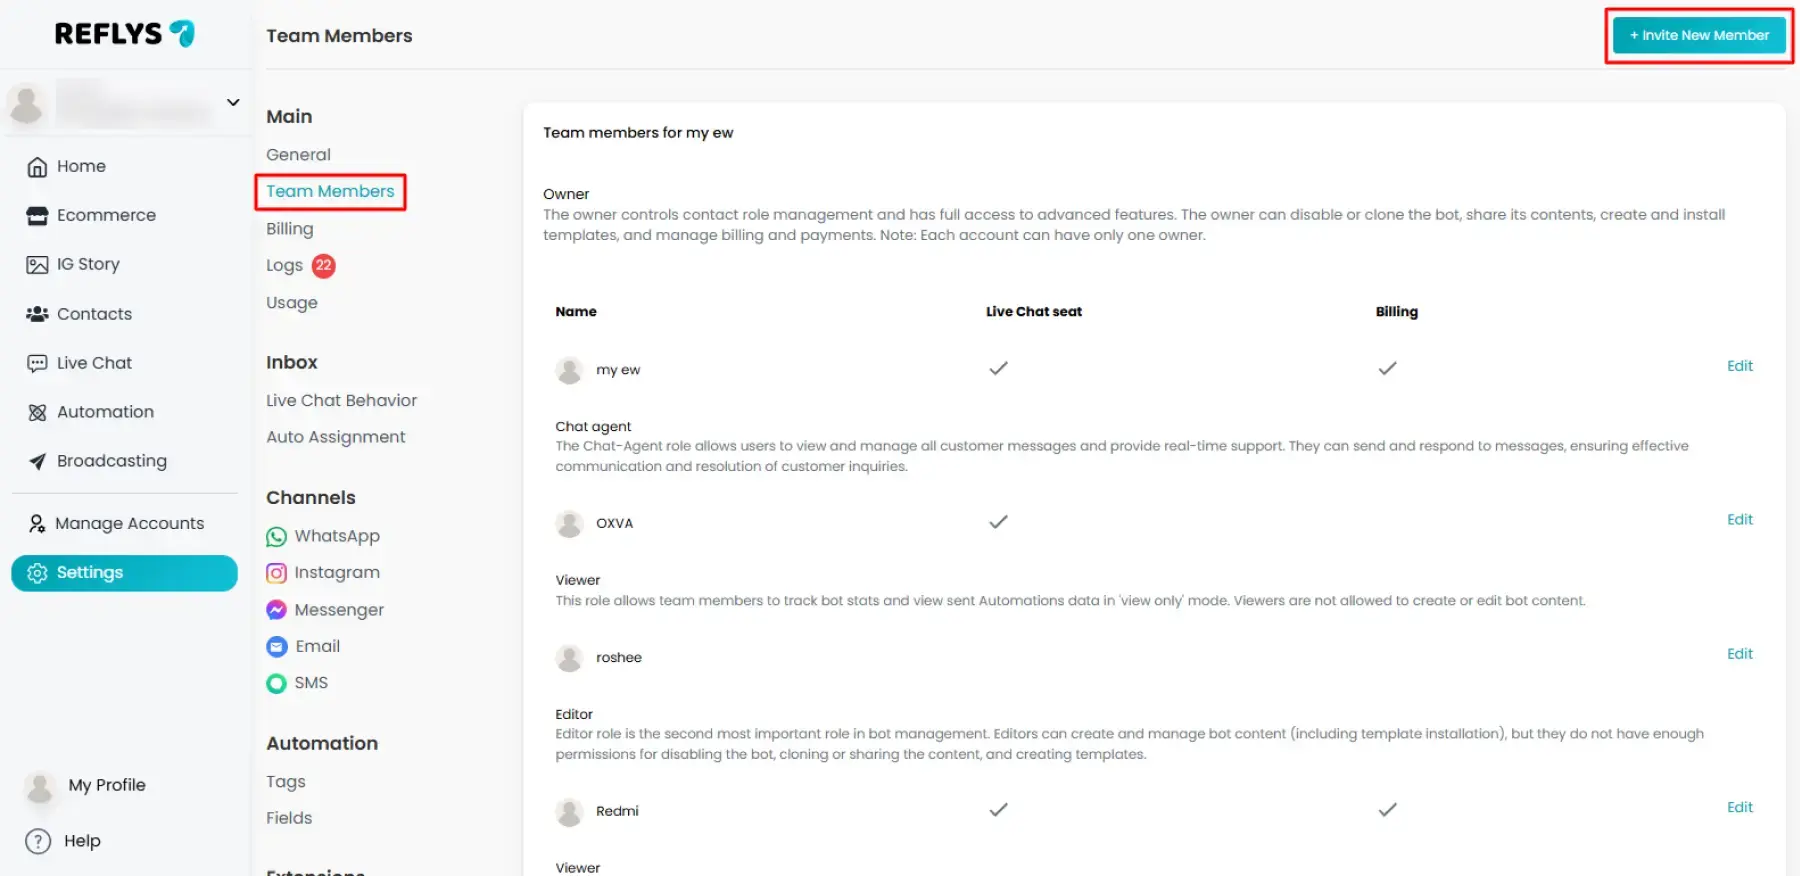
- Go to Settings → Team Members.
- Click Invite New Member.
- Select a role for the new member.
- Click Generate Link.
- Copy and share the link with your teammate.
Note: Even if someone is an Admin on your connected social media page, their Reflys role will depend on what you select while generating the link.
Removing Yourself from a Reflys Account
If you no longer want to be part of an account:
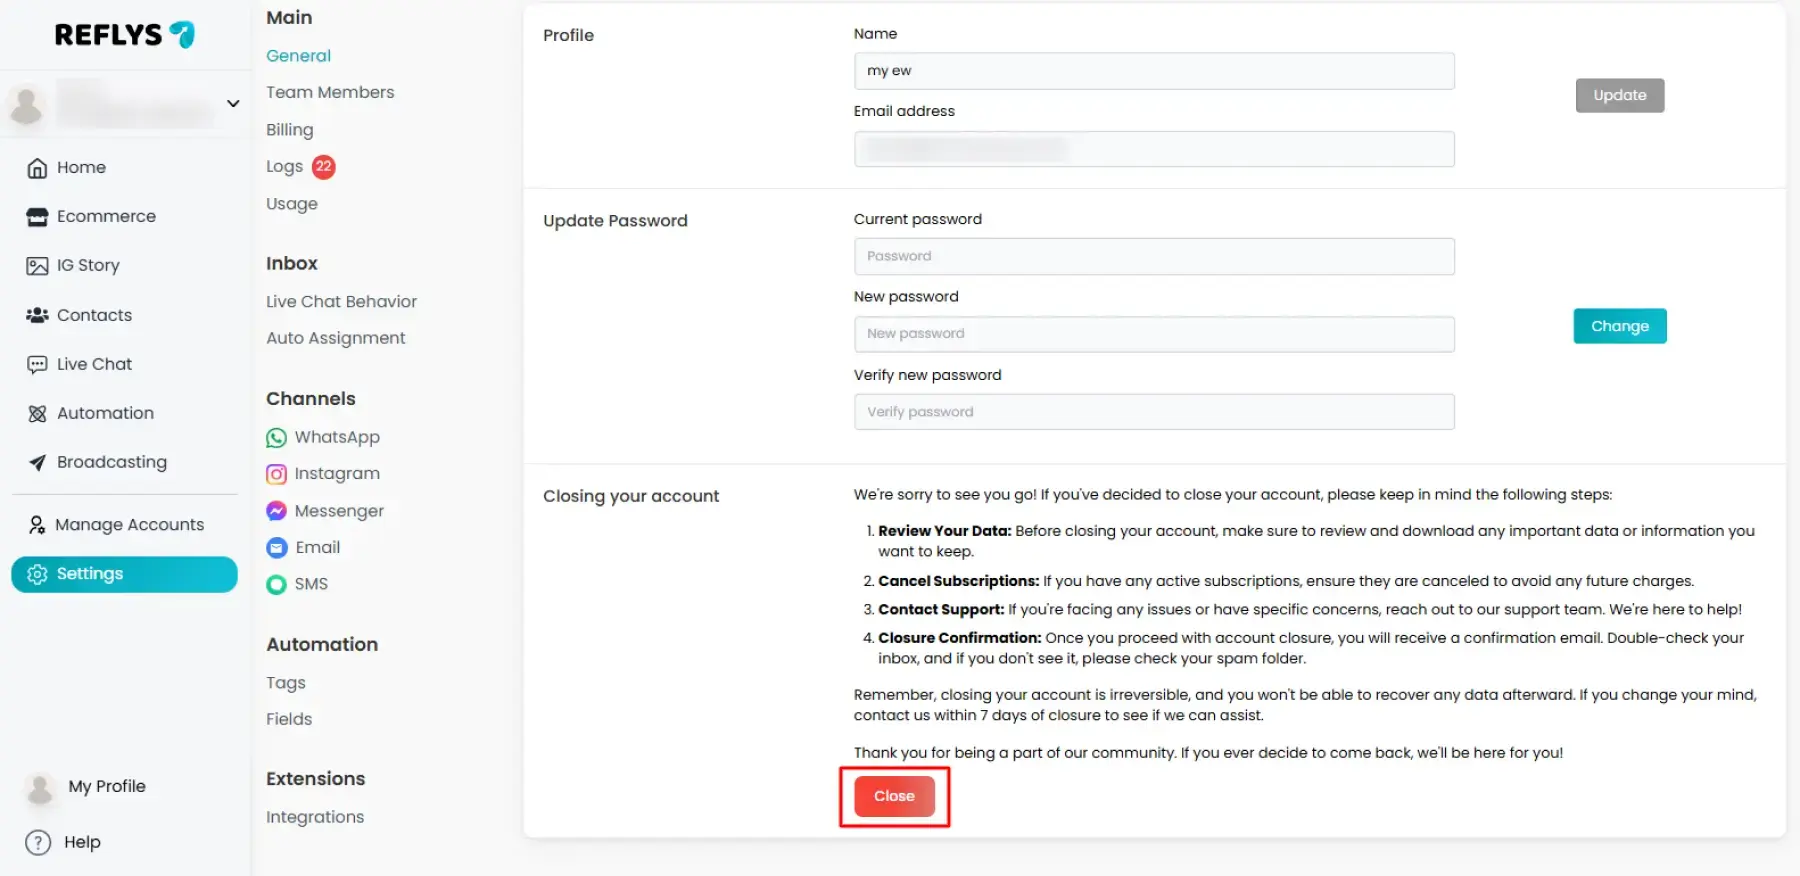
- Go to Settings → General.
- Scroll to the bottom.
- Click Close Account.
Important: If you are the Owner, you must first transfer ownership to another member before leaving.
Plan Limitations for Team Members
Refly’s plans come with specific team member limits. If you try to exceed the allowed number of team members, you’ll need to upgrade your plan or remove an existing member. Before inviting teammates, make sure you are familiar with our pricing plans:
- Free Plan: No additional team members can be added. Only the owner will have access to the account
- Pro Plan: 1 team member can be added. Best suited for small businesses that have one other employee or assistant.
- Business Plan: Up to 5 people can be invited. It is ideal when you want to expand your team and organizations that require multiple functions.
In case you attempt to add more than the specified number of team members, you either have to upgrade to a different plan or delete one of your current team members.