BigCommerce Installation Guide
Running your online store smoothly requires the right tools to work together. Reflys makes it easy to connect your eCommerce platform so you can manage automation, conversations, and sales in one place. If you are using BigCommerce, this guide will walk you through the full process of integrating it with Reflys.
Let’s go step by step.
Step 1: Go to Your Reflys Dashboard
Log in to your Reflys account. On the dashboard, you will see different options.
- Go to the E-commerce section.
- If you haven’t connected to any store before, this section will show as “Add Store.”
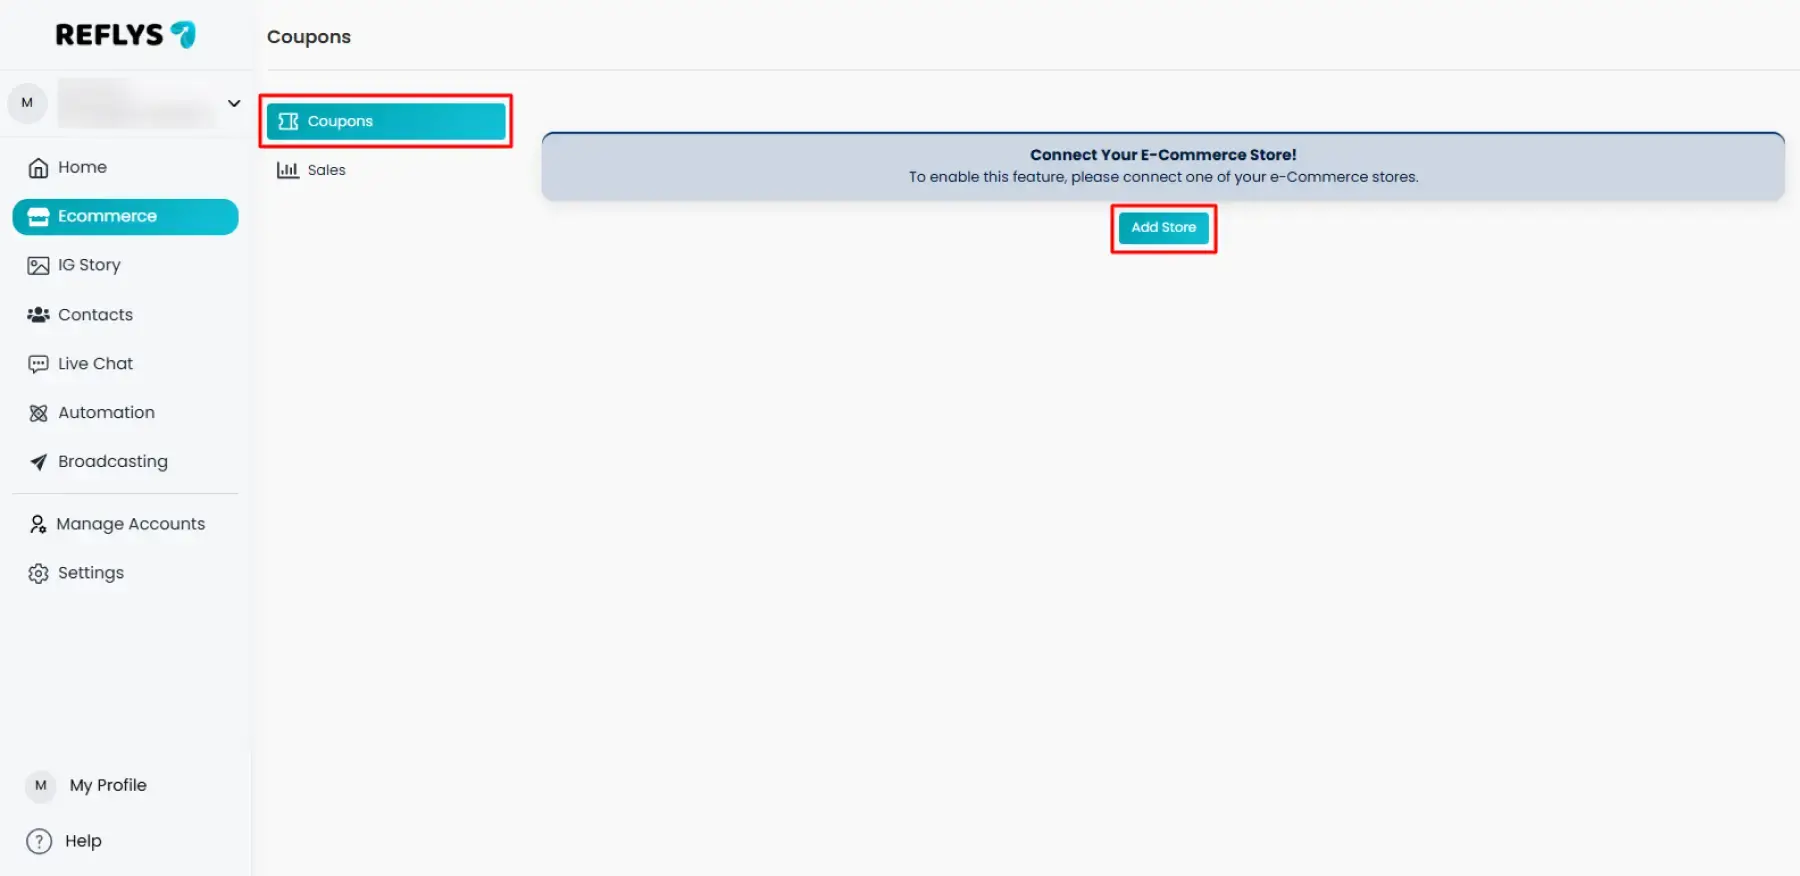
Remember: Reflys allows you to connect only one store at a time. You can choose from Shopify, WooCommerce, or BigCommerce.
Step 2: Add Your Store
- Click on Add Store.
- A list of available platforms will appear.
- Select BigCommerce from the list.
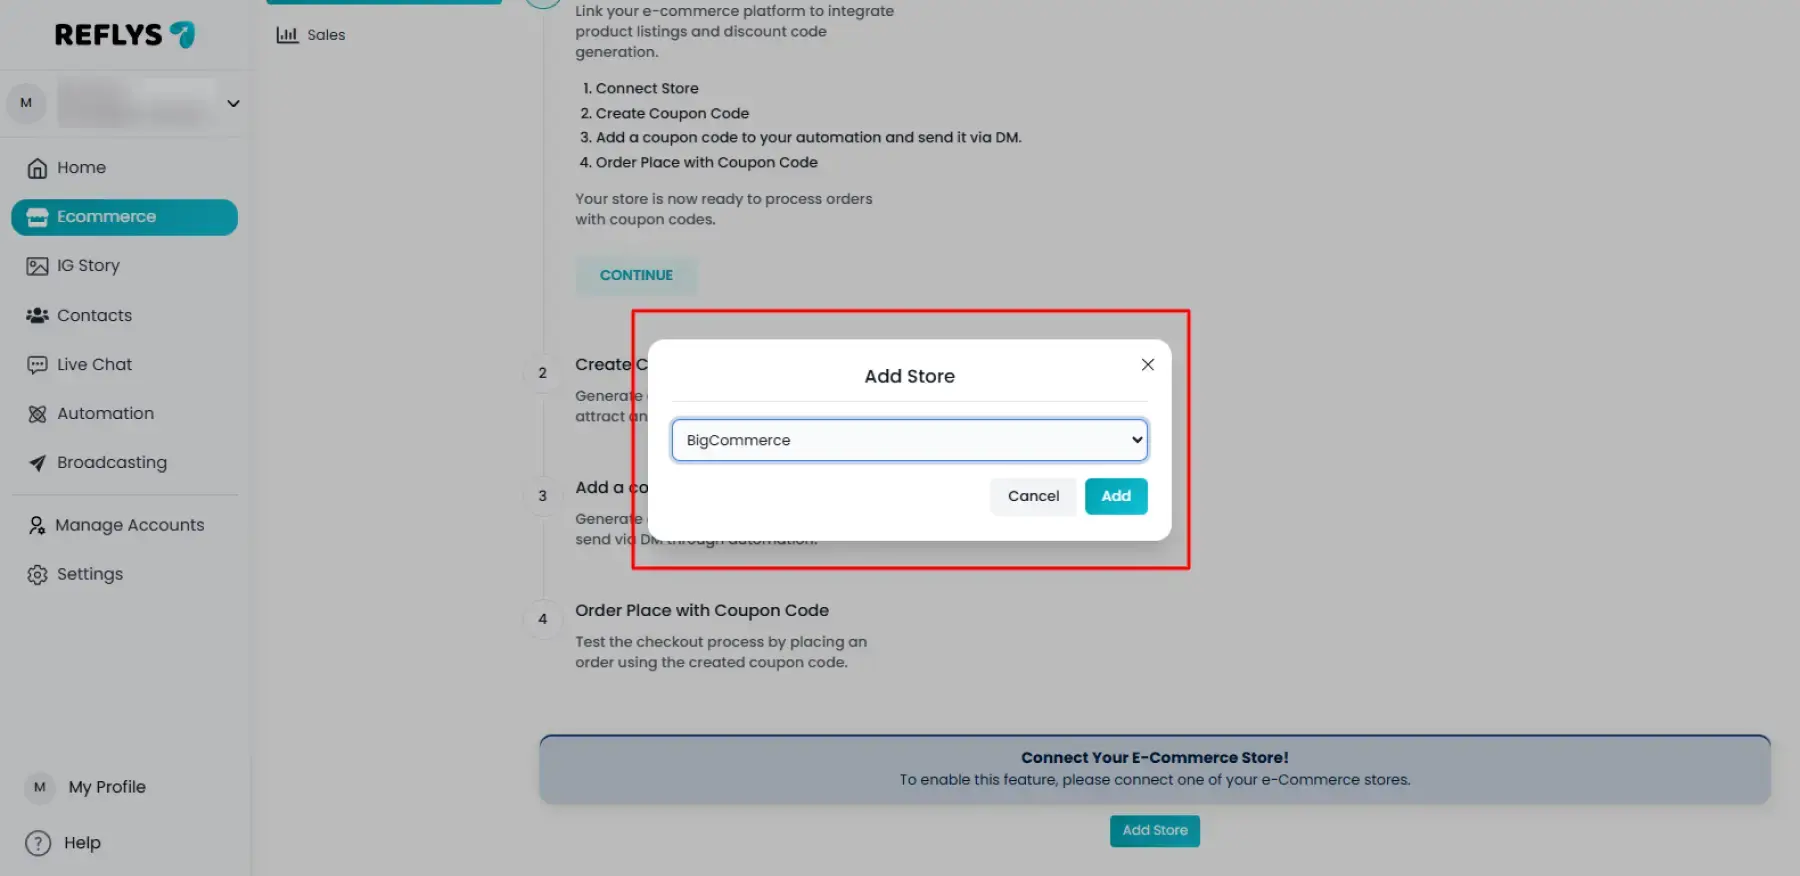
When you select BigCommerce, Reflys will redirect you to the BigCommerce website to complete the setup.
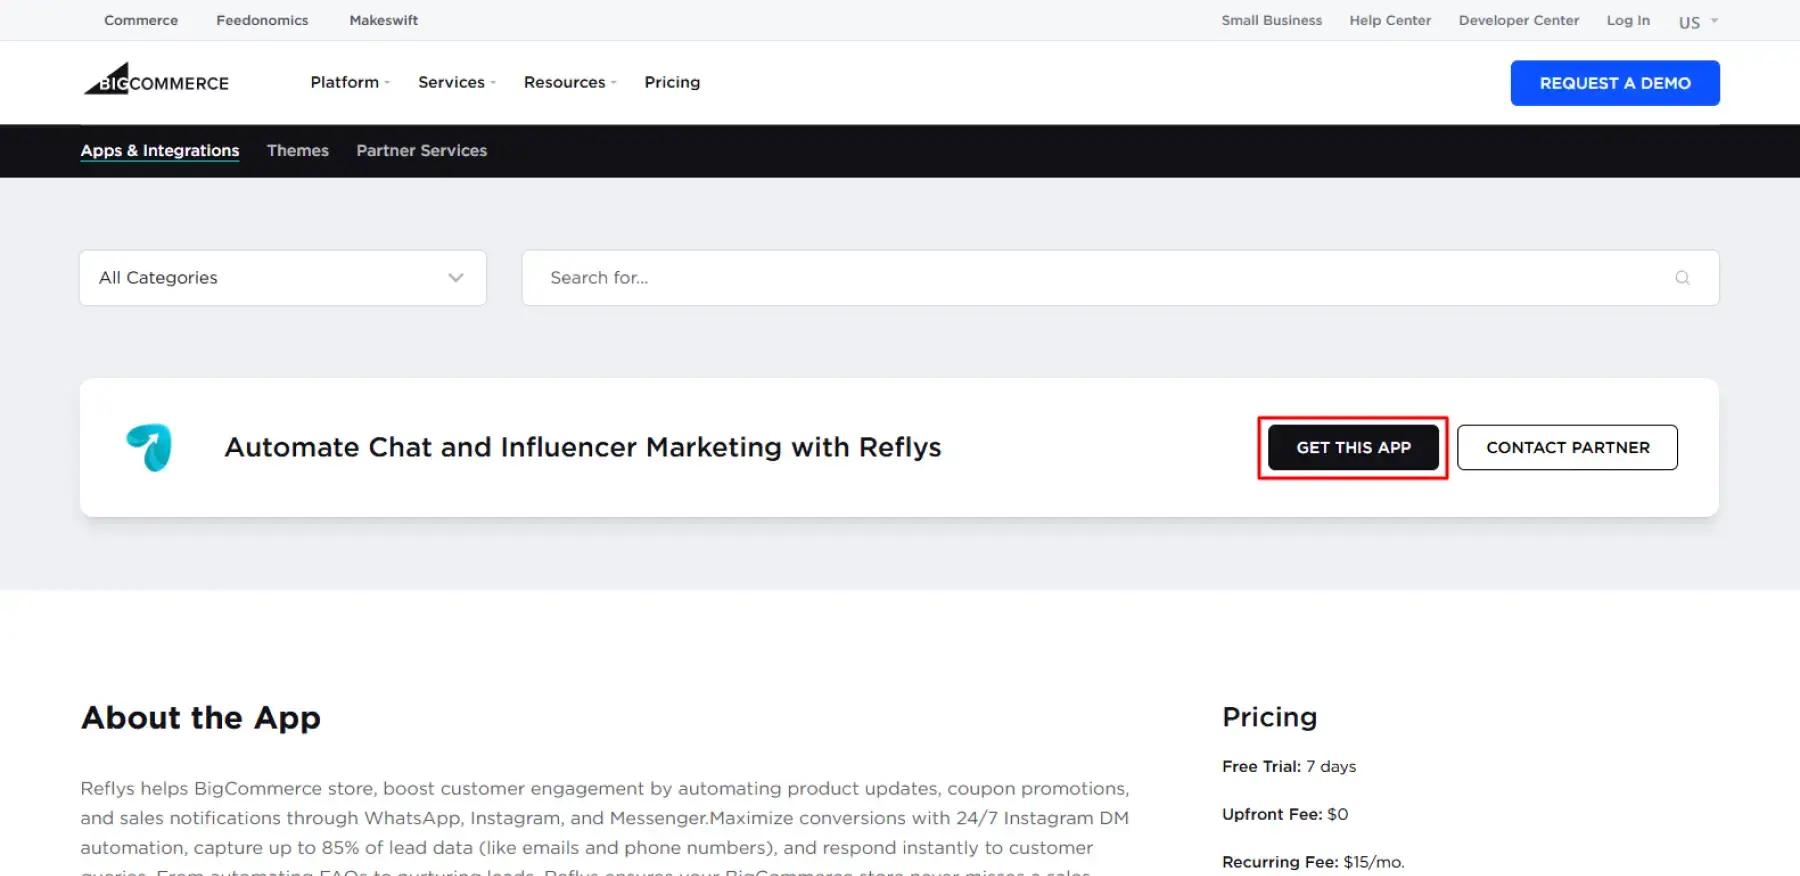
Step 3: Install the Reflys App in BigCommerce
On the BigCommerce page:
- Click on Get This App.
- You will now be asked to either log in with an existing BigCommerce account or create a new one.
Step 4: Log in or Sign up with a BigCommerce Account
If you already have a BigCommerce account:
- Simply log in with your email and password.
- Approve the connection to allow Reflys to integrate with your store.
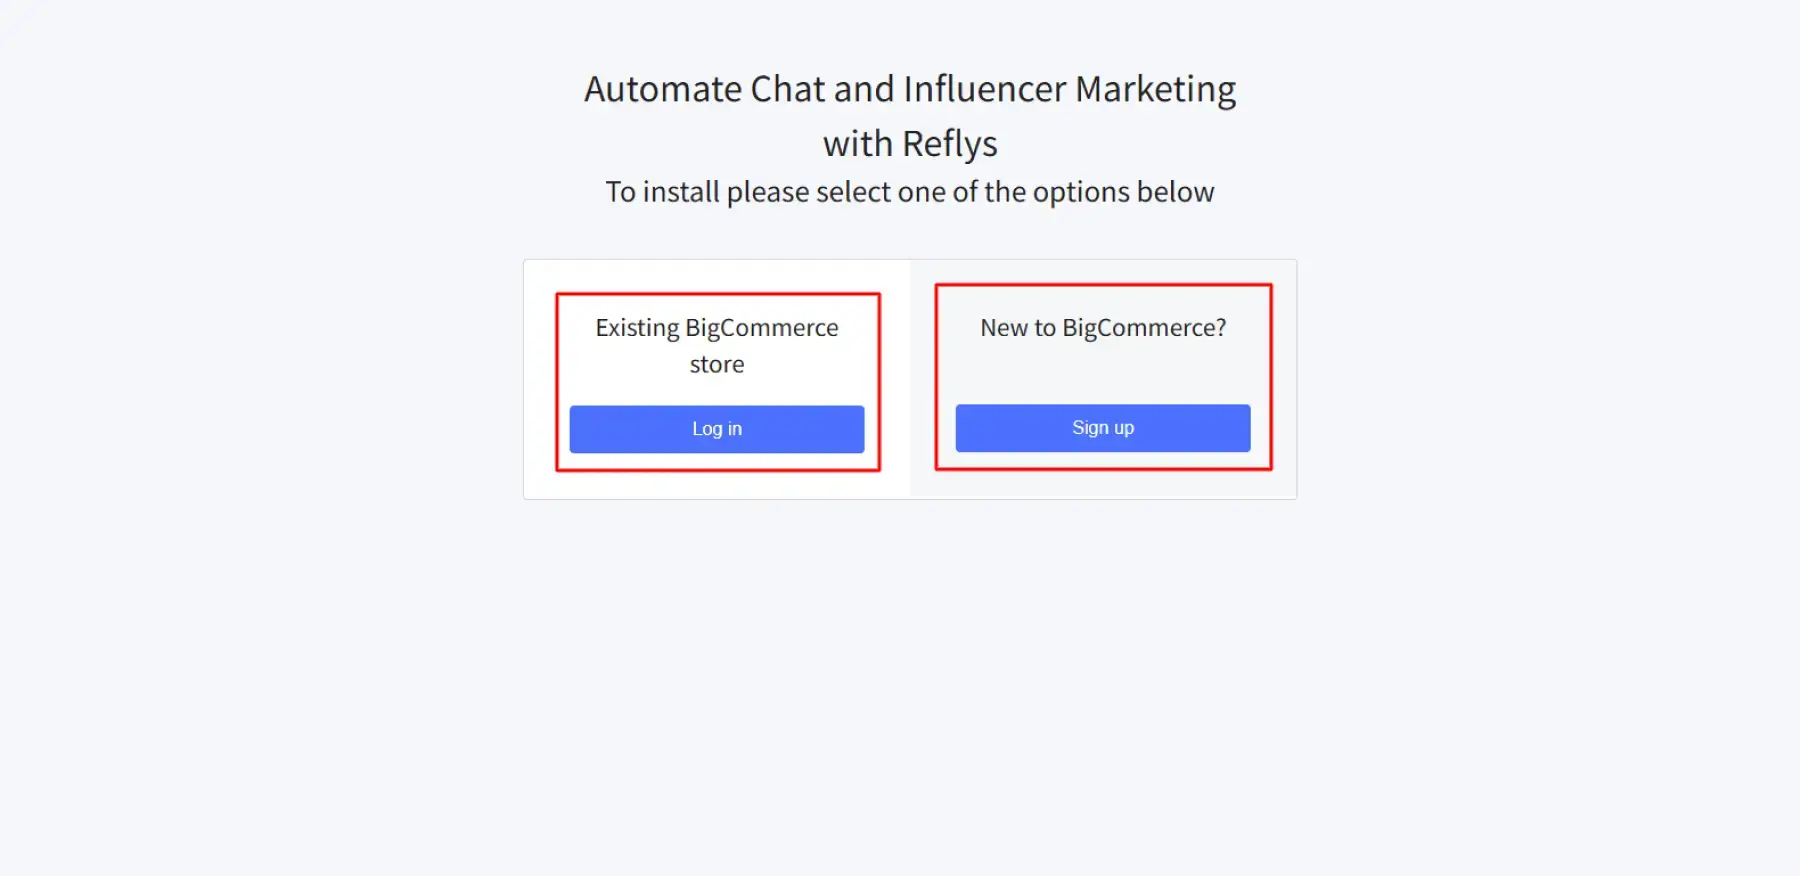
If you are new to BigCommerce:
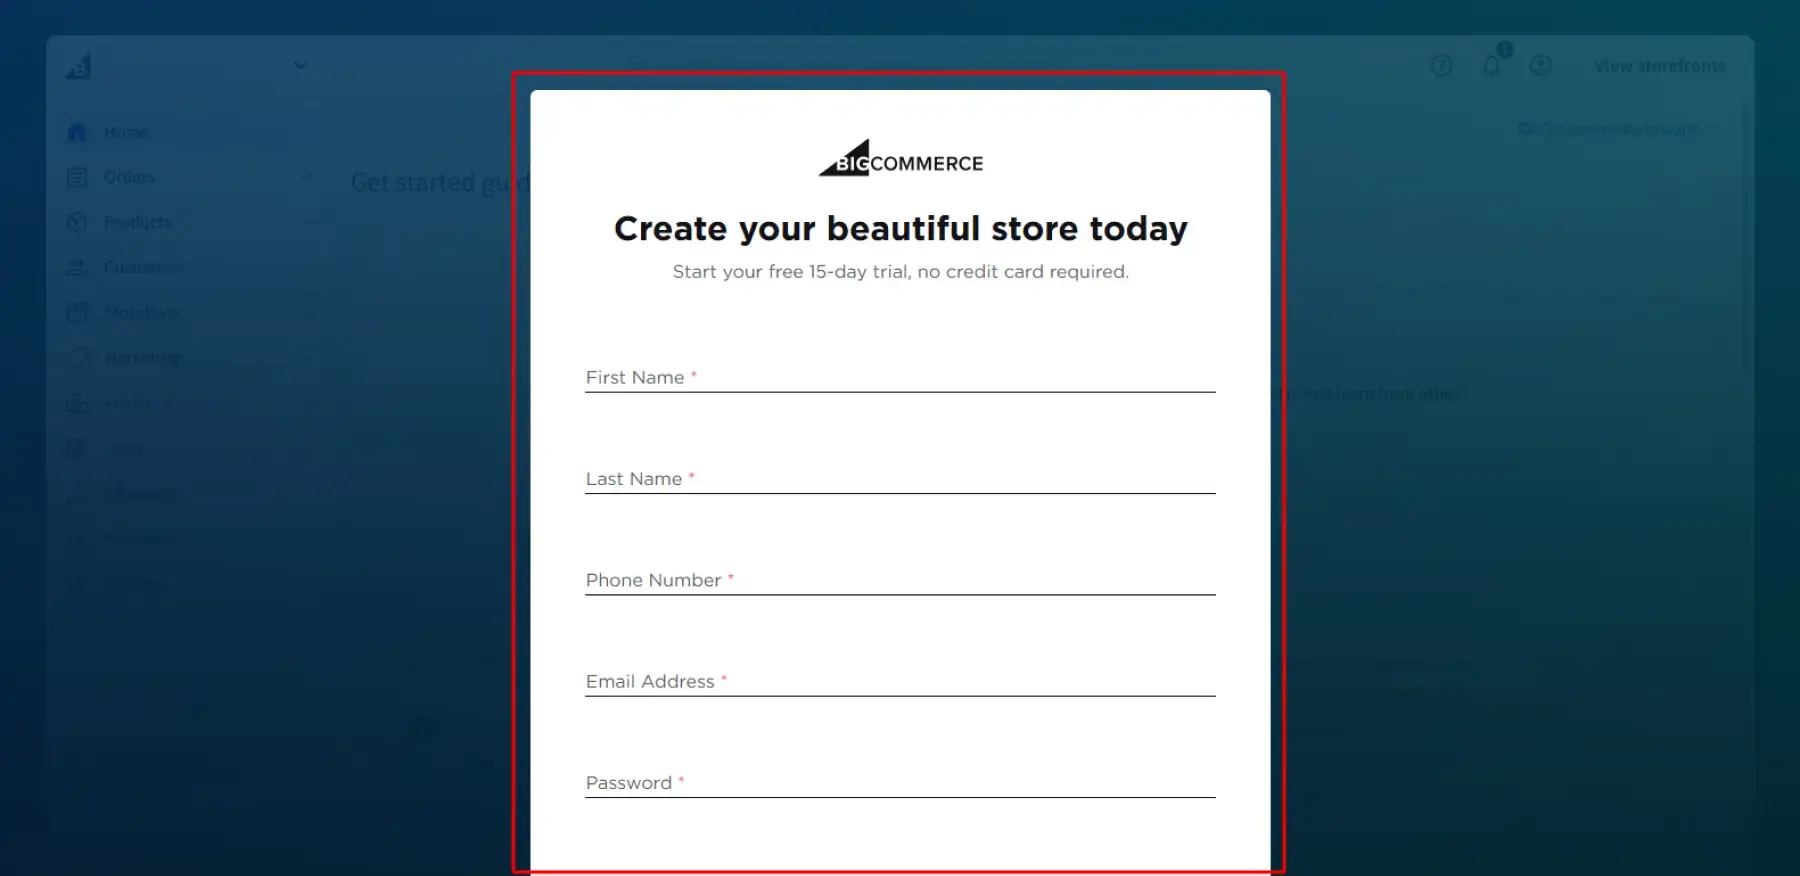
No worries! You can create a brand-new store for free.
- BigCommerce offers a 15-day free trial with no credit card required.
- Click on Sign up Account and provide the following details:
Information Required to Sign Up
- First Name (required)
- Last Name (required)
- Phone Number (required)
- Email Address (required)
- Password (with these rules):
- At least one special character (e.g., !@#$%^&*?{}[]+-|;:)
- At least 12 characters long
- At least one number
- One uppercase and one lowercase character
- Store Name
- You can set it now and change it later if you want.
- Business Size (choose from these options):
- I haven’t started selling yet (no revenue)
- Just starting out (< $50K)
- Building a business ($50K to $250K)
- Growing business ($250K to $1M)
- Maturing business ($1M to $20M)
- Established business ($20M to $50M)
- Mid-sized enterprise ($50M to $100M)
- Large enterprise ($100M+)
- I’m not sure
- Hosting Region
- North America
- Europe
- Asia-Pacific
Select the region closest to your customers for the best store speed and performance.
Once you are done with everything, click Create your Store.
Step 5: Connect Your Store with Reflys
After logging in (or signing up), BigCommerce will ask you to confirm that you want to connect to Reflys.
- Approve the connection.
- Once approved, you’ll be redirected back to Reflys.
Your BigCommerce store will now show as connected inside your Reflys E-commerce section.
Step 6: Start Using Reflys with BigCommerce
That’s it!
You have successfully integrated BigCommerce with Reflys. From here, you can:
- Automate conversations with your customers.
- Manage your store interactions through WhatsApp and other channels.
- Collect leads and provide support—all in one place.
Tip: If you ever want to switch your store from BigCommerce to Shopify or WooCommerce, you’ll need to disconnect the current store first because Reflys supports only one store connection at a time.
Managing Multiple BigCommerce Stores
In case you have more than two BigCommerce stores, you can link multiple accounts with the same process within your Reflys account. The stores will be separately integrated and priced accordingly, so you can keep things organized.
To open or integrate another store:
- Enter your Reflys account
- Click the profile to add a store and continue.
- Select Add store and repeat the procedure of adding another BigComerce store