How to Send Emails with Reflys
Email is a great way to stay in touch with your users and share important information at the right time. With Reflys, you can easily send emails as part of your automation flows. Whether you want to confirm a user’s action, share updates, or follow up after a conversation, Reflys allows you to create and send personalized emails directly within your flows.
In this guide, you will learn how to collect email addresses, design email messages, and send them to your users using Reflys. Everything is explained step by step in simple terms, so you can start sending emails with confidence, even if you’re just getting started.
Before You Begin
To send emails through Reflys, you’ll first need to connect your email service provider, such as Mailgun, Mailchimp (Mandrill), or Brevo.
If you haven’t connected one yet, please check our help guide:
[How to Connect Email with Reflys]
Once your email integration is complete, you can begin using email in your automations.
How to Collect Email Addresses in Reflys
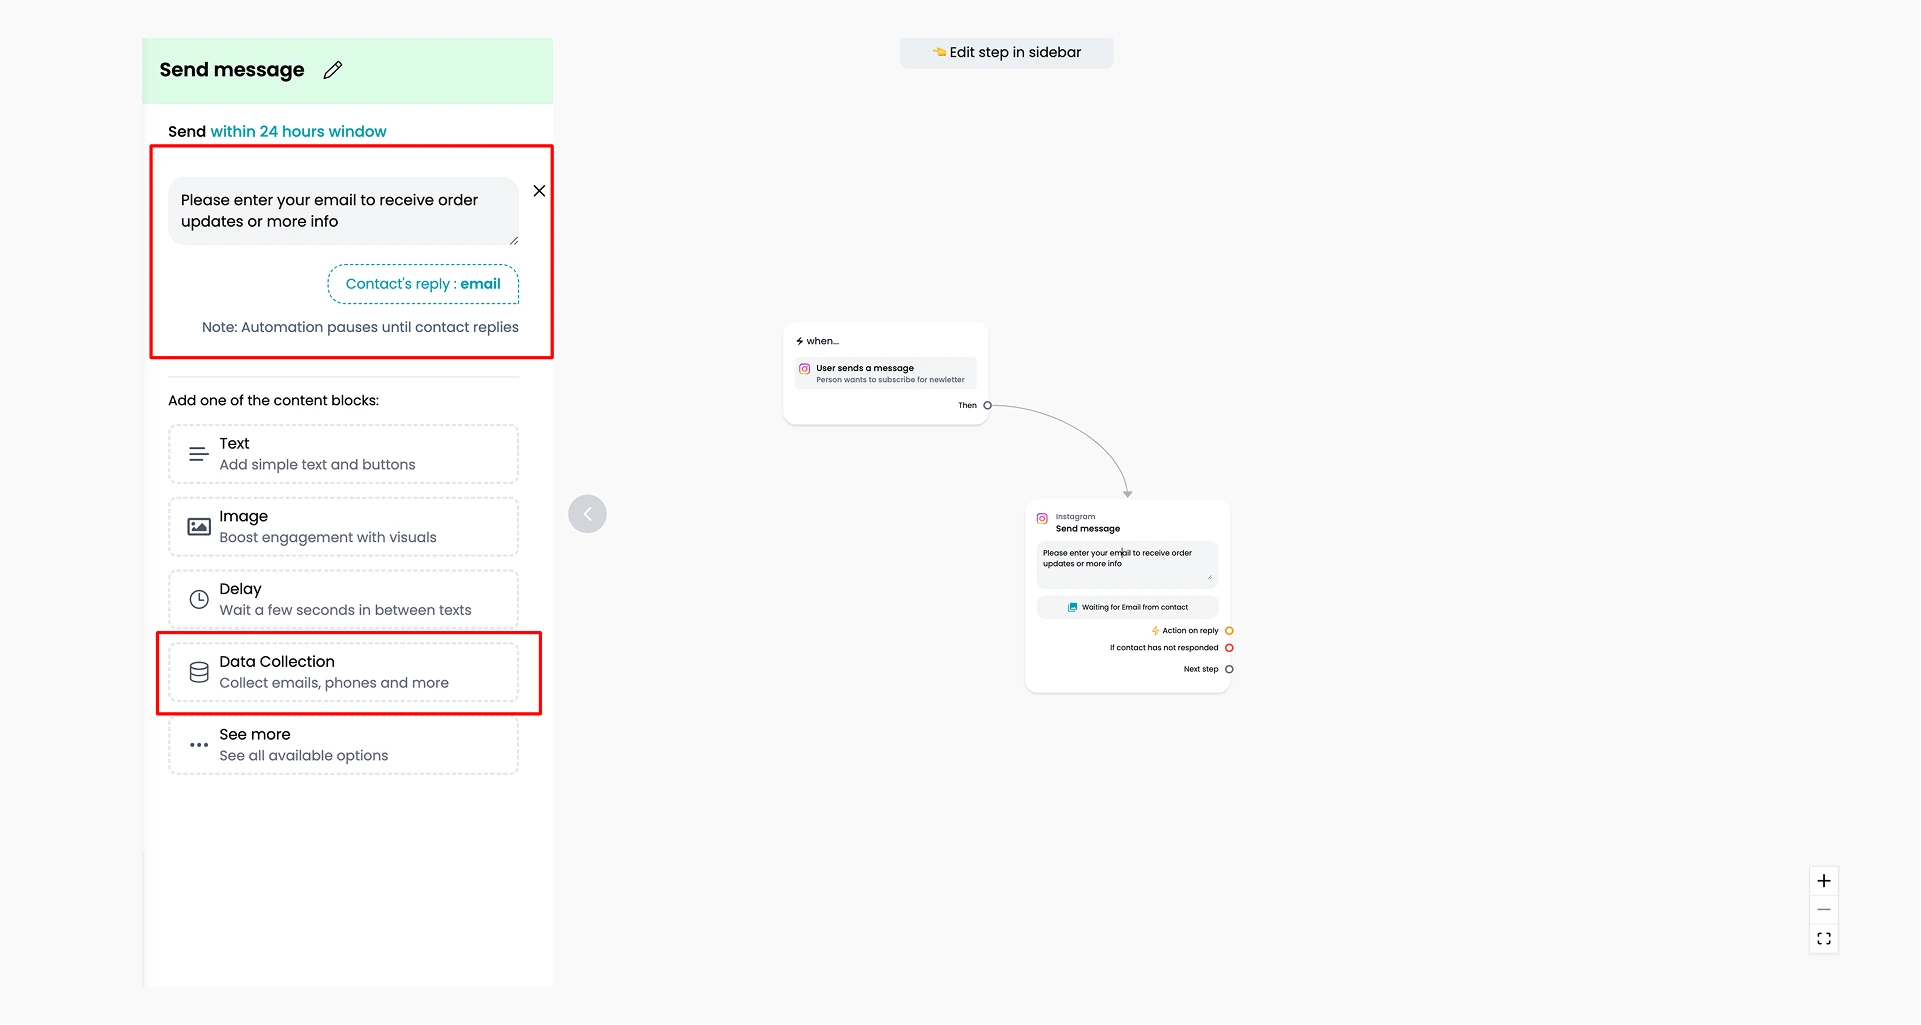
To send an email to someone through Reflys, you need to have their email address. The best way to do this is by collecting it directly from users during a conversation. You can use the Data Collection Block inside your automation flow to ask for the user’s email in a natural, friendly way.
Once the user shares their email, it gets saved in their contact profile automatically. You can then use this information to send personalized emails as part of your campaigns or automation.
To collect email addresses:
- Inside your automation flow, add a Data Collection block.
- Set the question to something like:
“Please enter your email to receive order updates or more info.”
You can view collected emails in the user’s profile contact information inside Reflys.
How to Send an Email in an Automation Flow
Reflys does not support sending broadcast emails to large groups of contacts. Instead, you can send individual, automated emails as part of a user’s journey through your automation flow.
Here’s how to do it:
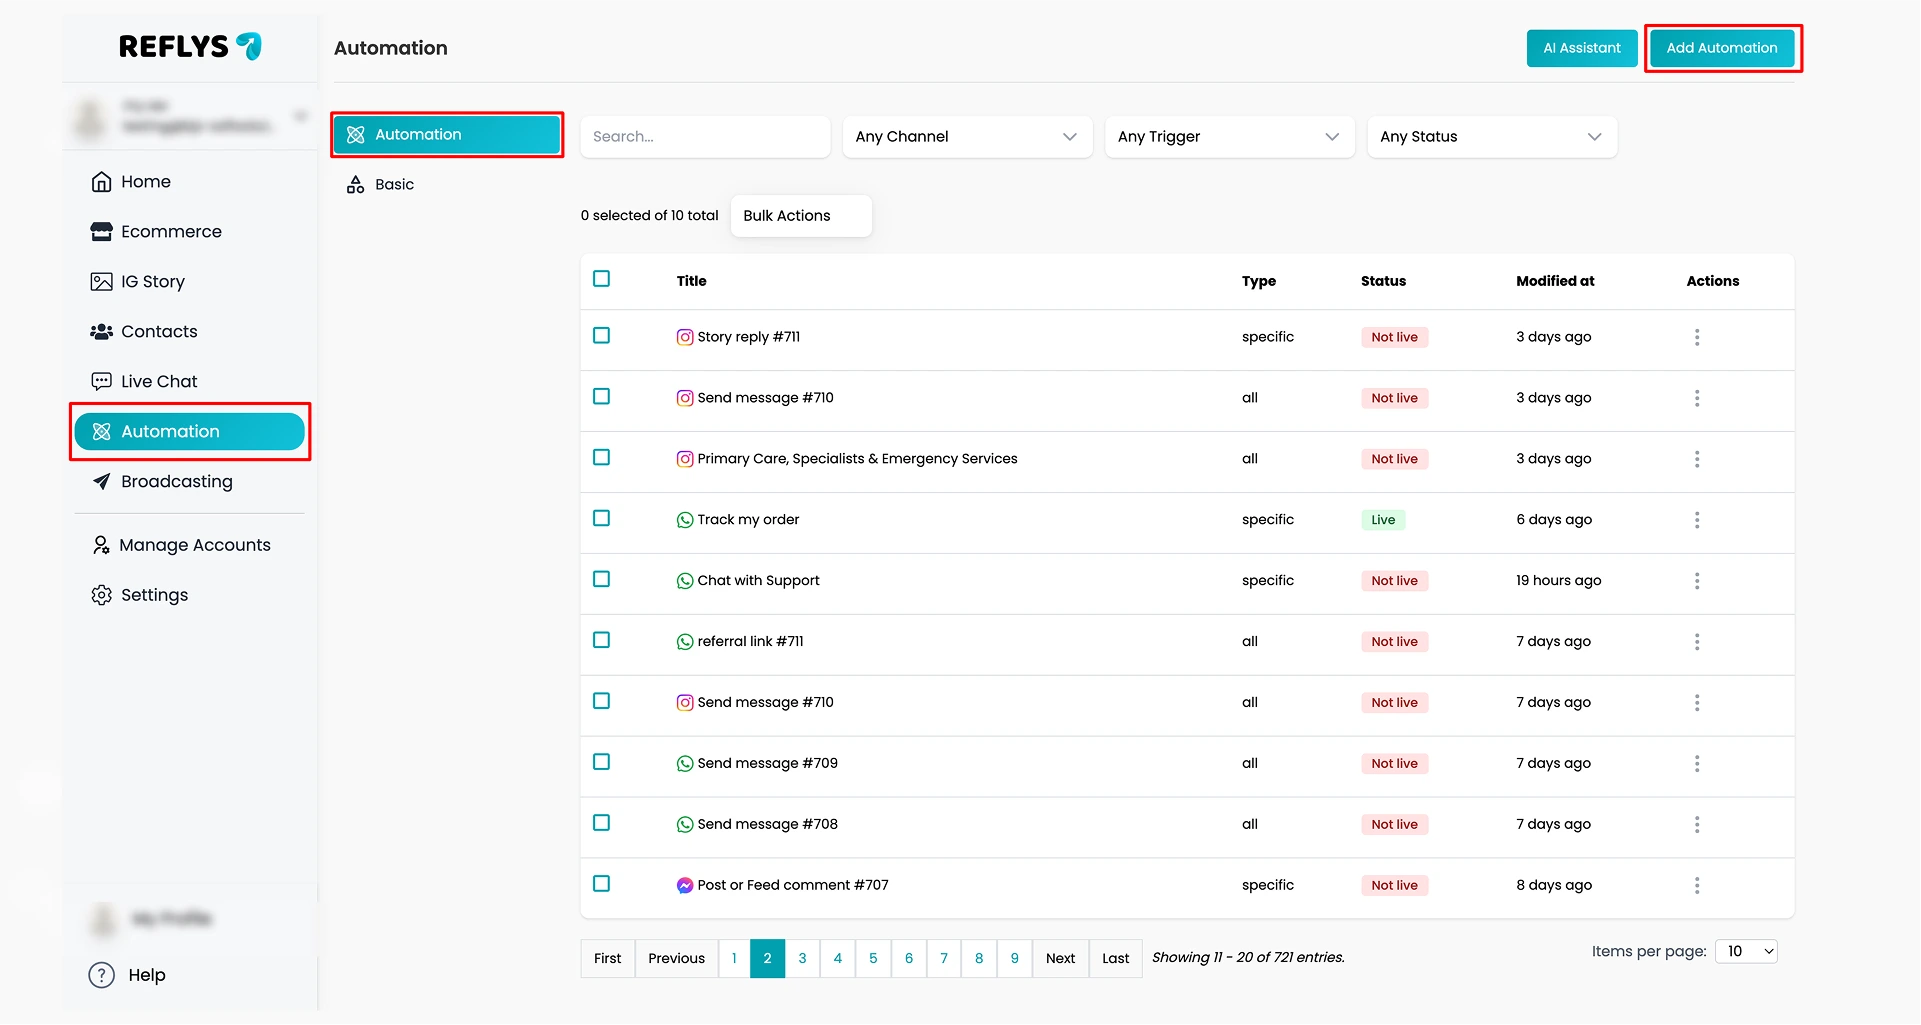
1. Go to the Automation Flow
- Open the Automation > Add Automation section.
- Select create a new one on WhatsApp, Instagram and Messenger
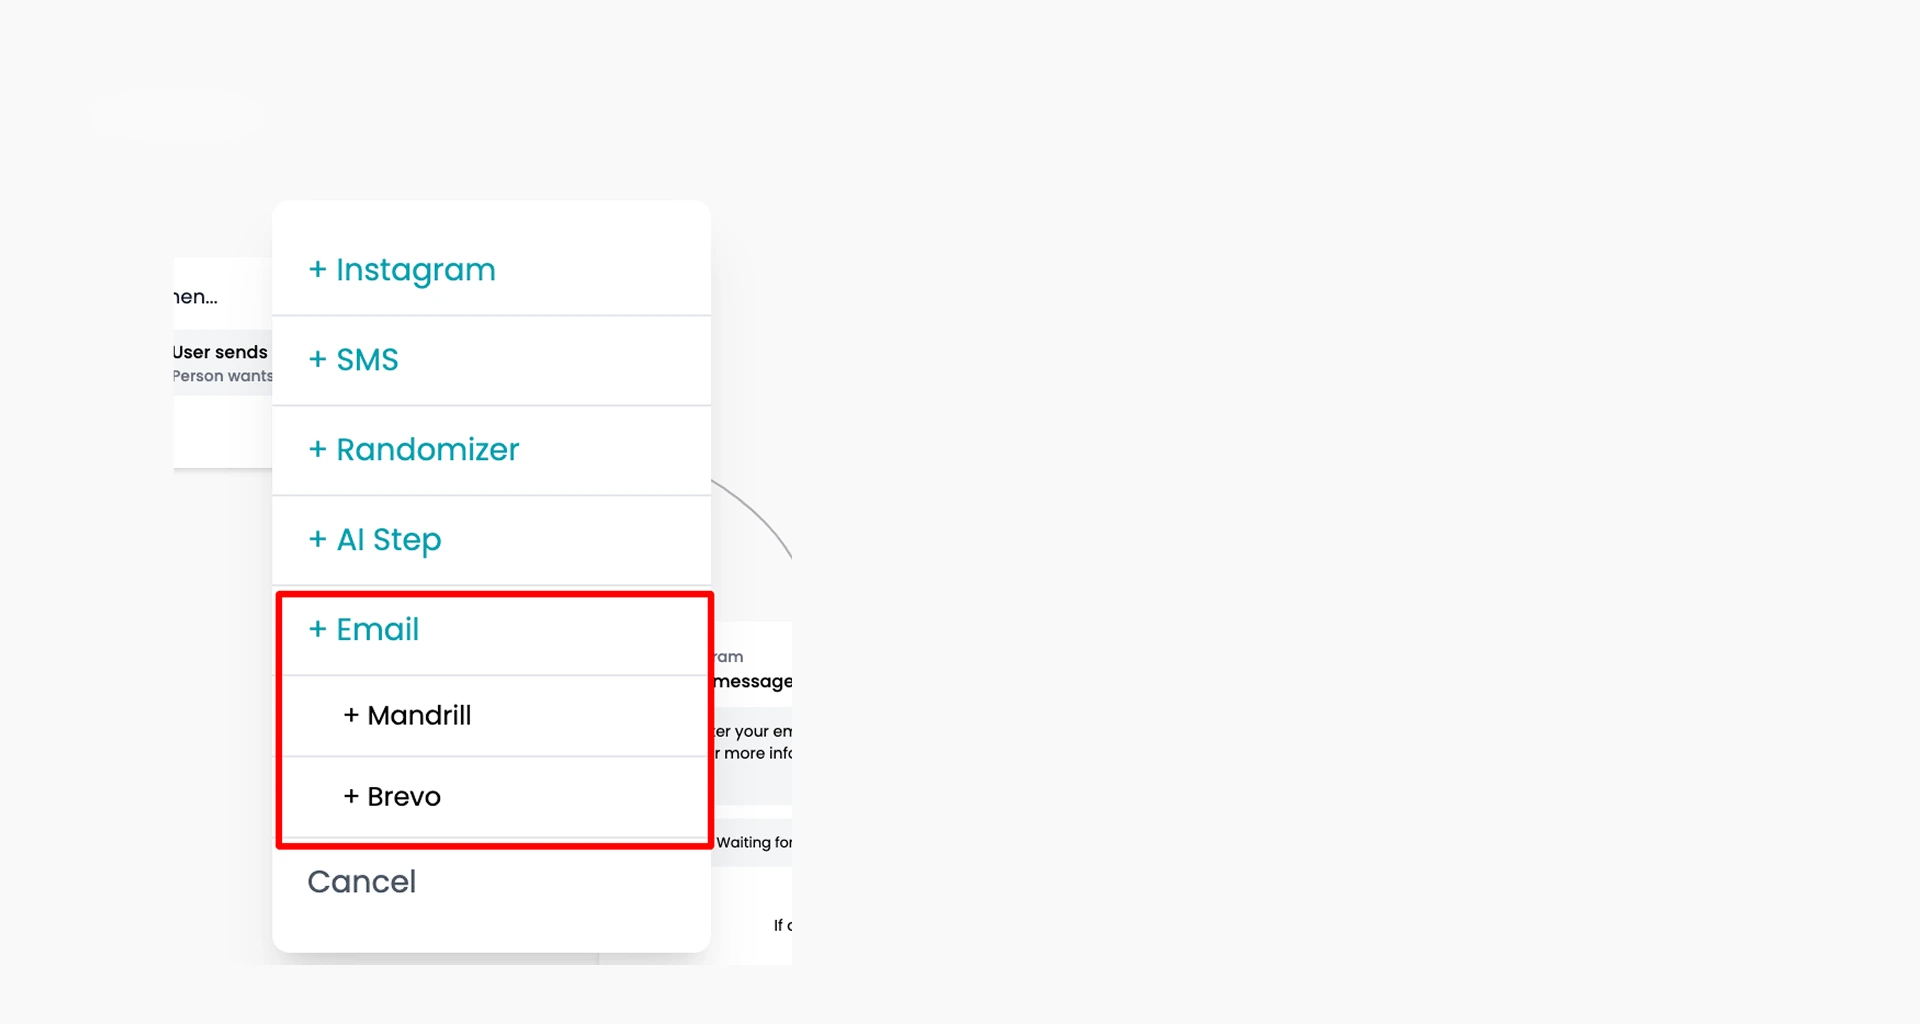
2. Add the Email Node
- In your flow, click Add Step and choose Email from Mailgun, Mailchimp or Brevo.
- This step sends an email to the user once they reach it in the automation.
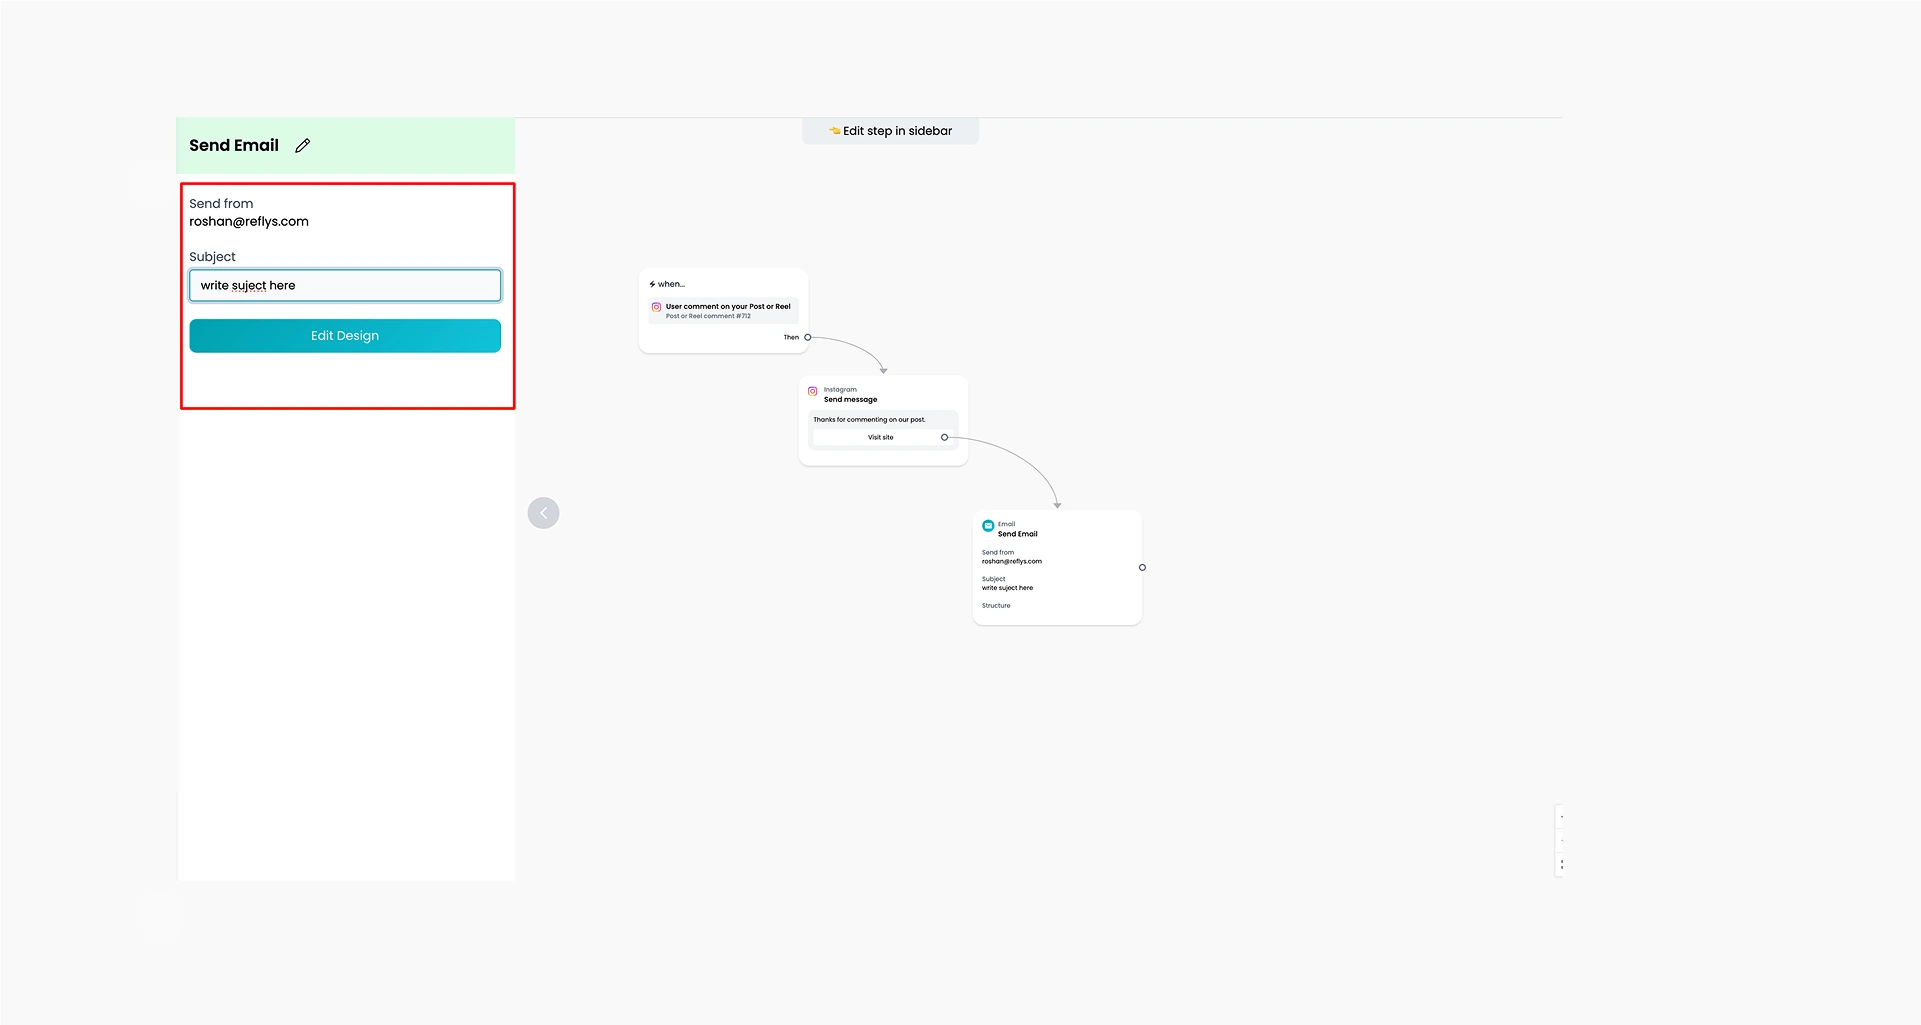
3. Set Up the Email Node
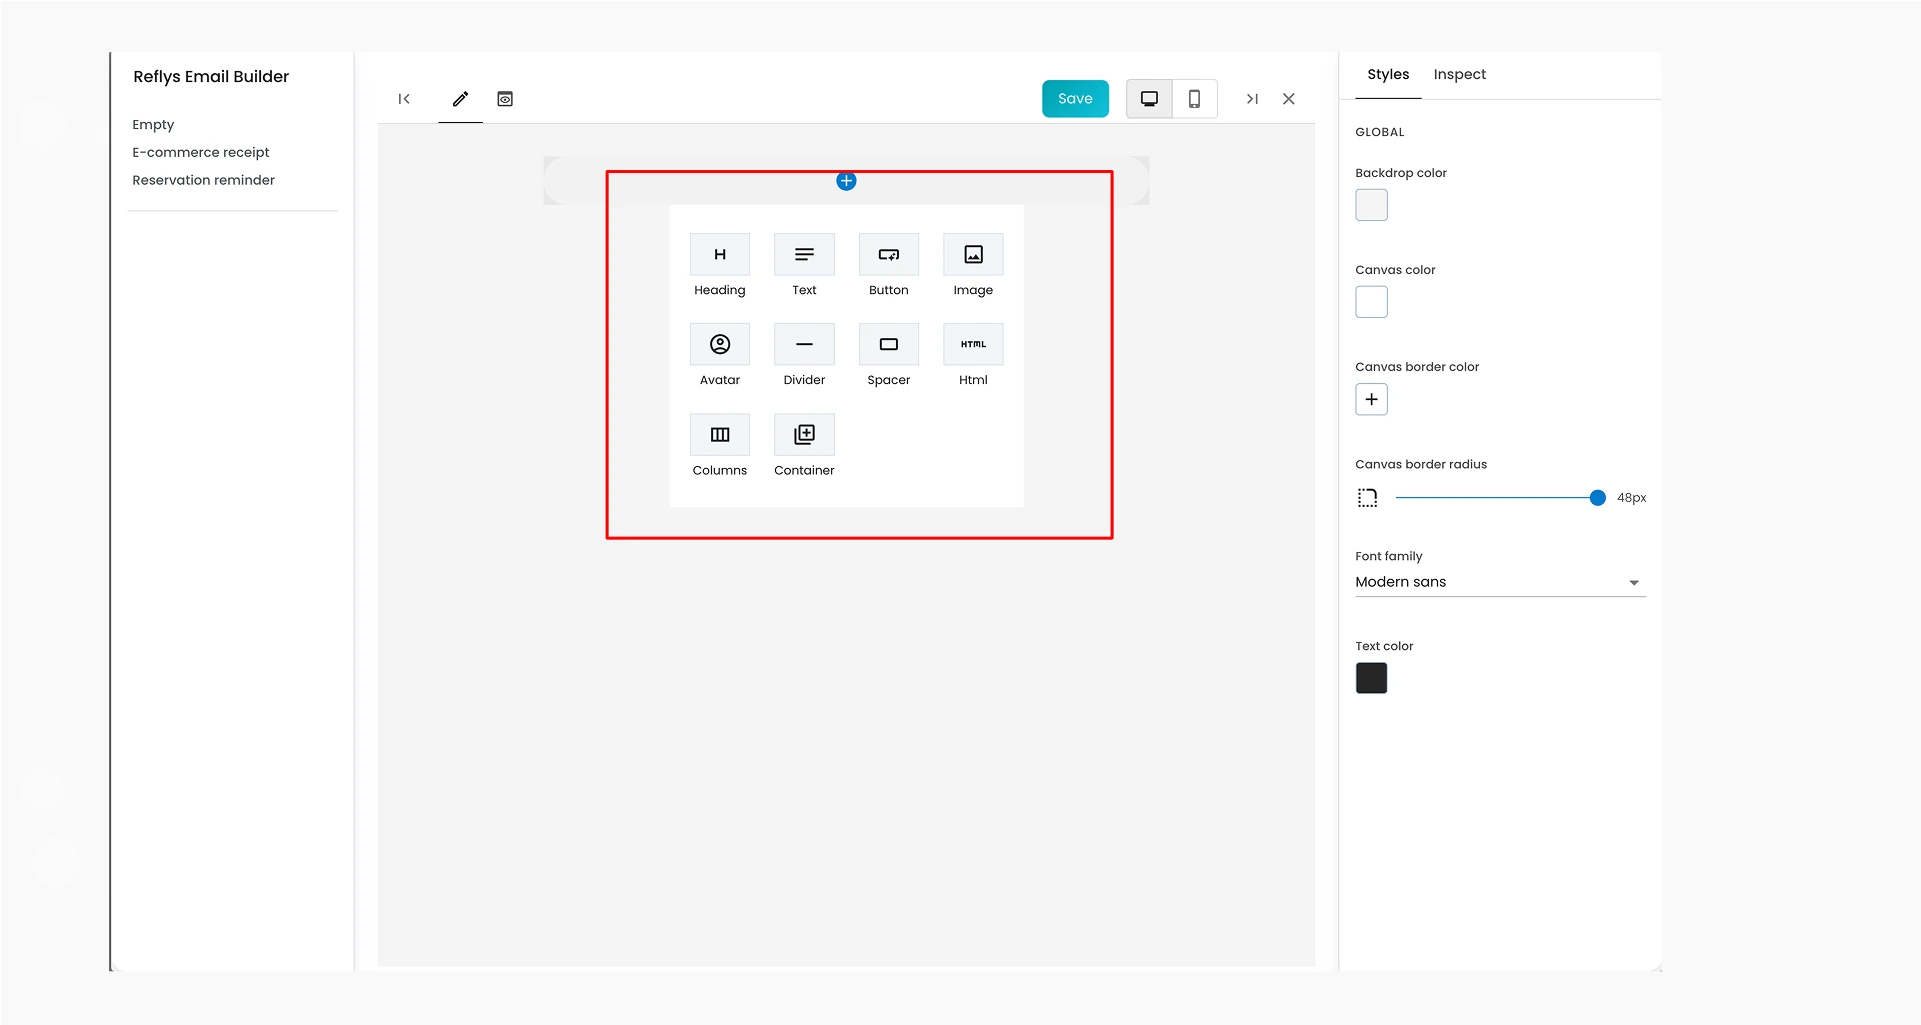
You’ll see a simple editor where you can customize your email:
- Sender Name – The name that appears in the user’s inbox.
- Subject Line – Write a clear and relevant subject.
- Preheader – A short sentence that shows under the subject line in many inboxes.
- Body Design – Add your message content. You can use:
- Text
- Images (JPG, PNG only)
- Buttons (with links)
- Avatar
- Spacer
- Html
- Columns
- Containers
- Dividers
- Button Actions – Add a clickable button that performs actions, such as opening a URL or directing the user to another part of the automation.
4. Customize Design
You can adjust the design to match your branding:
- Change text and background colors
- Adjust spacing and padding
- Add multiple content blocks (text, buttons, images)

Once you’re done designing the email, click Save.
How Consent Works in Reflys
When collecting emails, it’s important to get user consent before sending them any messages. Consent helps ensure that you’re complying with email marketing rules and that your users expect to hear from you.
- In Reflys, consent is obtained during the conversation in the Data Collection block.
- This makes sure the user agrees to receive emails from you.
- You do not need to (and cannot) upload pre-existing lists, so there is no need for consent during import.
Remember: Always be clear about why you’re collecting the email and what kind of emails the user should expect.
Pricing for Email Sending
Reflys doesn’t charge you directly for email usage. Instead, your email sending costs will depend on the email provider you’ve connected:
For full pricing details, please visit the official website of the provider you’re using.
Troubleshooting Tips
That’s it! You can now start creating automations in Reflys that include customized emails. Use this feature to follow up with users, share updates, or send reminders—all as part of a natural flow inside your automation.