Instagram Automation: AI Keyword-Based Triggers with Reflys
If you want to respond to Instagram DMs automatically, even when you’re not online, Reflys can help. One useful feature is the AI Keyword-Based Trigger, which lets you set up automatic replies when someone sends you a message containing specific words. This makes it easier to stay connected with your audience without having to reply manually every time.
You can choose to respond to:
- Specific keywords or phrases (like “discount,” “price,” “delivery”)
- Or general intents (like someone asking a question about your store)
Once activated, Reflys instantly sends the reply you’ve set — no manual work is required.
Whether it’s a simple “Hi,” a question about your product, or someone asking for help, this feature allows you to instantly respond with the right message, collect leads, or guide users to the next step without needing to check your inbox 24/7.
Here’s how you can set up an AI keyword-based trigger with Reflys.
How to Set Up AI Keyword-Based Triggers with Reflys
From the Reflys Dashboard
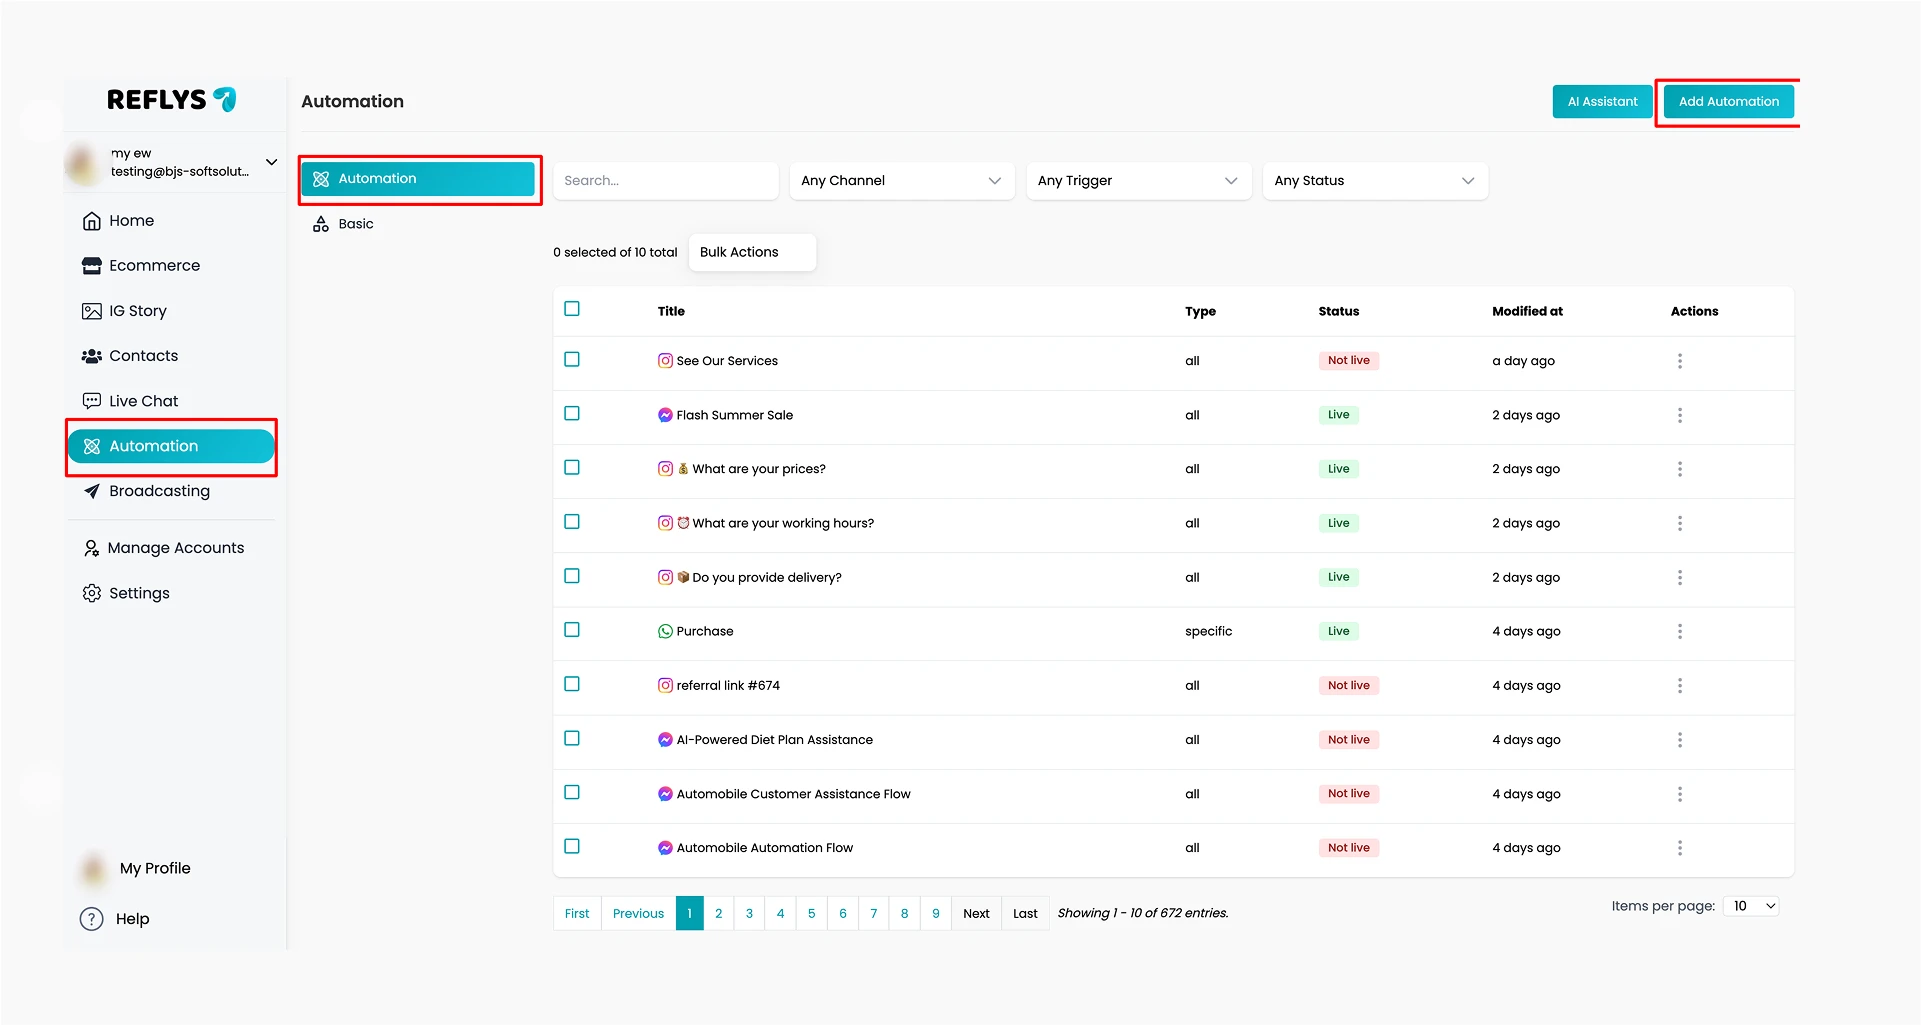
Step 1: Go to Automation > Add Automation
Within your Reflys dashboard, click the Automation tab, then select Add Automation.
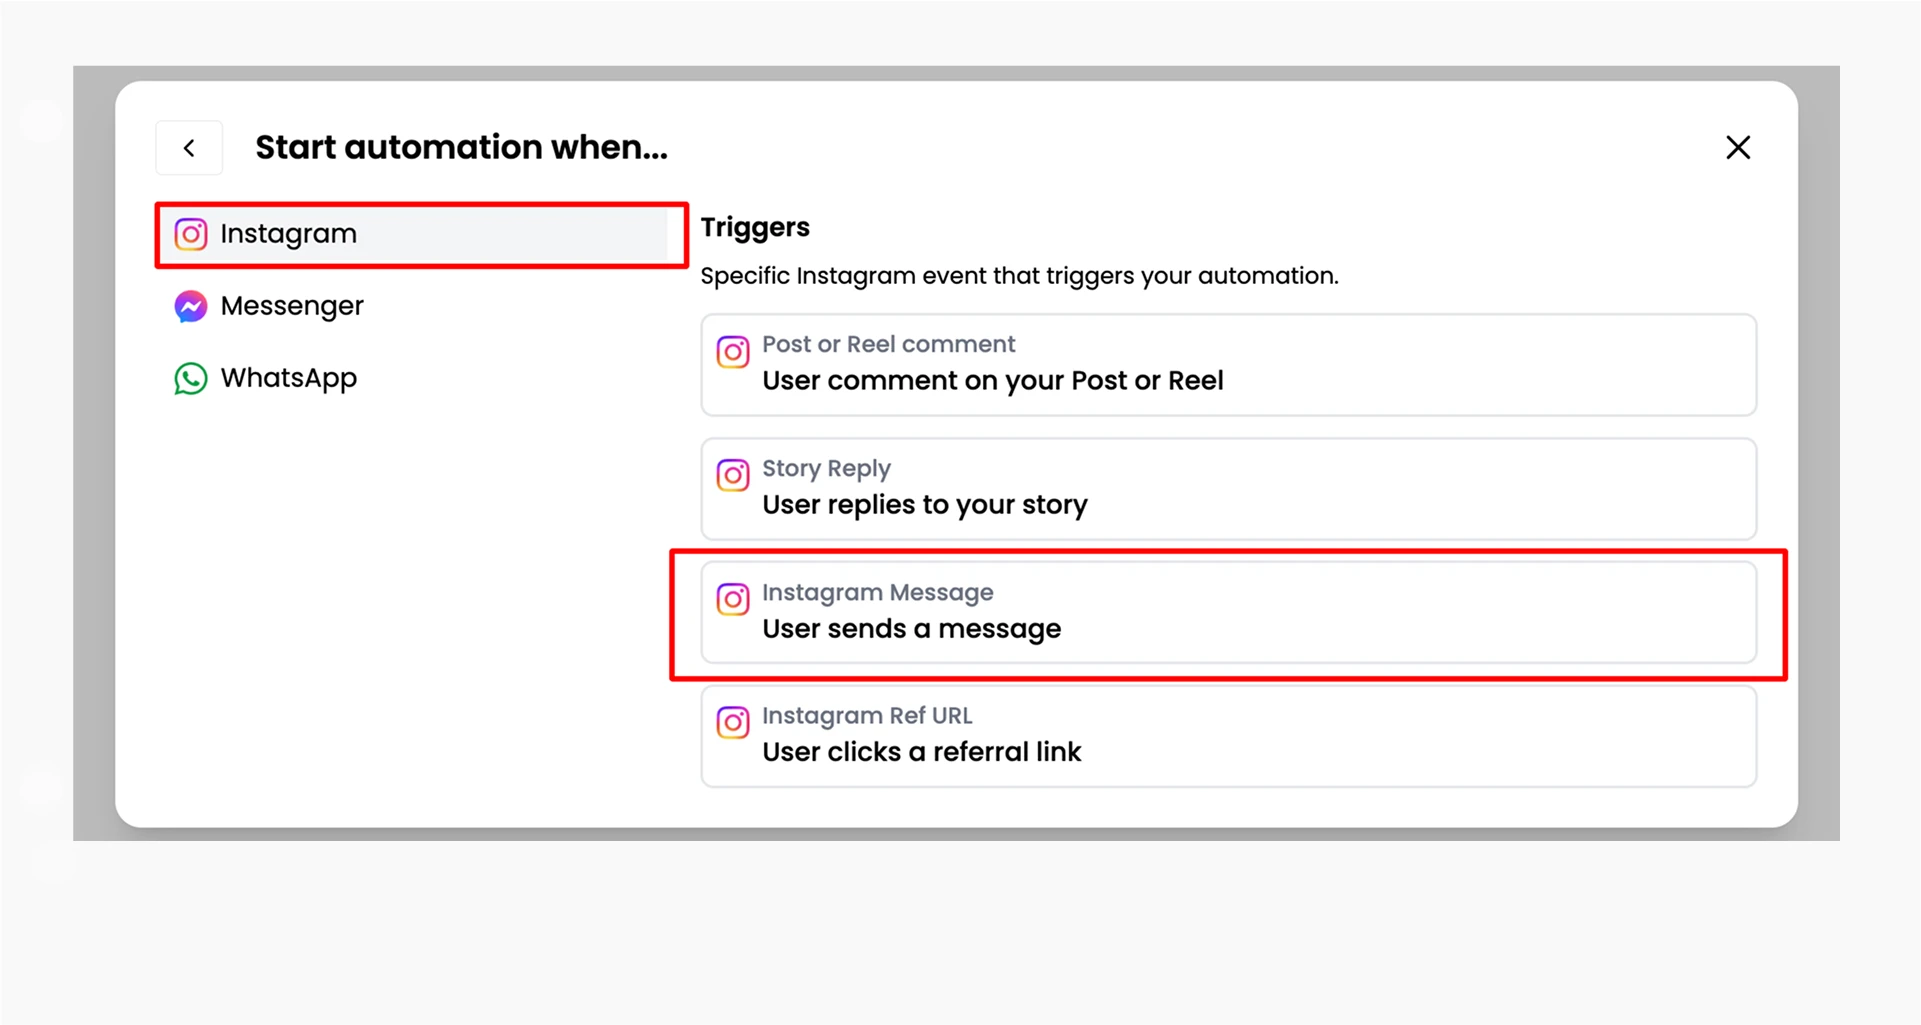
Now, click the Instagram > User sends a message trigger.
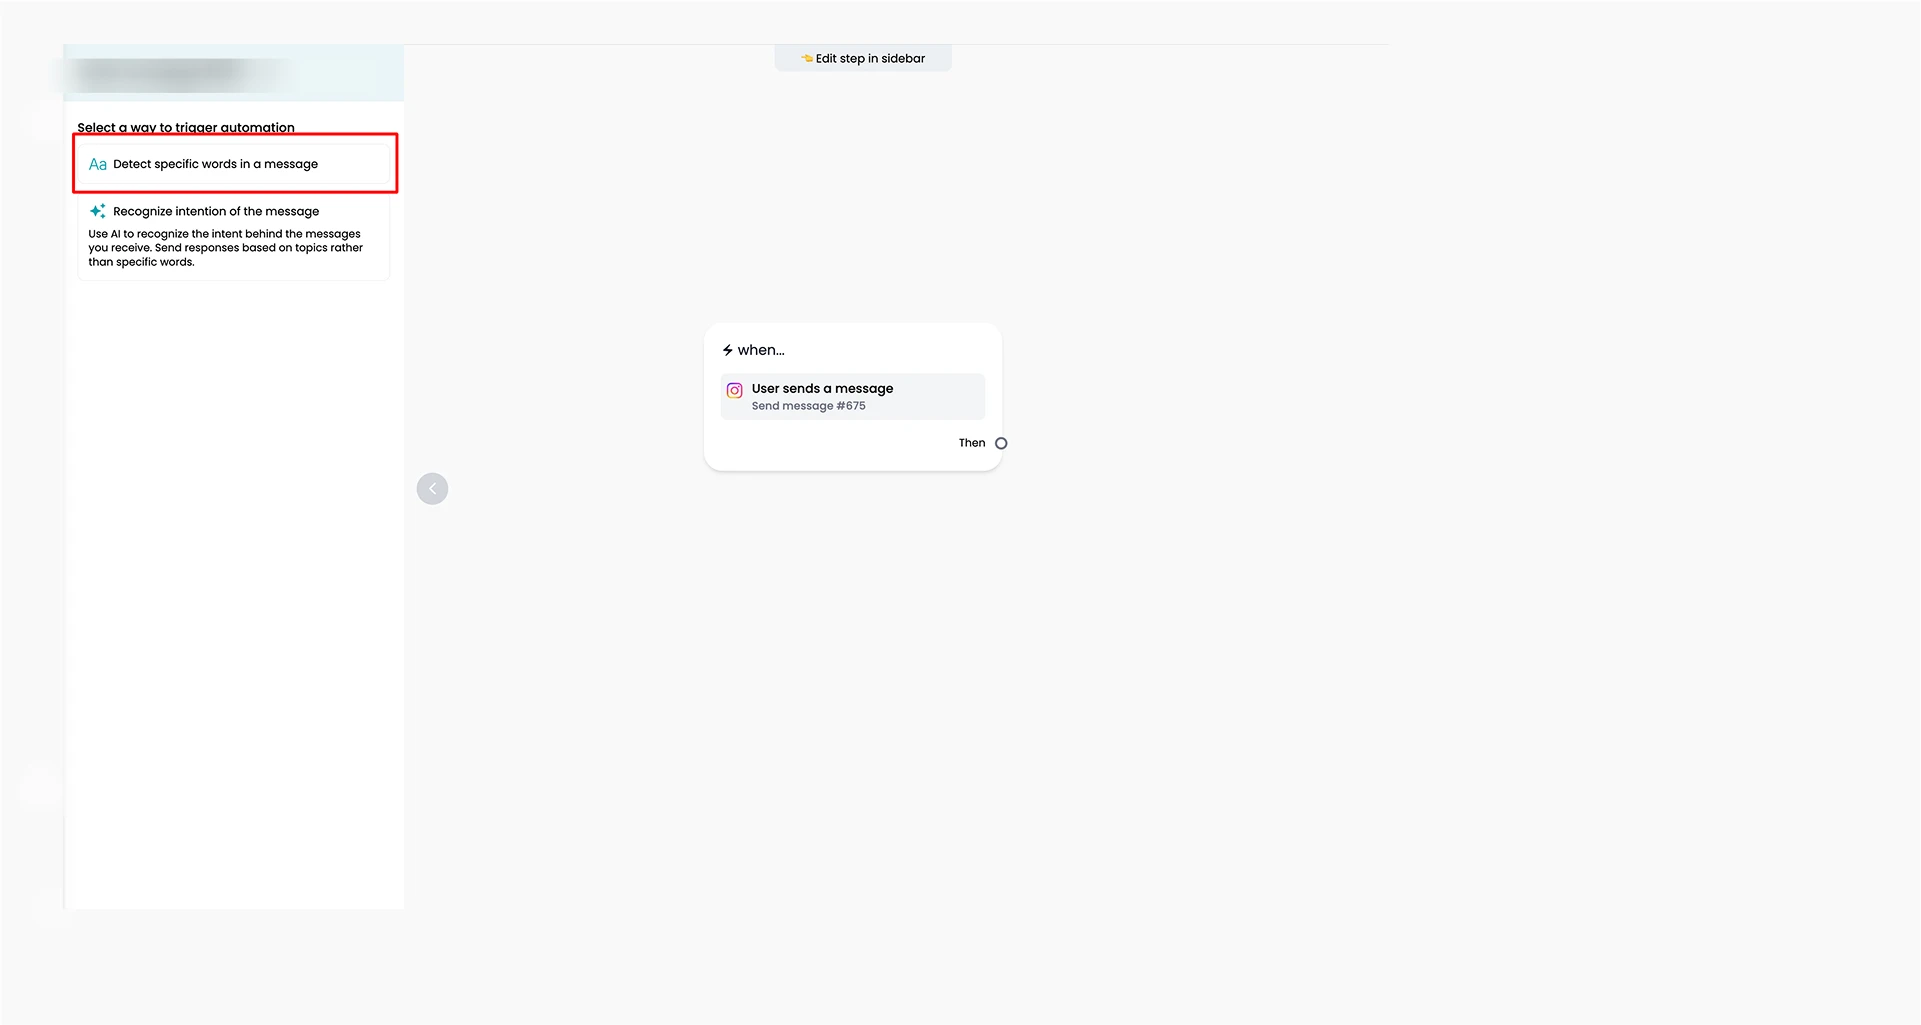
Step 2: Select a Way to Trigger Automation
After choosing the ‘user sends a message ‘, a left panel will open. Choose ‘detect specific words in a message’ in trigger automation.
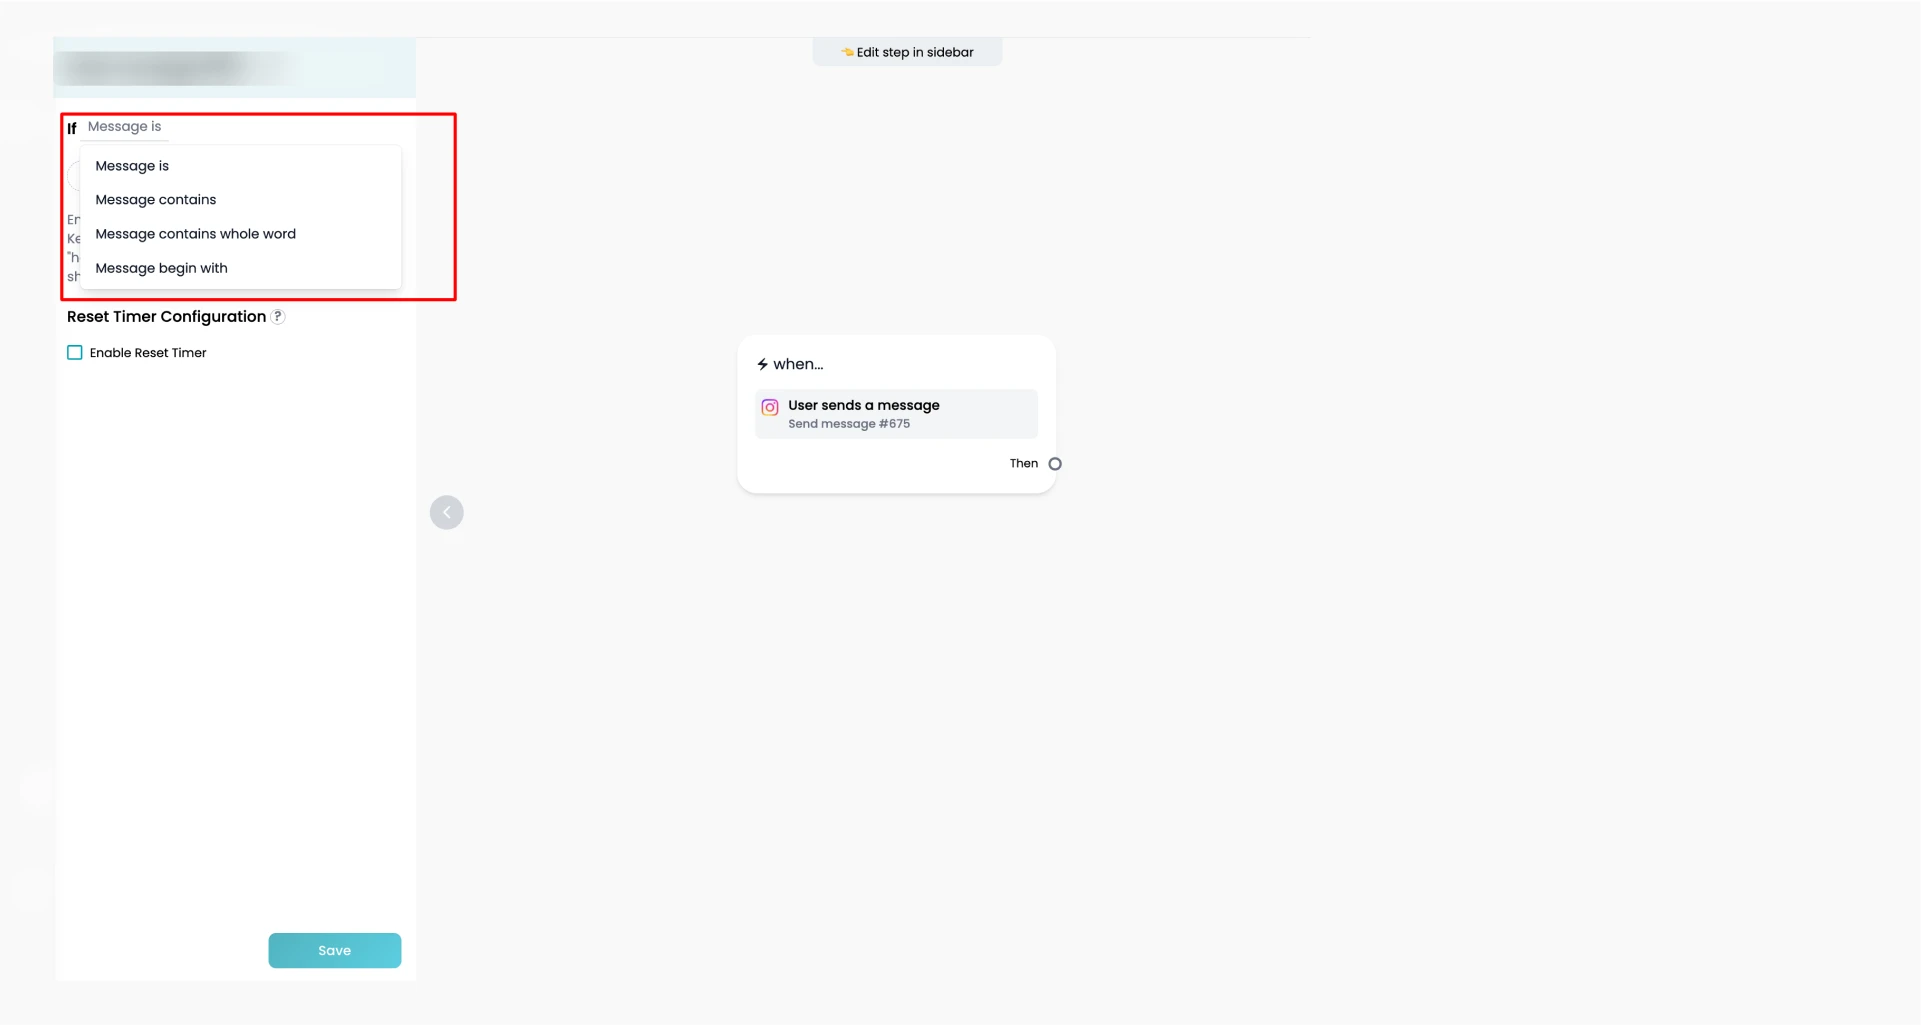
Step 3: Pick the Keyword Rule
Now choose how the keyword will behave. You’ll see options like:
- The message is: Works only if the message exactly matches the keyword
- Message contains: Triggers if the keyword appears anywhere in the message
- The message begins with: Useful if the keyword is at the start
- The message contains a whole word: Avoids matching part of another word
Example: If your keyword is “price” and someone types:
“Can you tell me the price?”
The Message contains a rule that will still catch it.
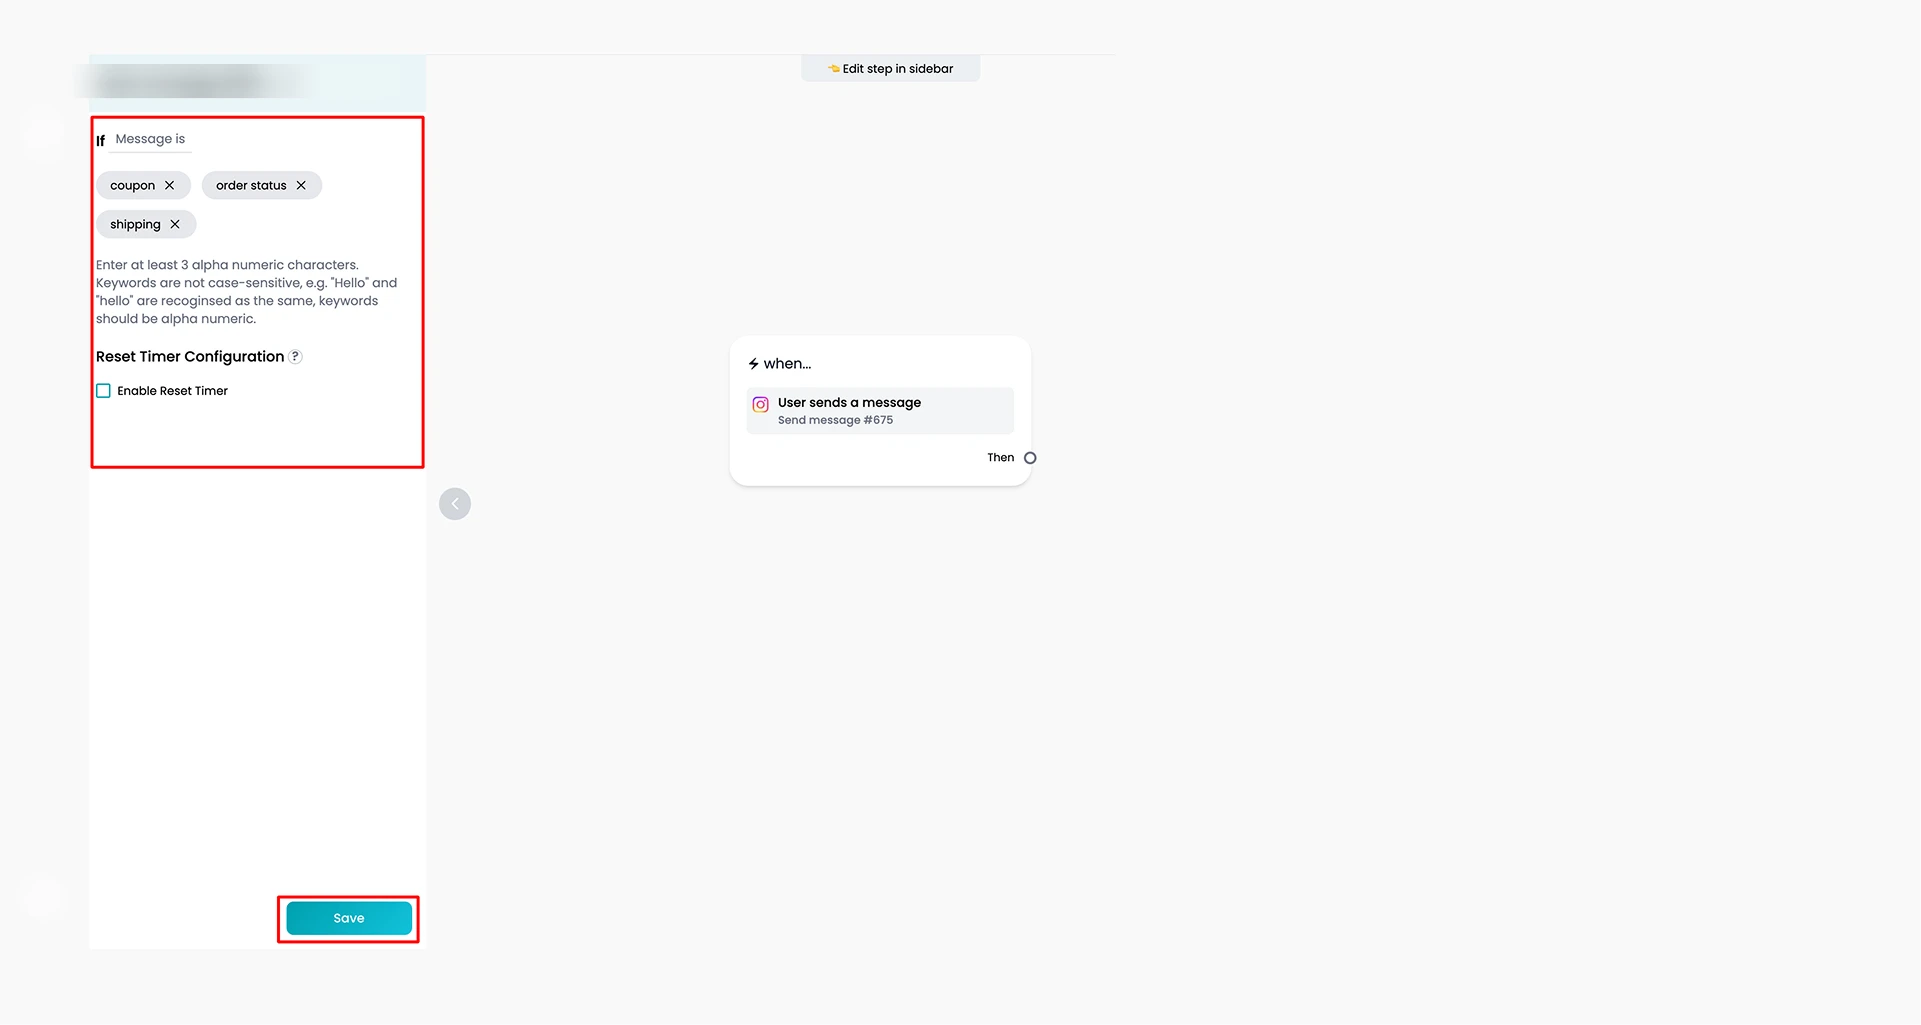
Step 4: Add the Keywords
Add up to 3 alphanumeric characters for keyword selection. For example:
- “Price”
- “Shipping”
- “Order status”
- “Coupon”
You can enter up to 3 keywords for each rule and click the save button to continue.
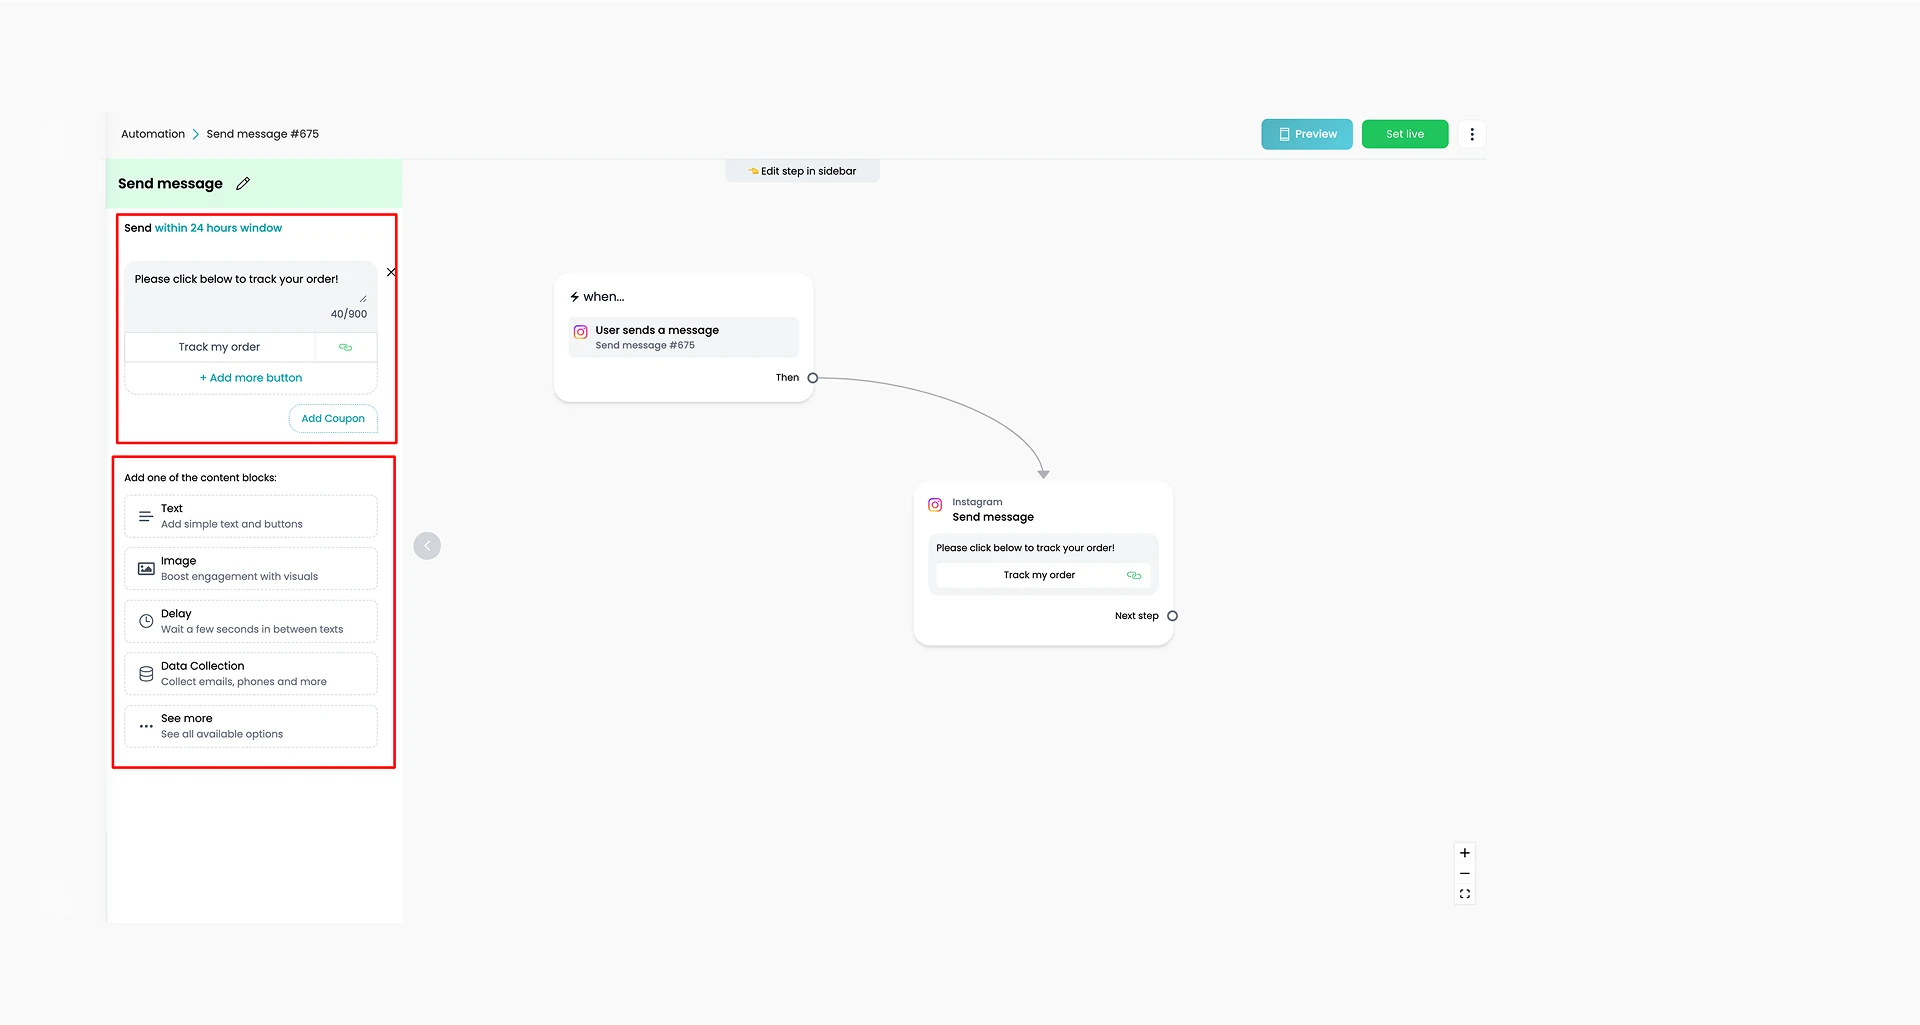
Step 5: Connect the Keyword to an Automation
Once you’ve added your keywords, you can create a new automation. While creating a new one, you’ll be taken to the Flow Builder to design the message flow.
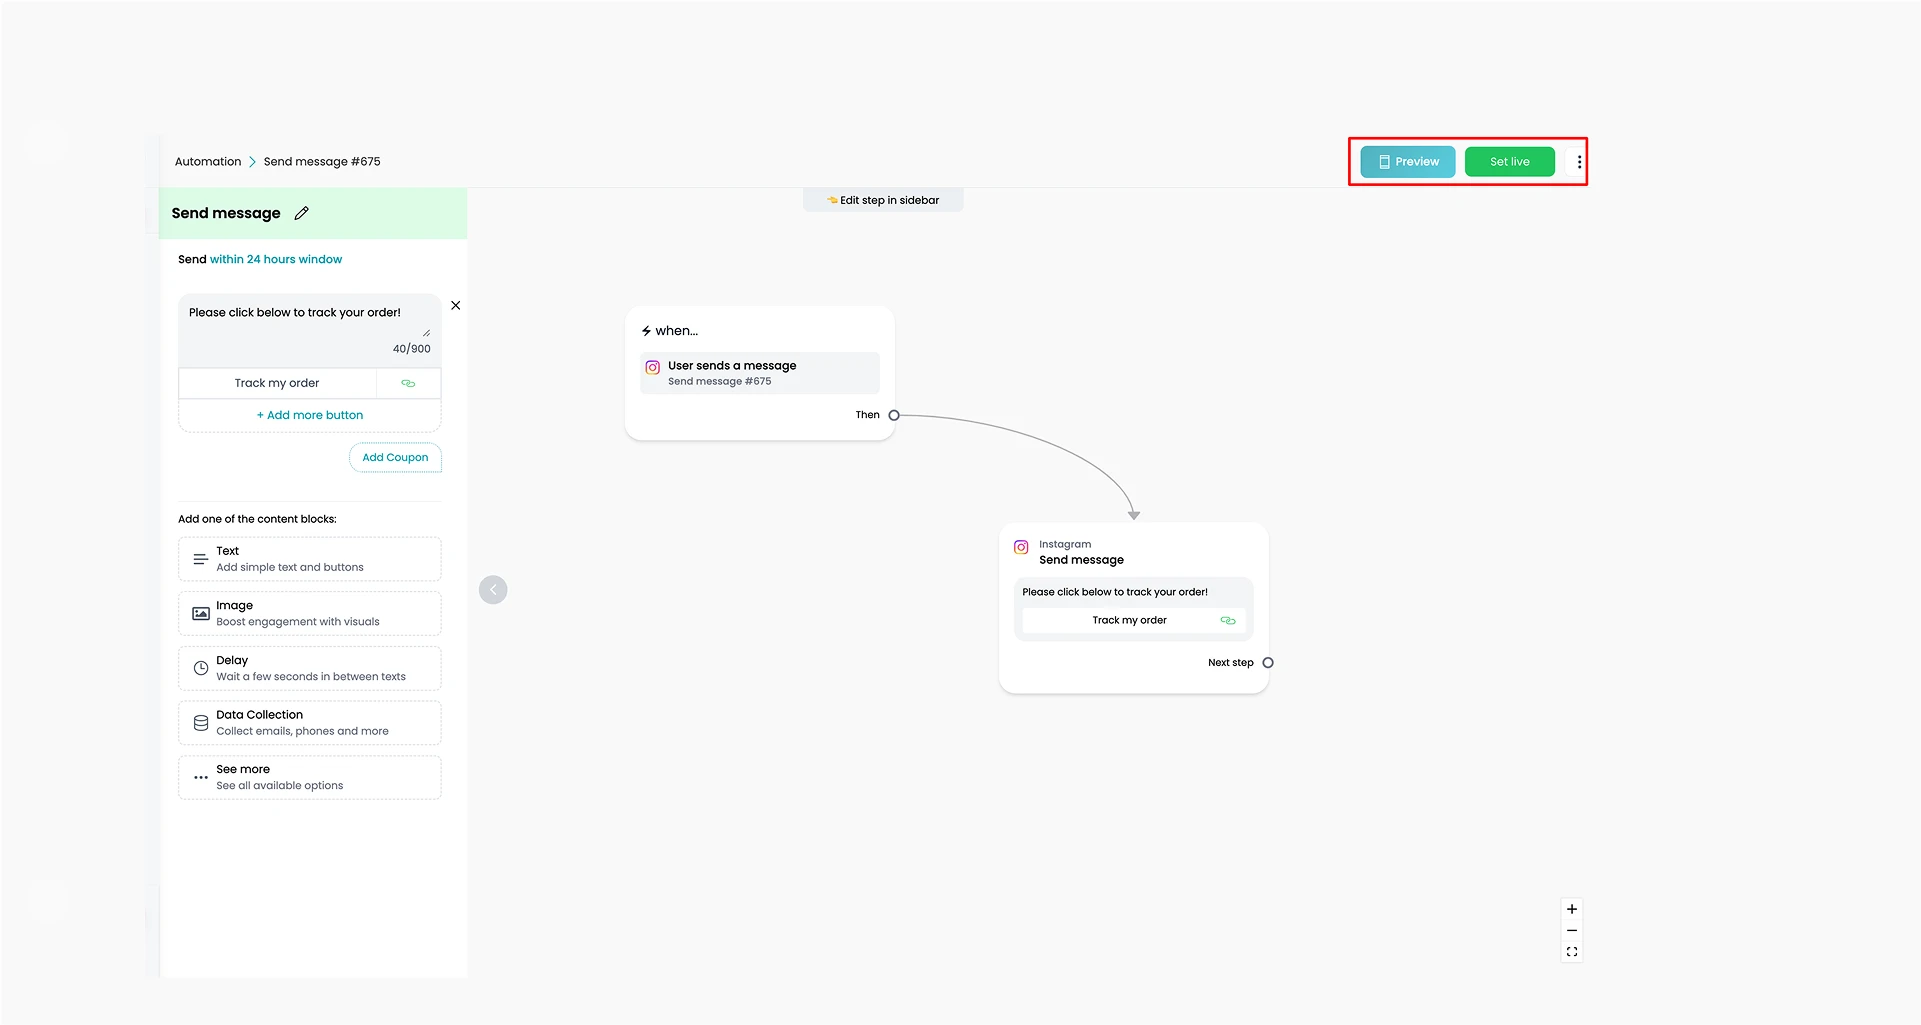
Step 6: Click the Preview and Set Live
Once you are done with your changes, you can preview them in the top right corner of your screen. Click set live, and your automation is live now!
Limitations You Should Know
- If a message has two keywords, only the first one listed will trigger
- If no keyword matches, your Default Reply will be sent
- You can change keyword order by dragging them; the top keywords get priority.
Troubleshooting
Here’s how to fix common issues:
Keyword not triggering
- Make sure the keyword is enabled
- Check if the automation is published and set live
Wrong automation triggered
- Check your rule type — “contains” and “is” act differently
- Rearrange your keyword list to prioritize the right one
Can’t see the Keywords tab
- Go to Settings > Display and turn the keyword tab on
Whether you’re answering product questions, sending discount codes, or starting a sales funnel, this trigger lets you do it automatically and instantly.