Reflys AI Flow Builder Assistant
The AI Flow Builder Assistant in Reflys is a tool that helps you set up automations quickly and easily. You do not require technical expertise to use it. Just tell AI a few simple questions, and the assistant will help you create a custom automation flow.
Whether you want to collect leads, reply to common questions, or set up appointment bookings, this tool guides you through the process step by step.
How to Use the AI Flow Builder Assistant
Step 1: Go to the Reflys Dashboard
Start by heading to your Automation tab on the Reflys dashboard. Tap the AI Assistant button to go to a canvas where you indicate to the AI how to make your new flow.
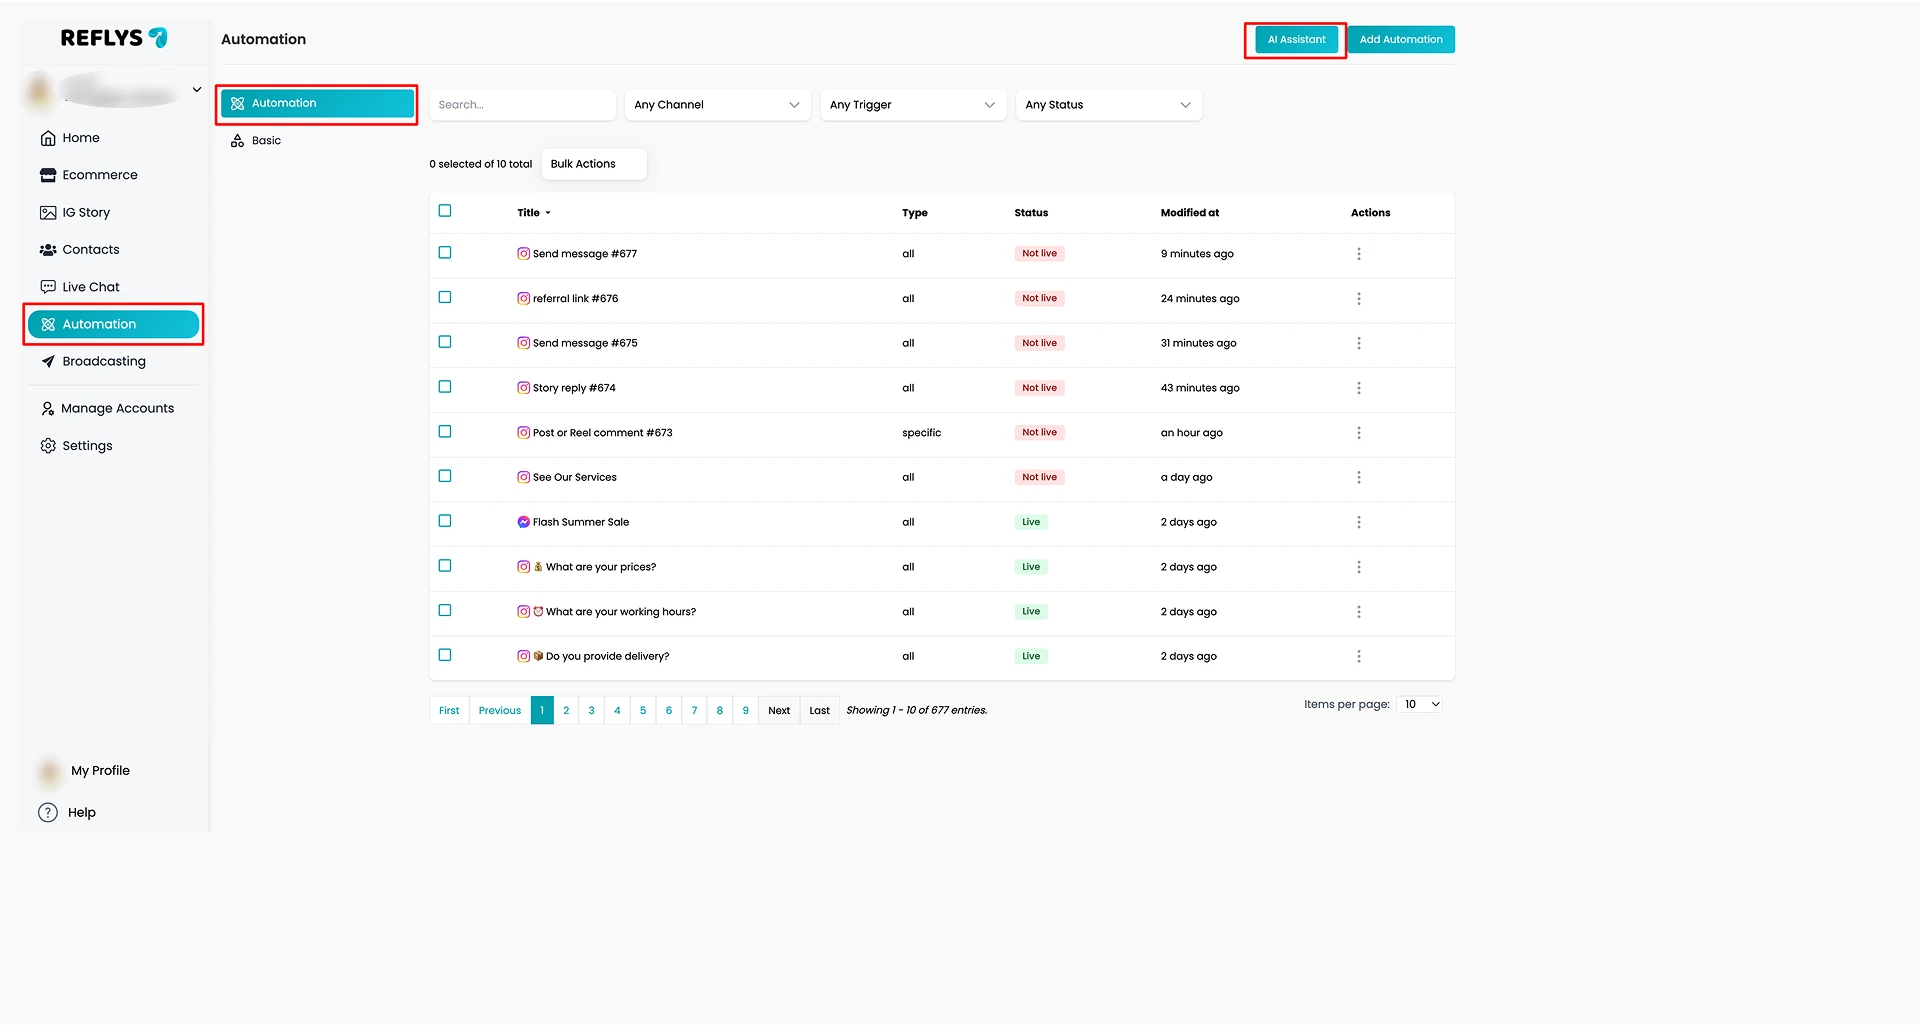
This is where the magic begins.
Step 2: Select Your Channel
In the canvas that opens, you’ll first select your preferred communication channel.
You can choose between:
- Messenger

Step 3: Choose a Relevant Category
Next, you’ll see a list of categories that match different industries.
Pick the one that best fits your business.
Examples include:
- Automobile
- Education
- Finance
- Healthcare
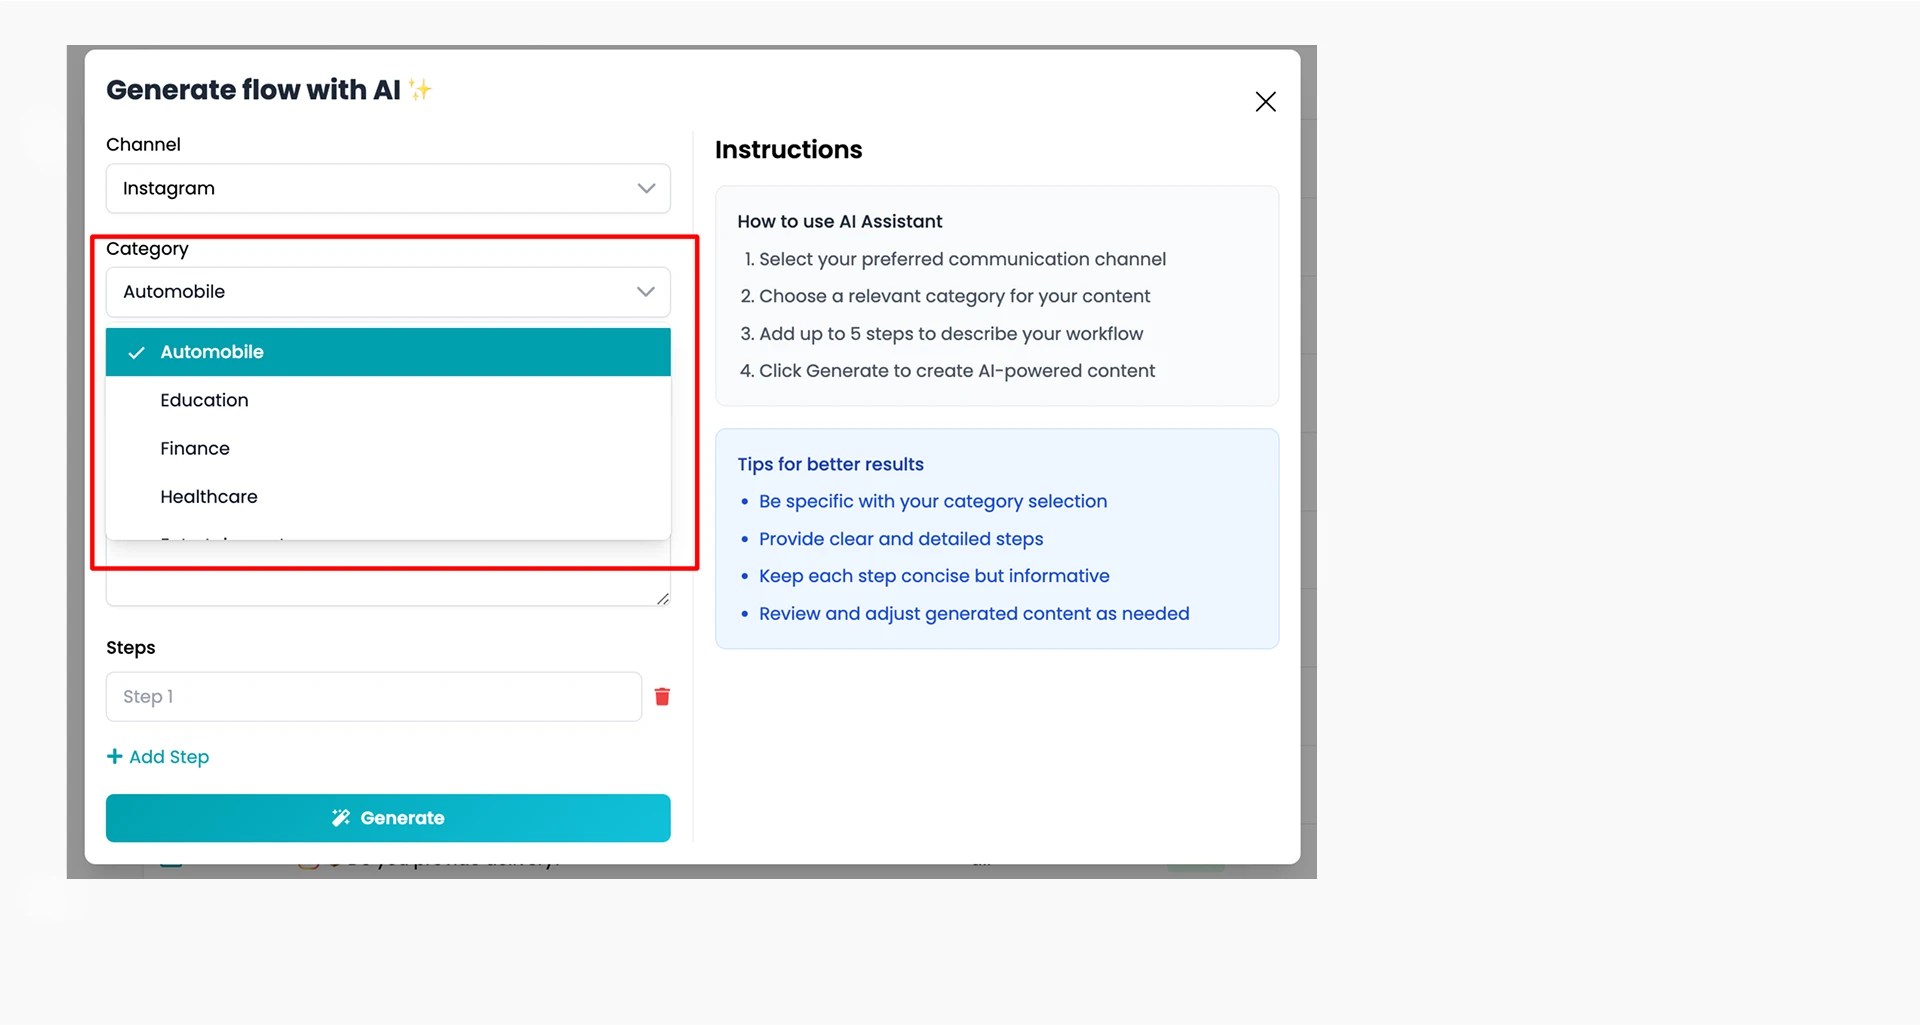
Choosing the right category helps the assistant create automation that’s more tailored to your industry.
Step 4: Pick the Type of Trigger Input
Now, choose how you want the AI to understand your automation flow.
You’ll see two options:
- Specific Keywords: Use this if you want the flow to respond to certain words or phrases.
- AI Intention: Choose this if you want the AI to understand the intent behind what users say and reply accordingly.
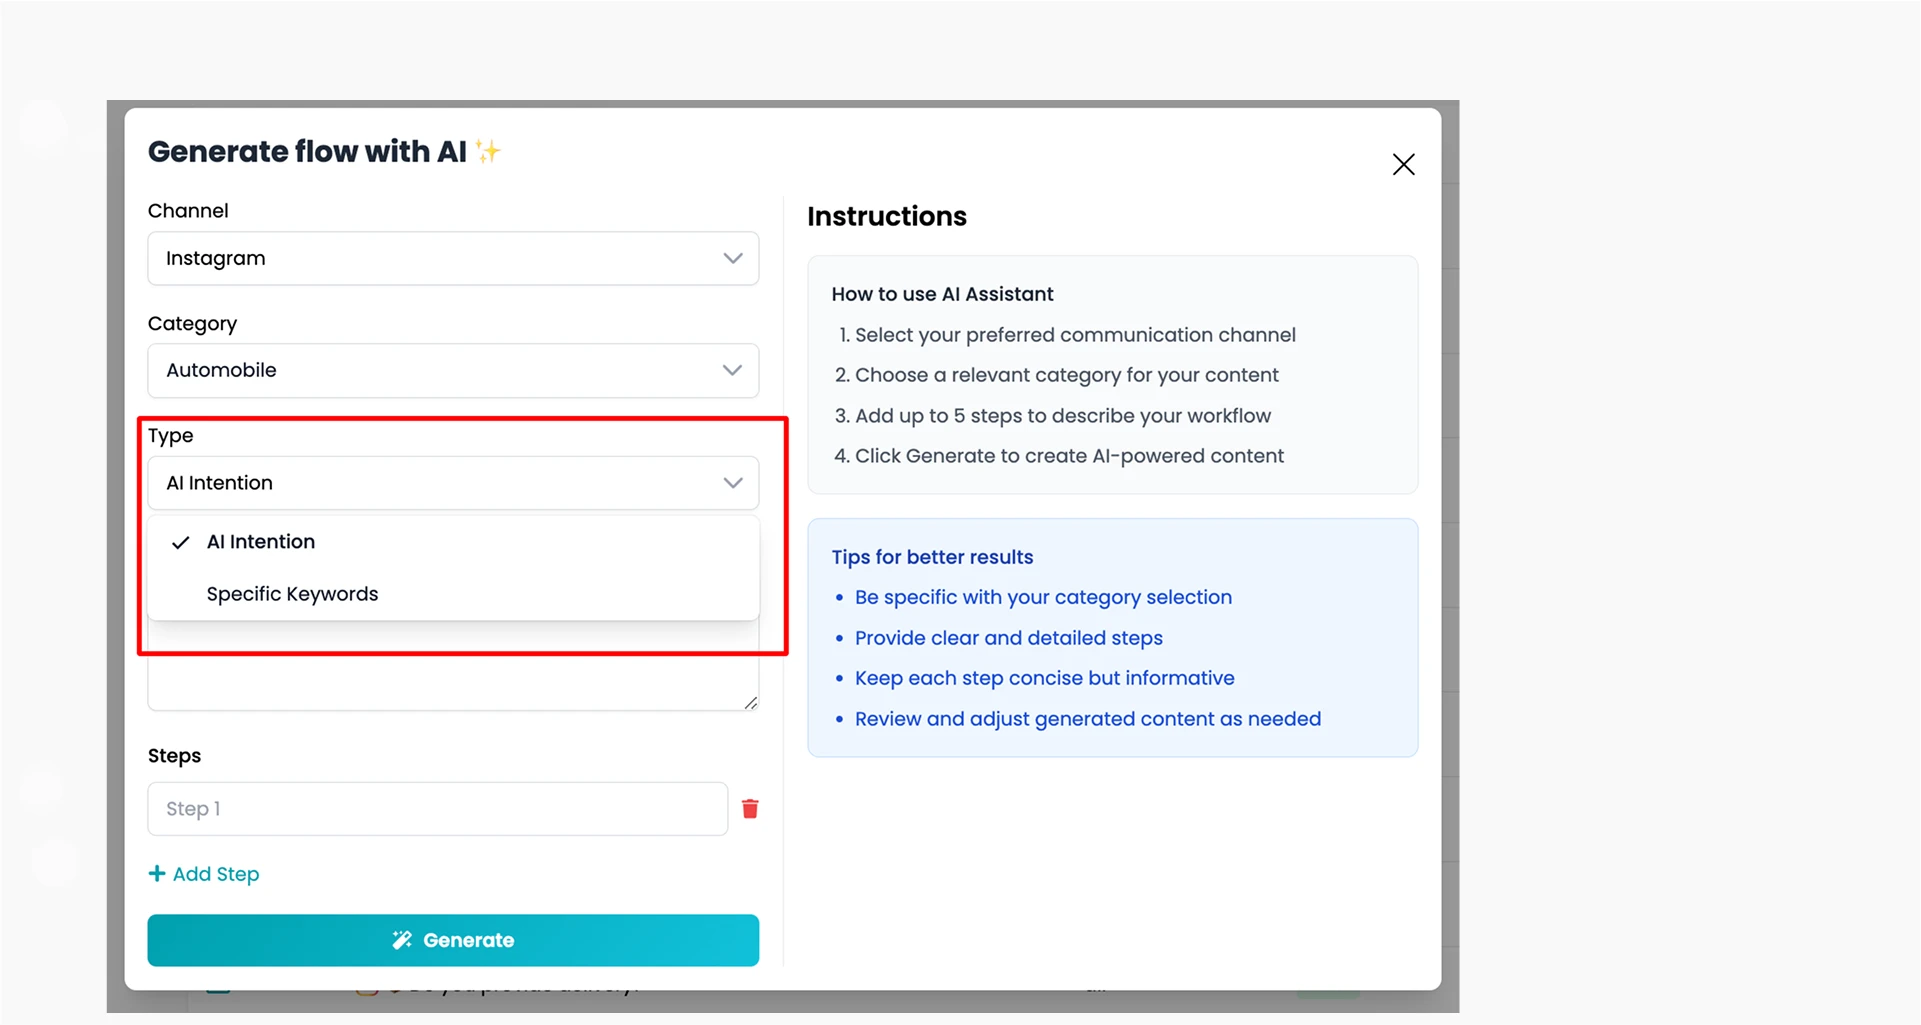
Pick the one that suits your needs best.
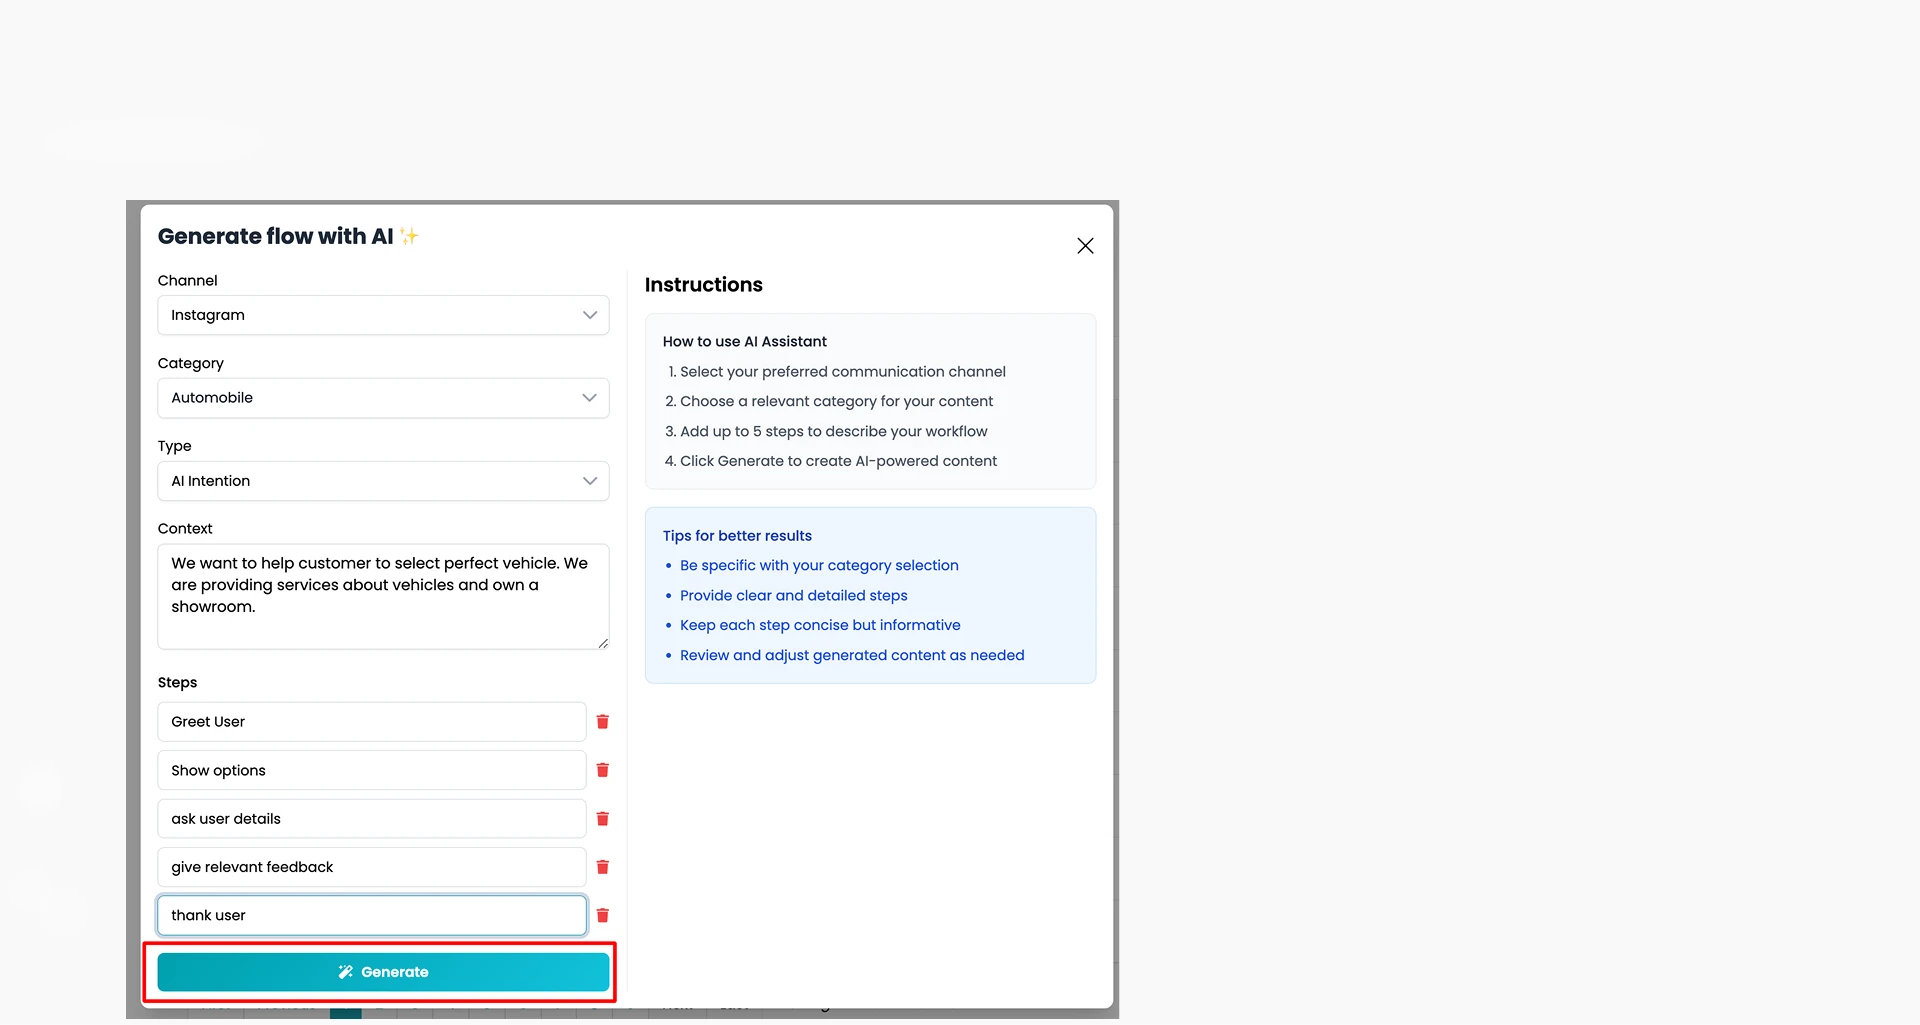
Step 5: Set the AI Context
This is where you give the AI some guidance. It’s time to tell the AI what your flow is all about. You’ll see a box labeled “AI Context.”
It helps you to explain the general idea of the automation you want to create.
For example:
- “I want to guide users through booking a free consultation.”
- “I want to help customers browse skincare products.”
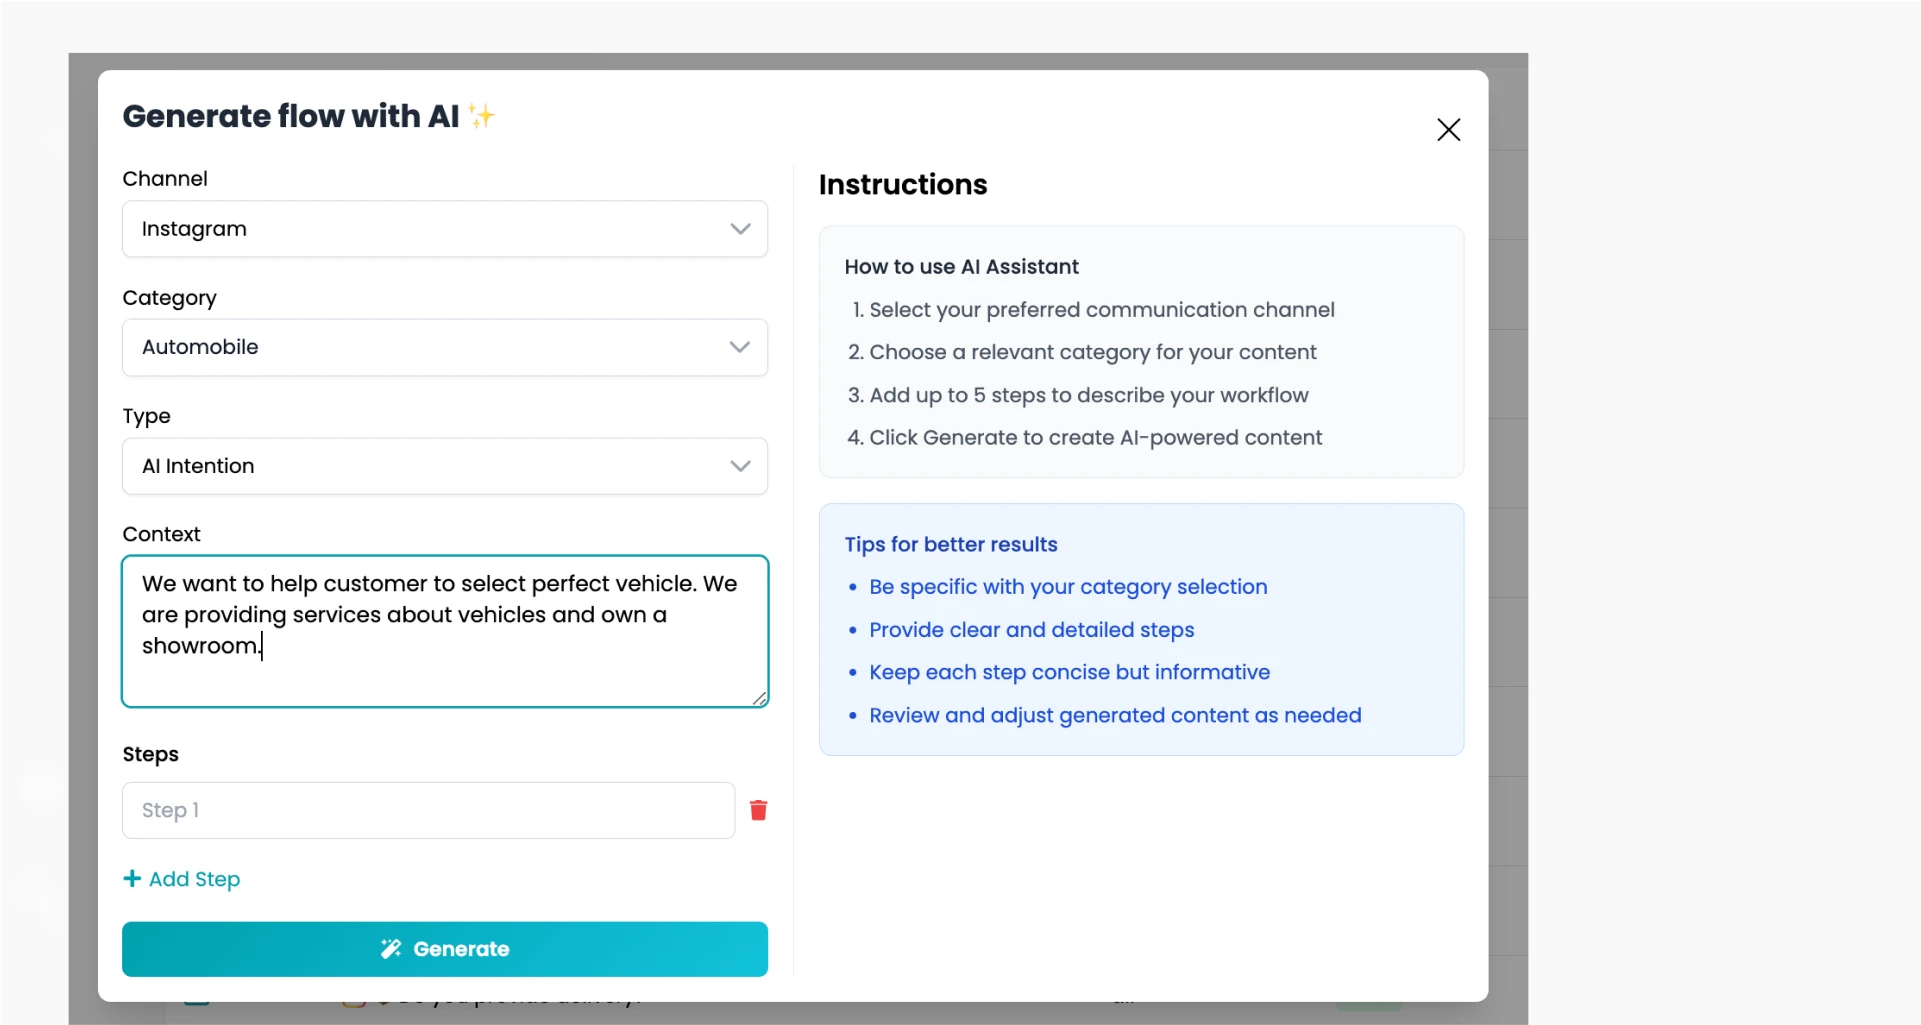
Keep it simple and relevant. This context helps the AI understand your intent and build a more relevant flow.
Step 6: Add Steps
You can now add up to 5 simple steps to describe how your automation should work.
Think of this like giving instructions to a smart assistant.
For example:
- Step 1: Greet the user and ask what they’re looking for
- Step 2: Show a menu with available options
- Step 3: Ask for user details if needed
- Step 4: Share relevant products or info
- Step 5: Offer to connect with a human agent

Keep your steps short but clear. This helps the assistant build your flow exactly how you want it.
Step 7: Click Generate to Let the AI Build
Once you’ve entered your steps, click the Generate button.
The AI will now take your instructions and build a complete automation flow for Instagram.
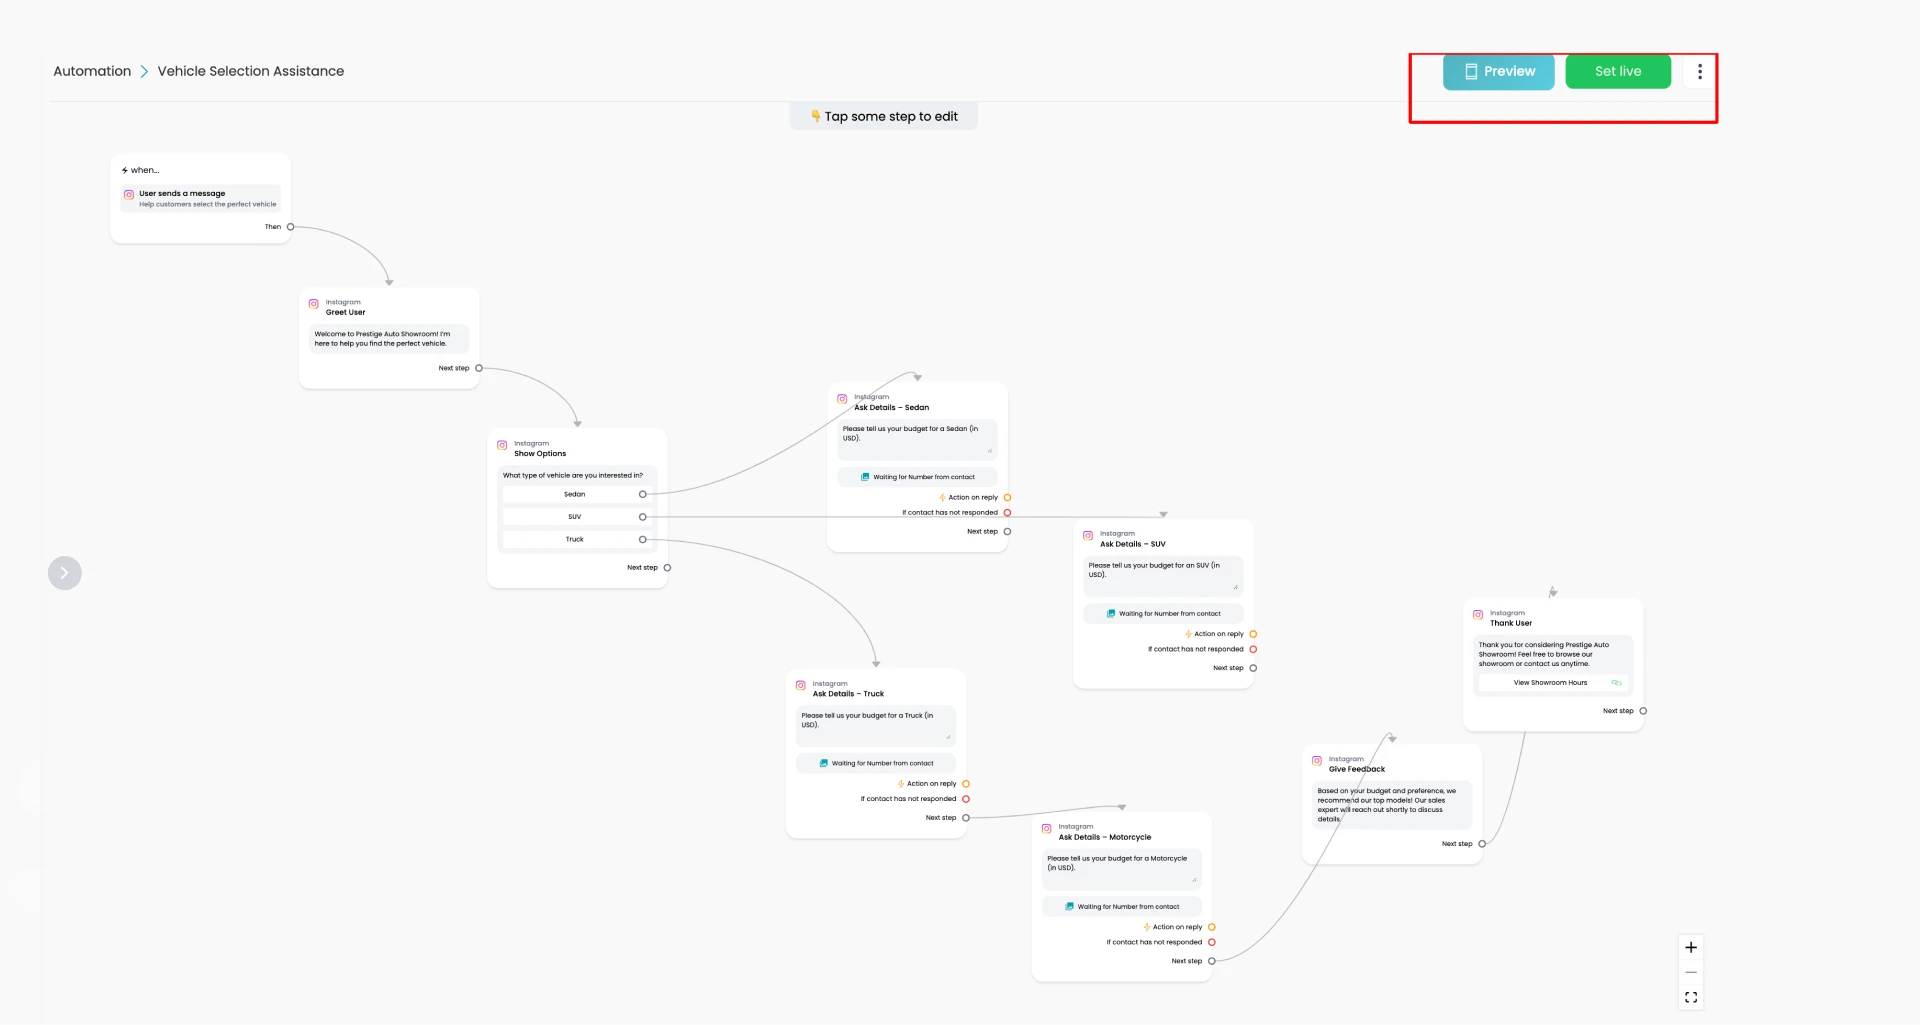
It only takes a few seconds, and once it’s ready, you’ll see the option to “Preview” and “Set Live.” Click it, and your flow will be added to your account!
What If You Want to Make Changes?
No problem.
You can either:
- Use the Flow Builder to tweak and edit the automation
- Or hit Start from Scratch to build a completely new flow with your own ideas
Best Tips to Get the Most Out of the AI Assistant
Be Clear About Your Business
Use simple words. Tell the assistant what you do in one or two lines.
Set Clear Goals
Be clear about what you want. Automation is defined by how you want to improve the situation by the end, whether additional sales, leads, or smoother replies.
Customize the Flow
When AI has provided you with a background, take it as yours. Change words, create your own steps, or upload your own pictures to go with your brand.
Always Test First
Before making it live, test and preview the flow. Send yourself a test message to make sure it works the way you want.
Improve with Feedback
Watch how users respond. If they drop off or get confused, go back in and adjust the flow.