How to Import Contacts to WhatsApp Channel in Reflys
In Reflys, you can easily add contacts to your WhatsApp channel using two simple methods:
- By creating individual contacts manually
- By importing a list of contacts through a CSV file
Both methods help you build your WhatsApp contact list and communicate with users using automated flows or messages. Before starting, ensure your WhatsApp channel is connected and that you have a Business subscription with Reflys.
Important Note: Before adding any data to your contact list, ensure you have obtained proper consent from each person to send them messages. This is important to follow WhatsApp’s Business Policy. Once imported, contacts will be treated as opted-in to receive messages through the bot.
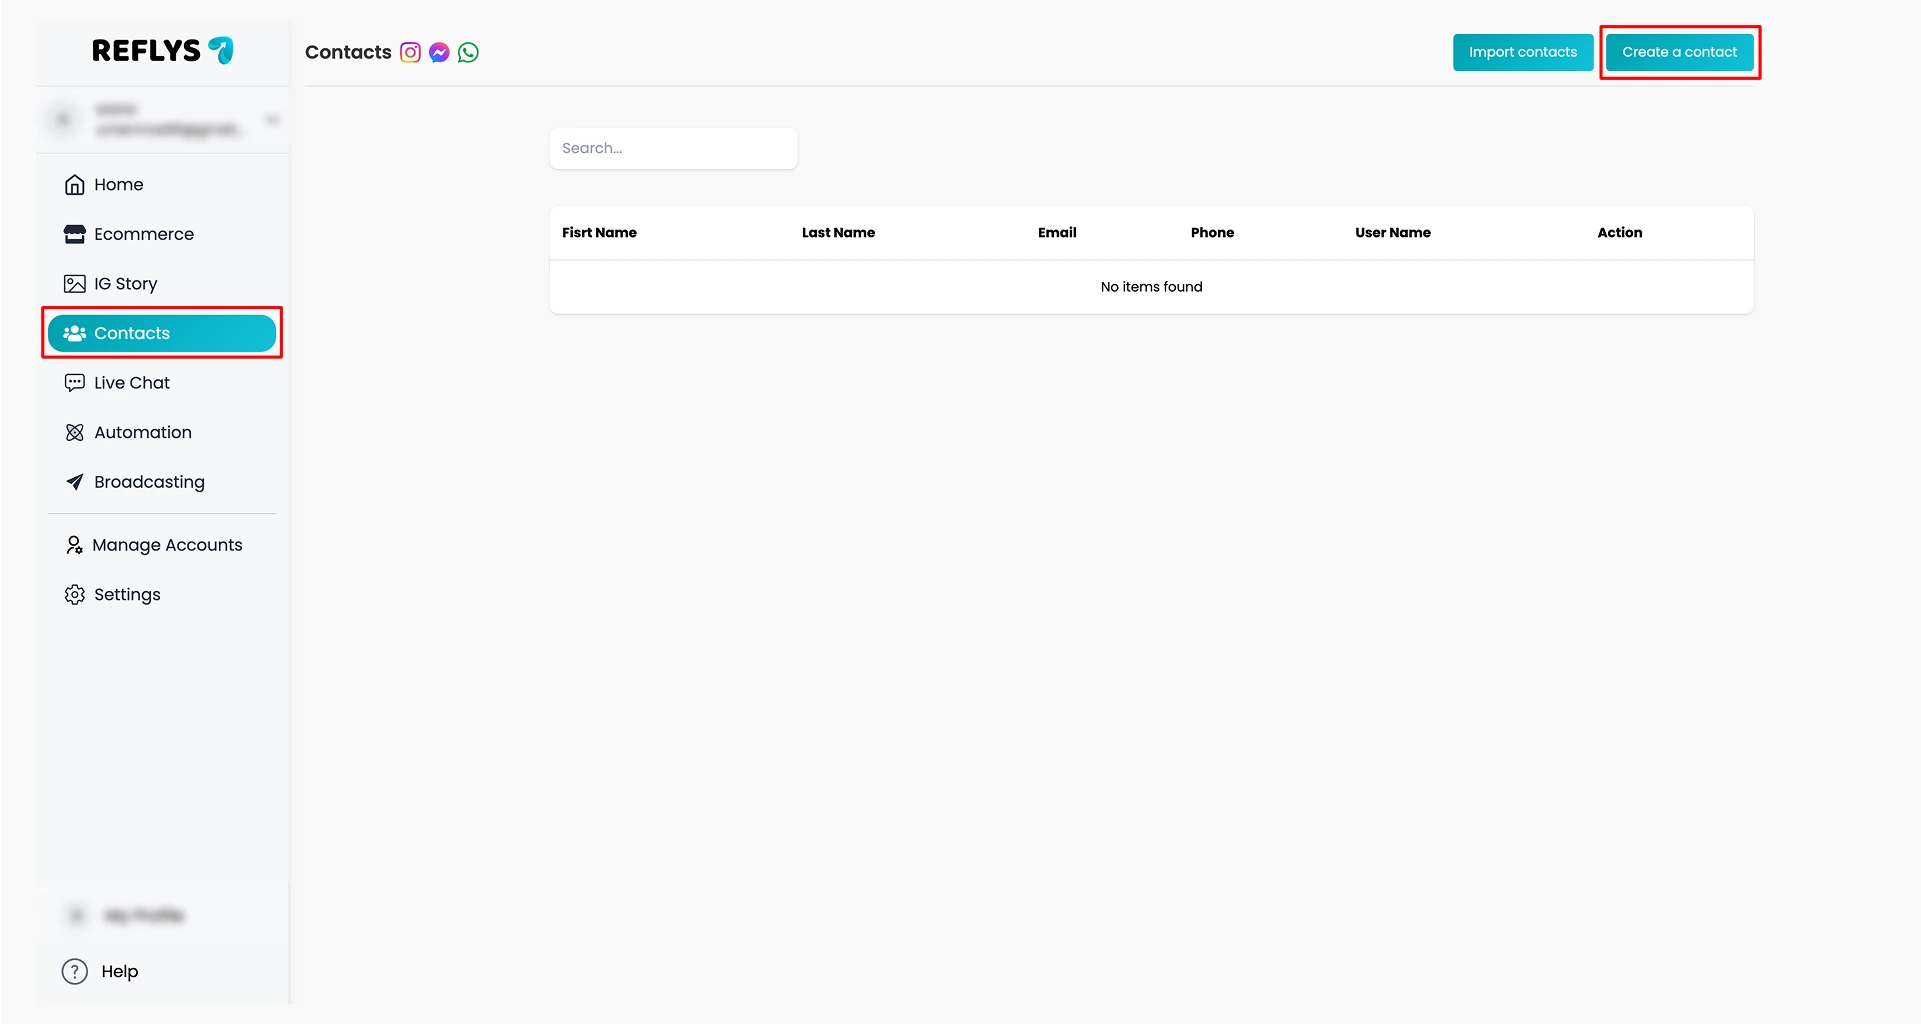
Manually Add Individual Contacts
If you want to add a single contact manually, follow these steps:
- Go to the Contacts section inside your Reflys dashboard.
- Click on the “Create New Contact” button.
3.Fill in the required fields like:
- First name
- Last name (optional)
- Email (optional)
- Phone number (with country code)
4. Ensure that you select the option to save the number for WhatsApp use.
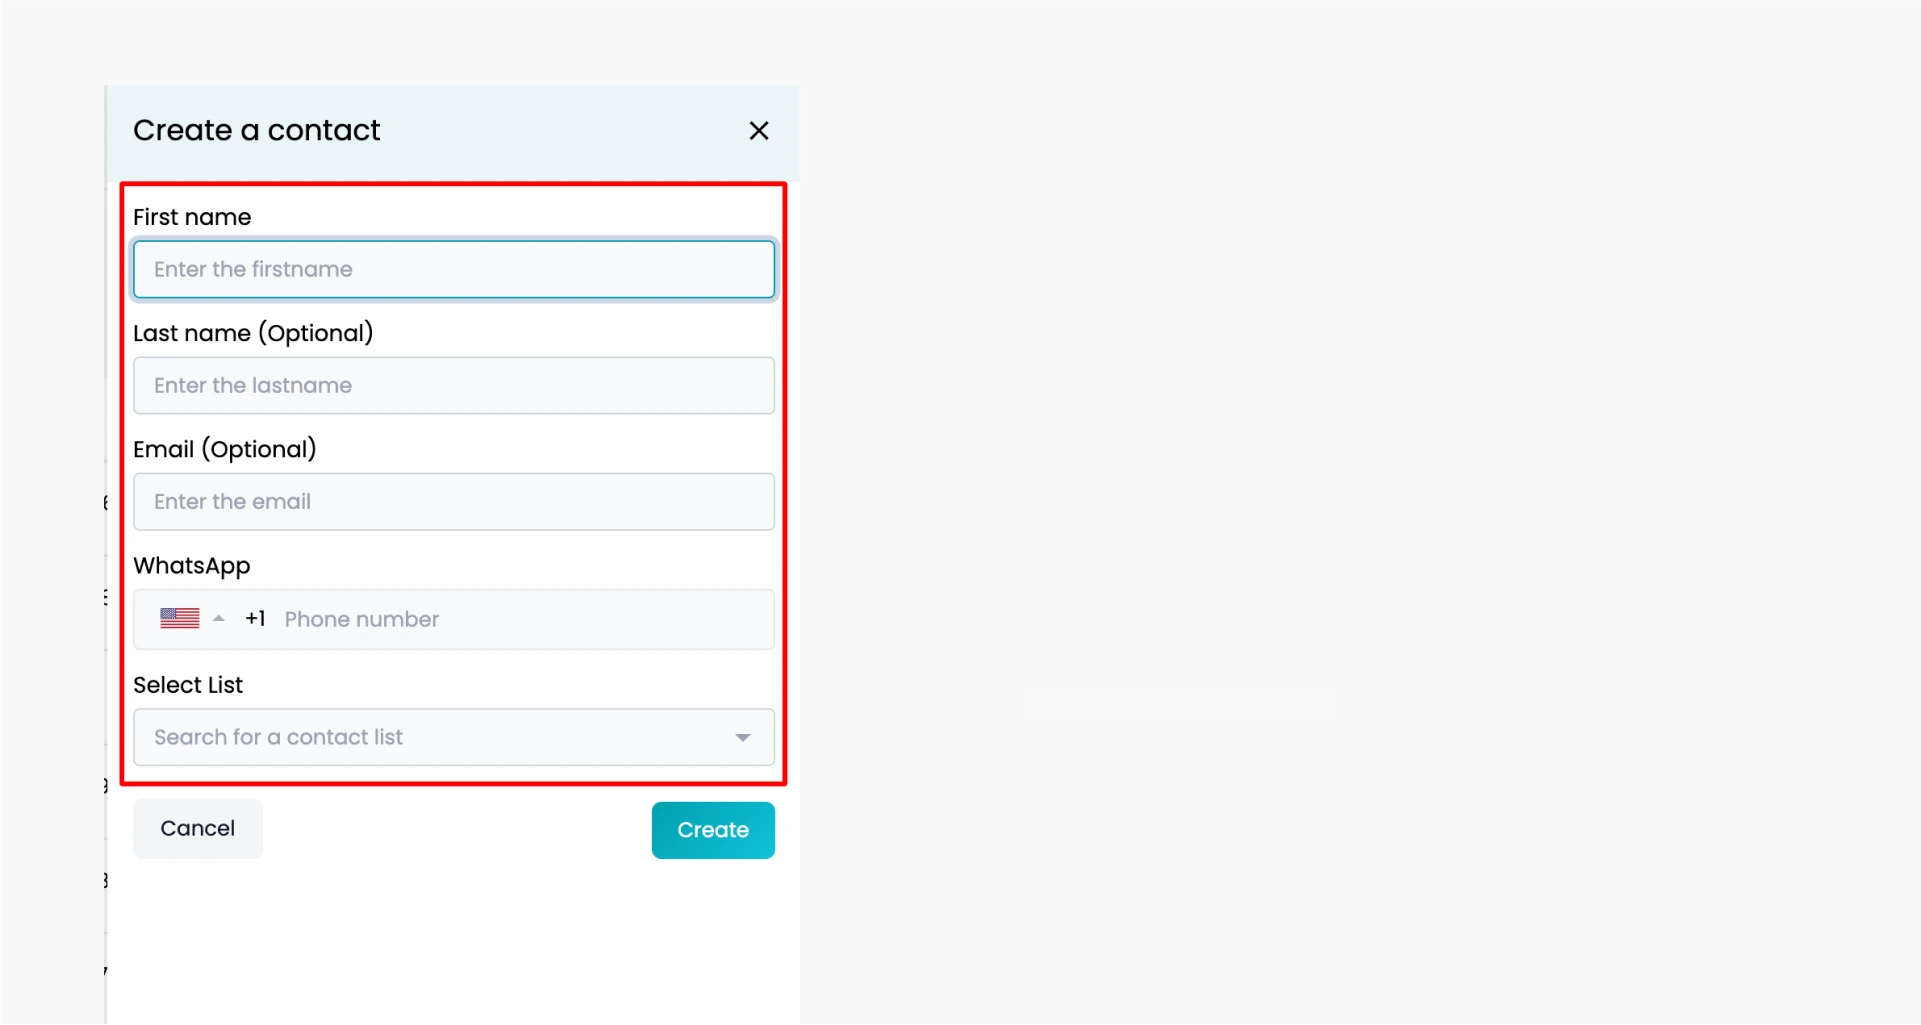
5. Once everything is filled, click Create.
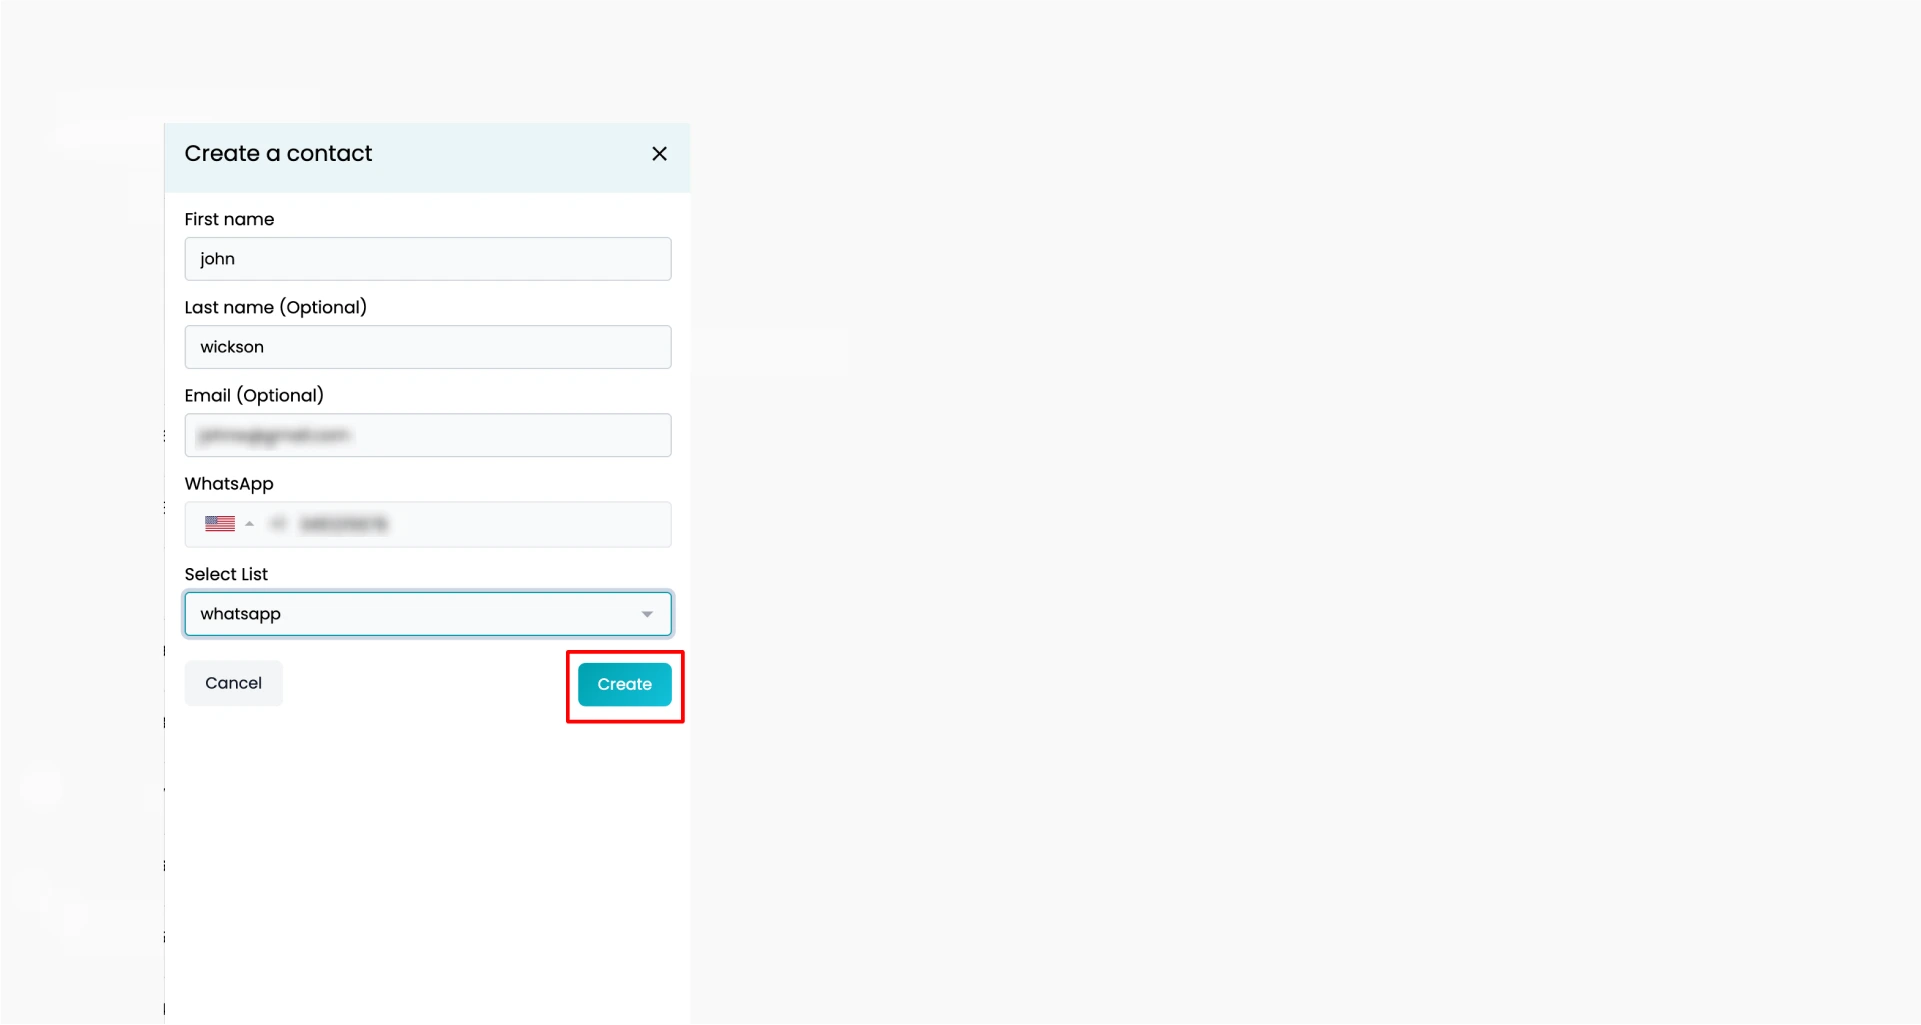
The contact will now be saved and available for WhatsApp communication within Reflys.
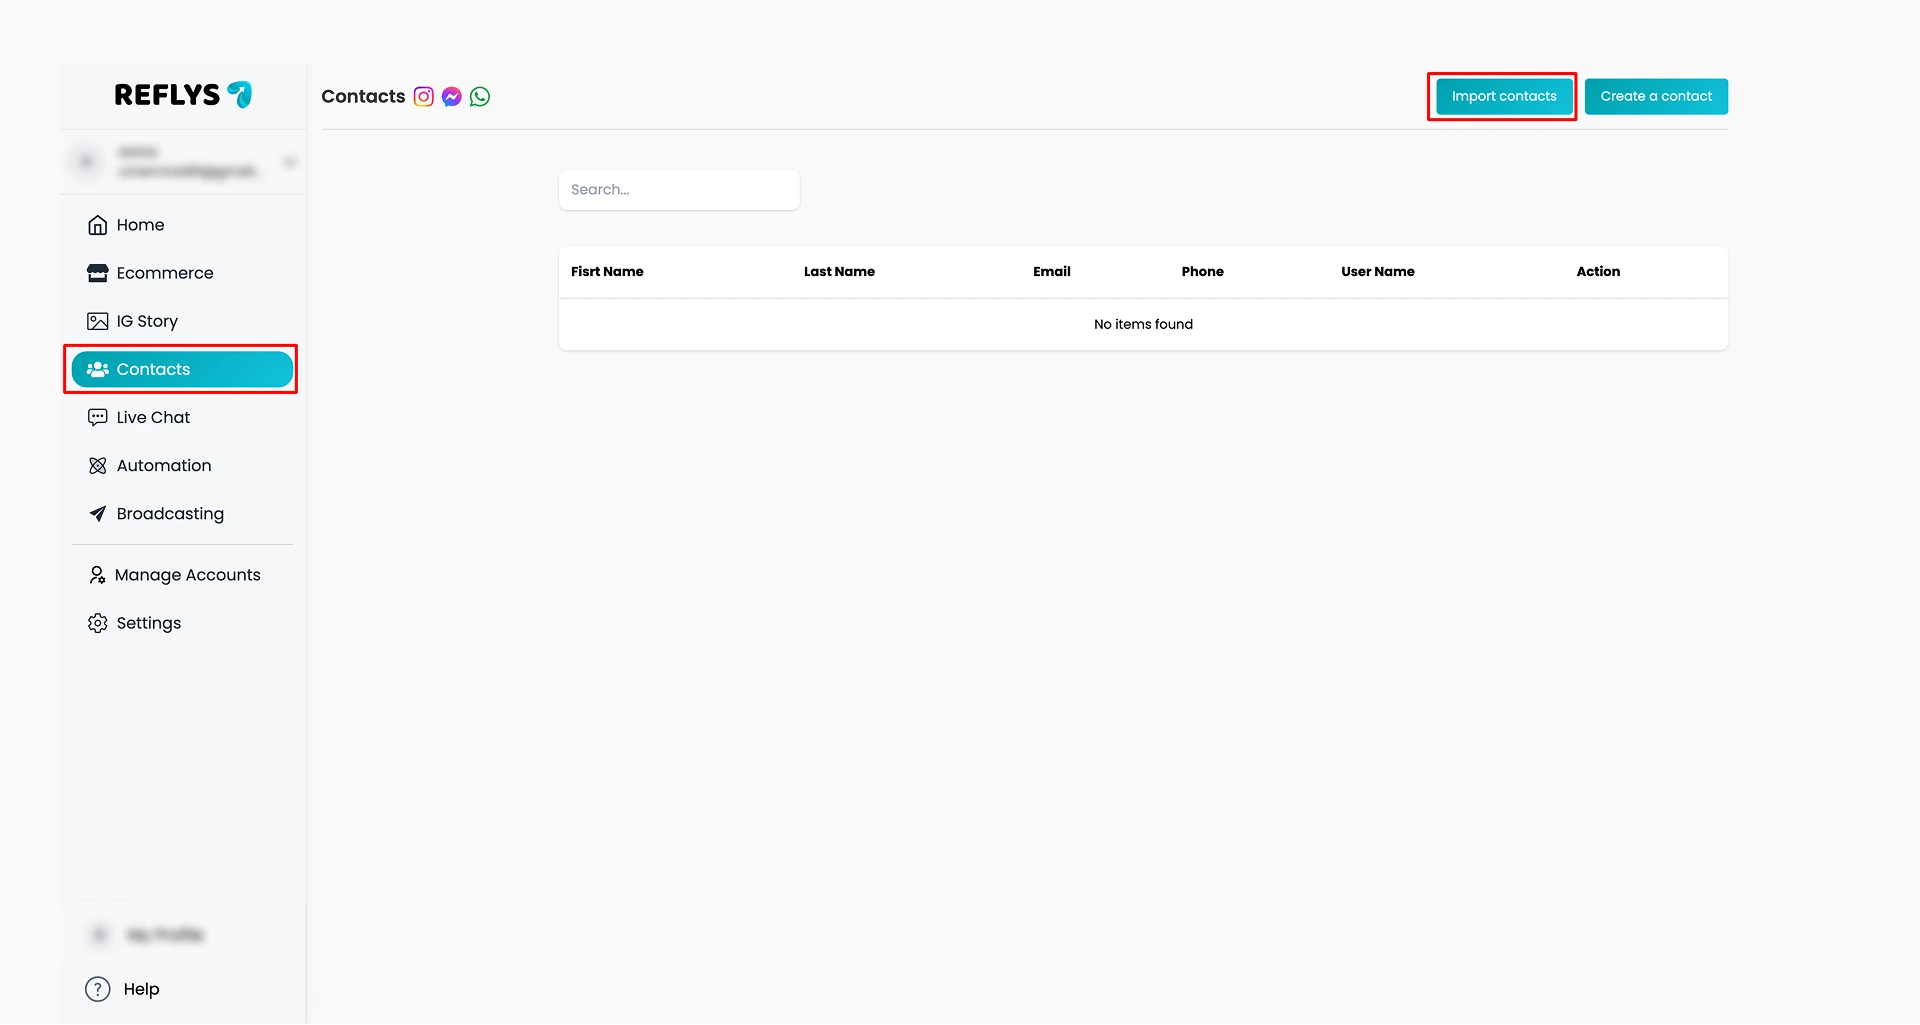
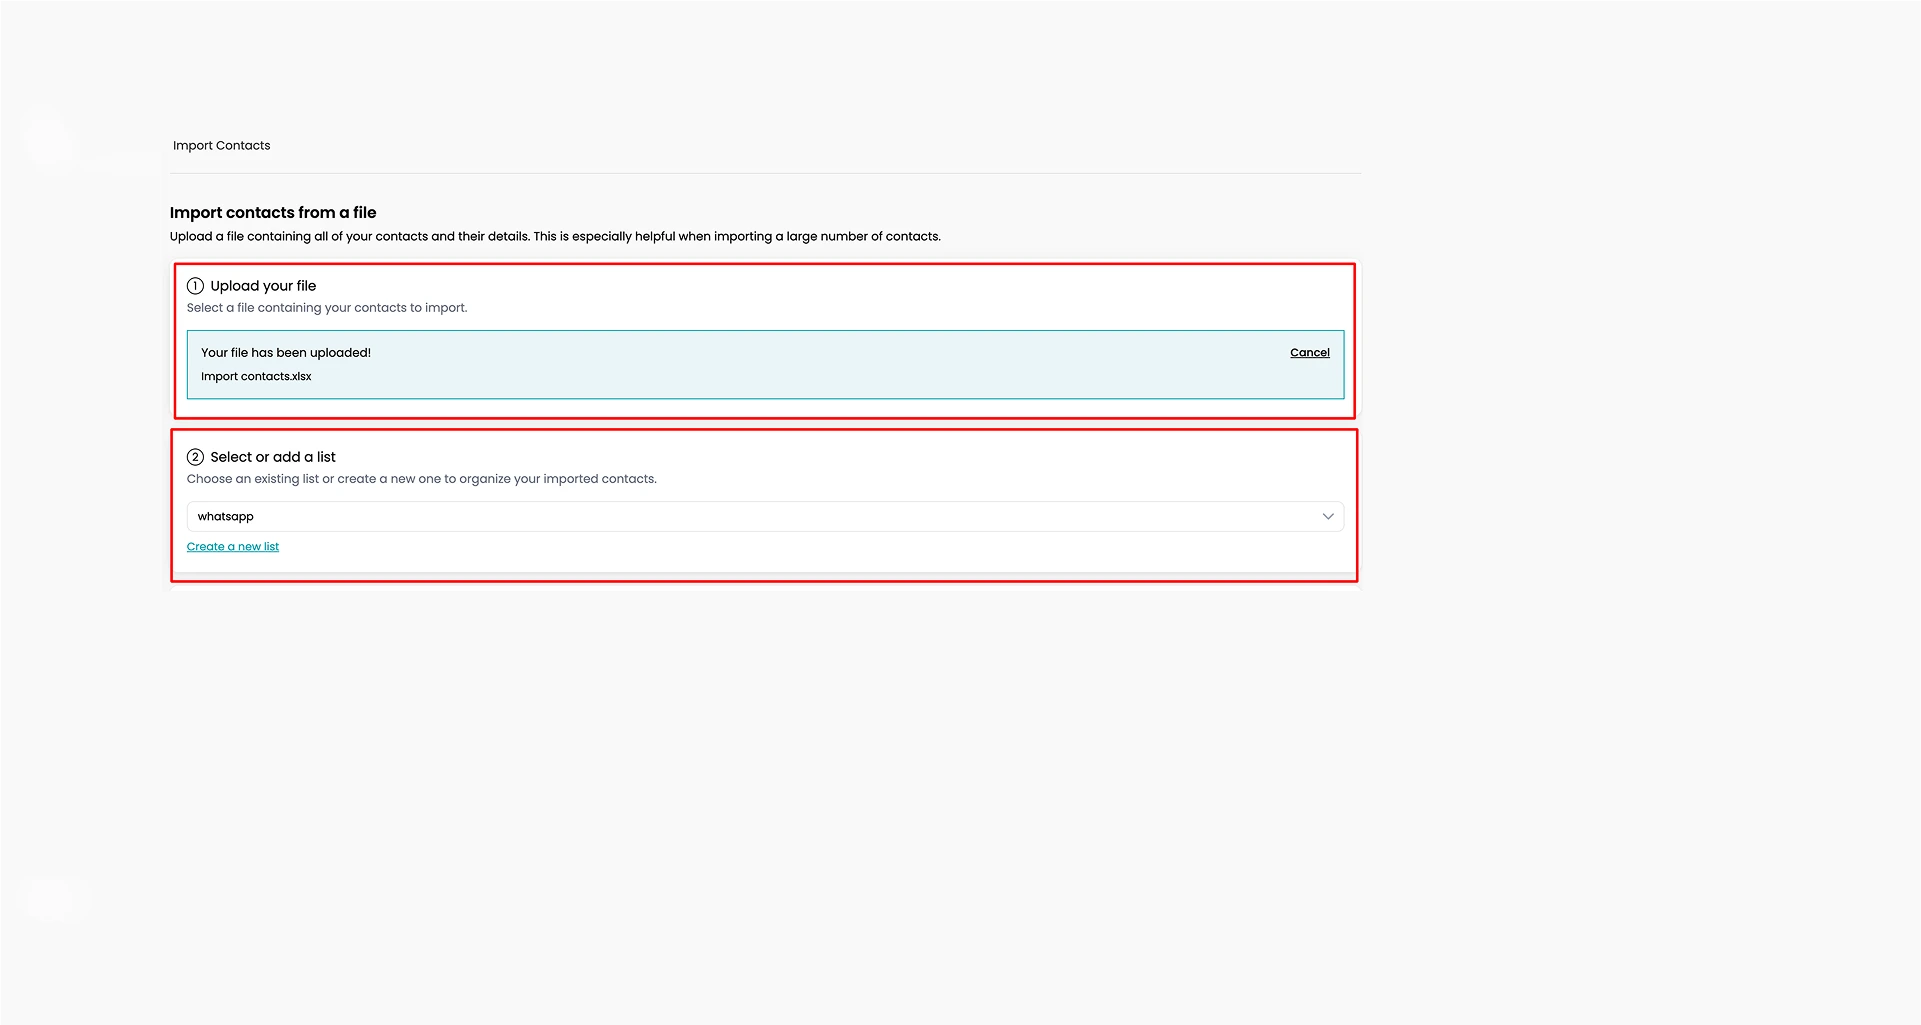
Import Contacts via CSV File
If you have a large number of contacts and want to add them all at once, using a CSV file is the most efficient option. Here’s how you can do it:
- Go to the Contacts section in Reflys.
- Click the “Import” button.
3.Upload your CSV file that contains the phone numbers and any other contact details you’d like to include.
- Make sure the phone numbers include the country code.
- Ensure all contacts in the file have given consent to receive WhatsApp messages.
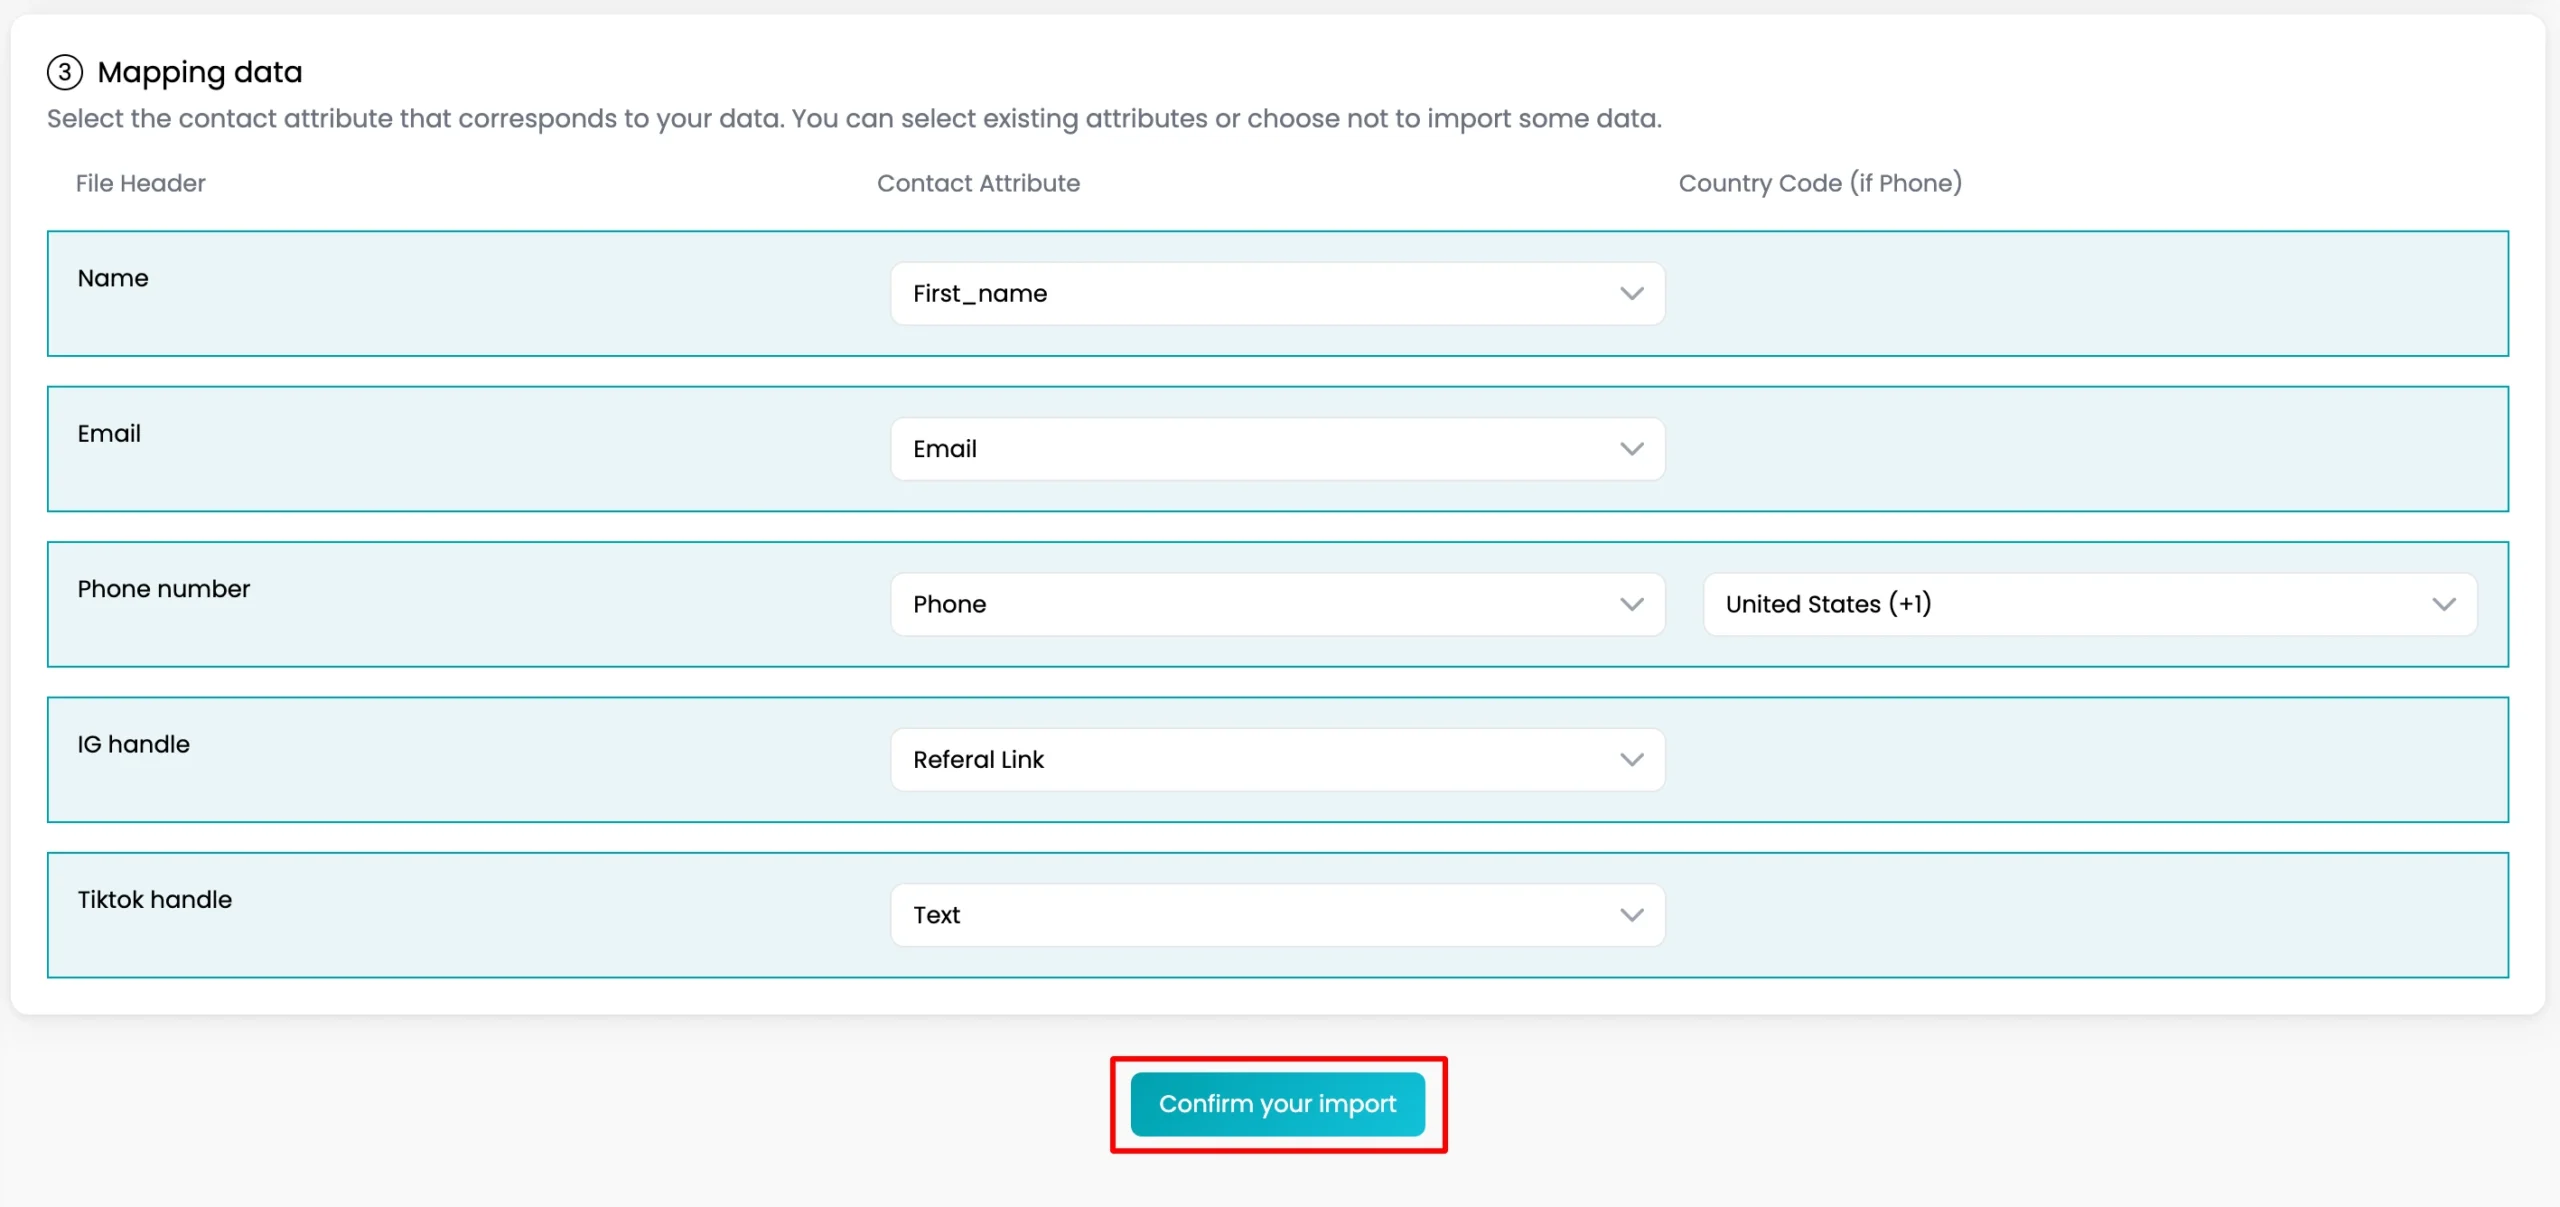
Match CSV Columns with Fields
In the next step, you’ll be asked to match the columns from your CSV file to the system fields in Reflys.
- Find the column that contains the WhatsApp phone numbers.
- Map this column to the “WhatsApp ID” system field.
- You can also match other columns like name, email, or any custom tags.
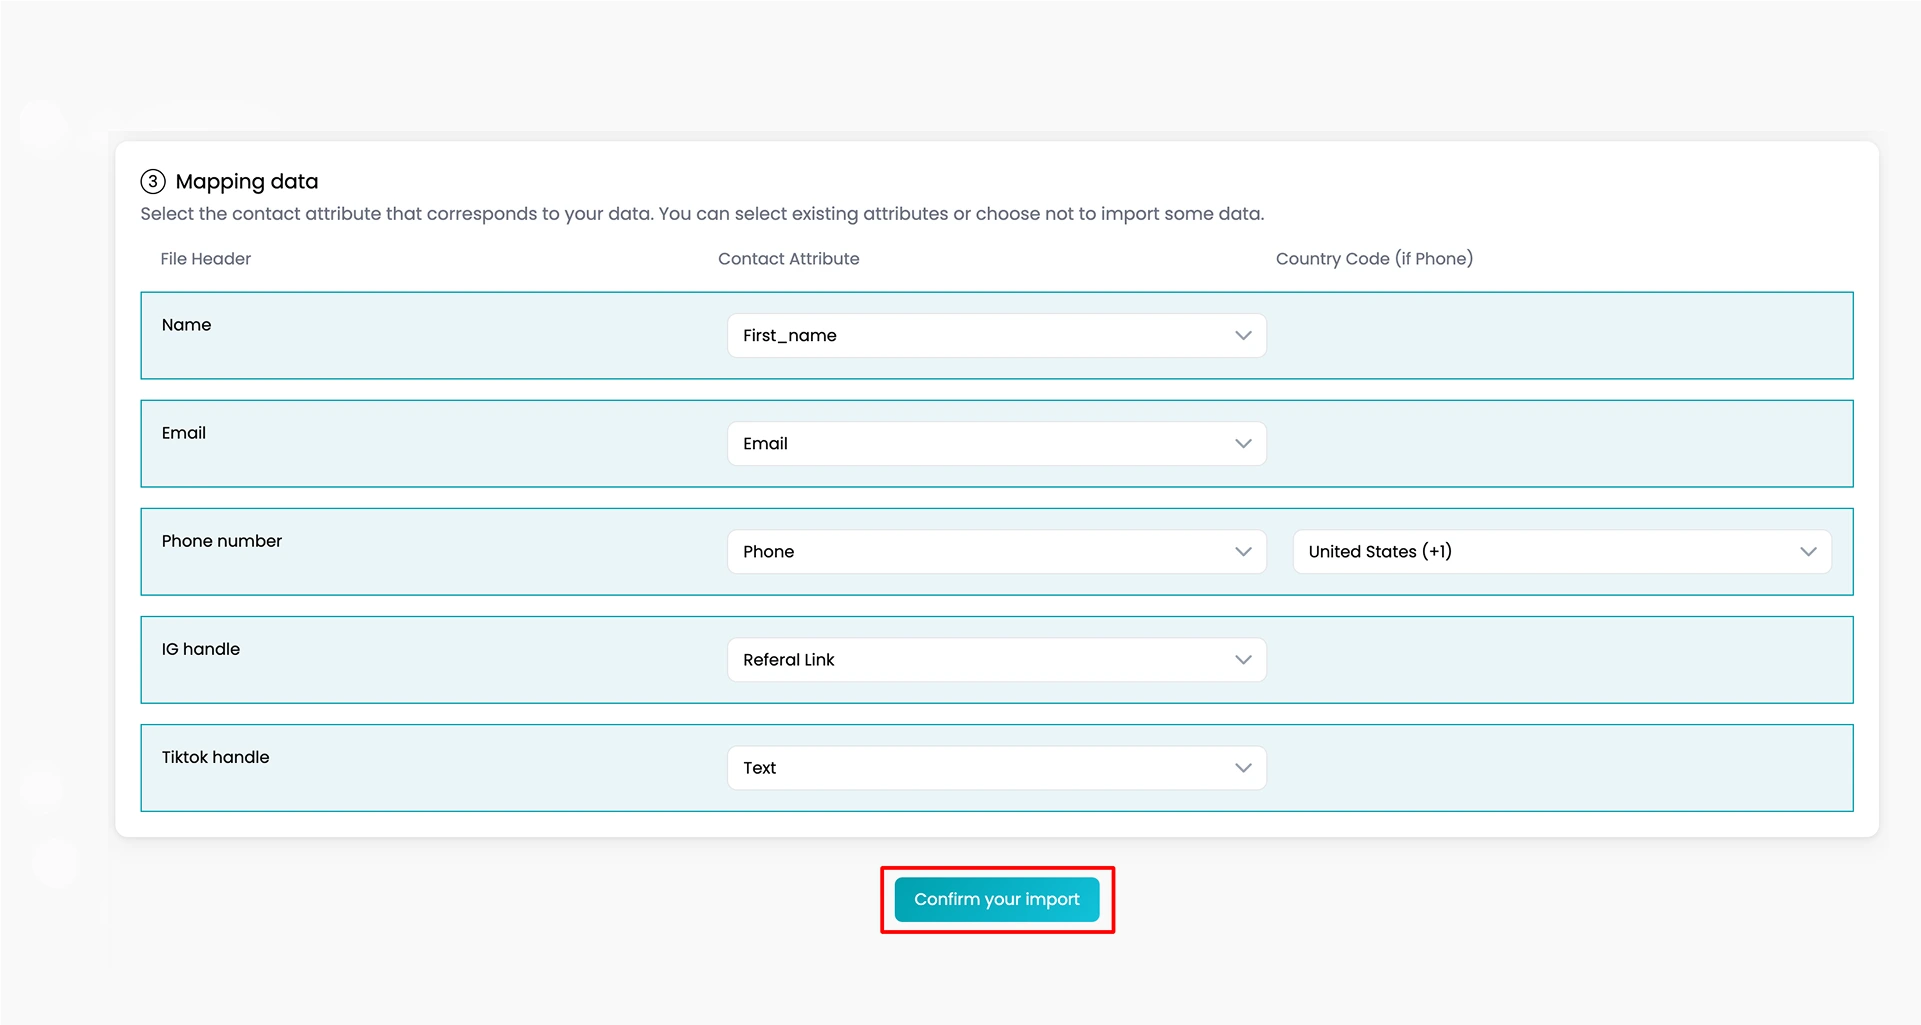
If you plan to send SMS to the same numbers in the future, select the SMS option too so that the numbers can be used across both channels.
Review and Confirm
After mapping the fields:
- Review the import details.
- Add any tags if needed. Tags help you group and organize contacts for campaigns or automation.
- Once everything appears to be in order, click Confirm.
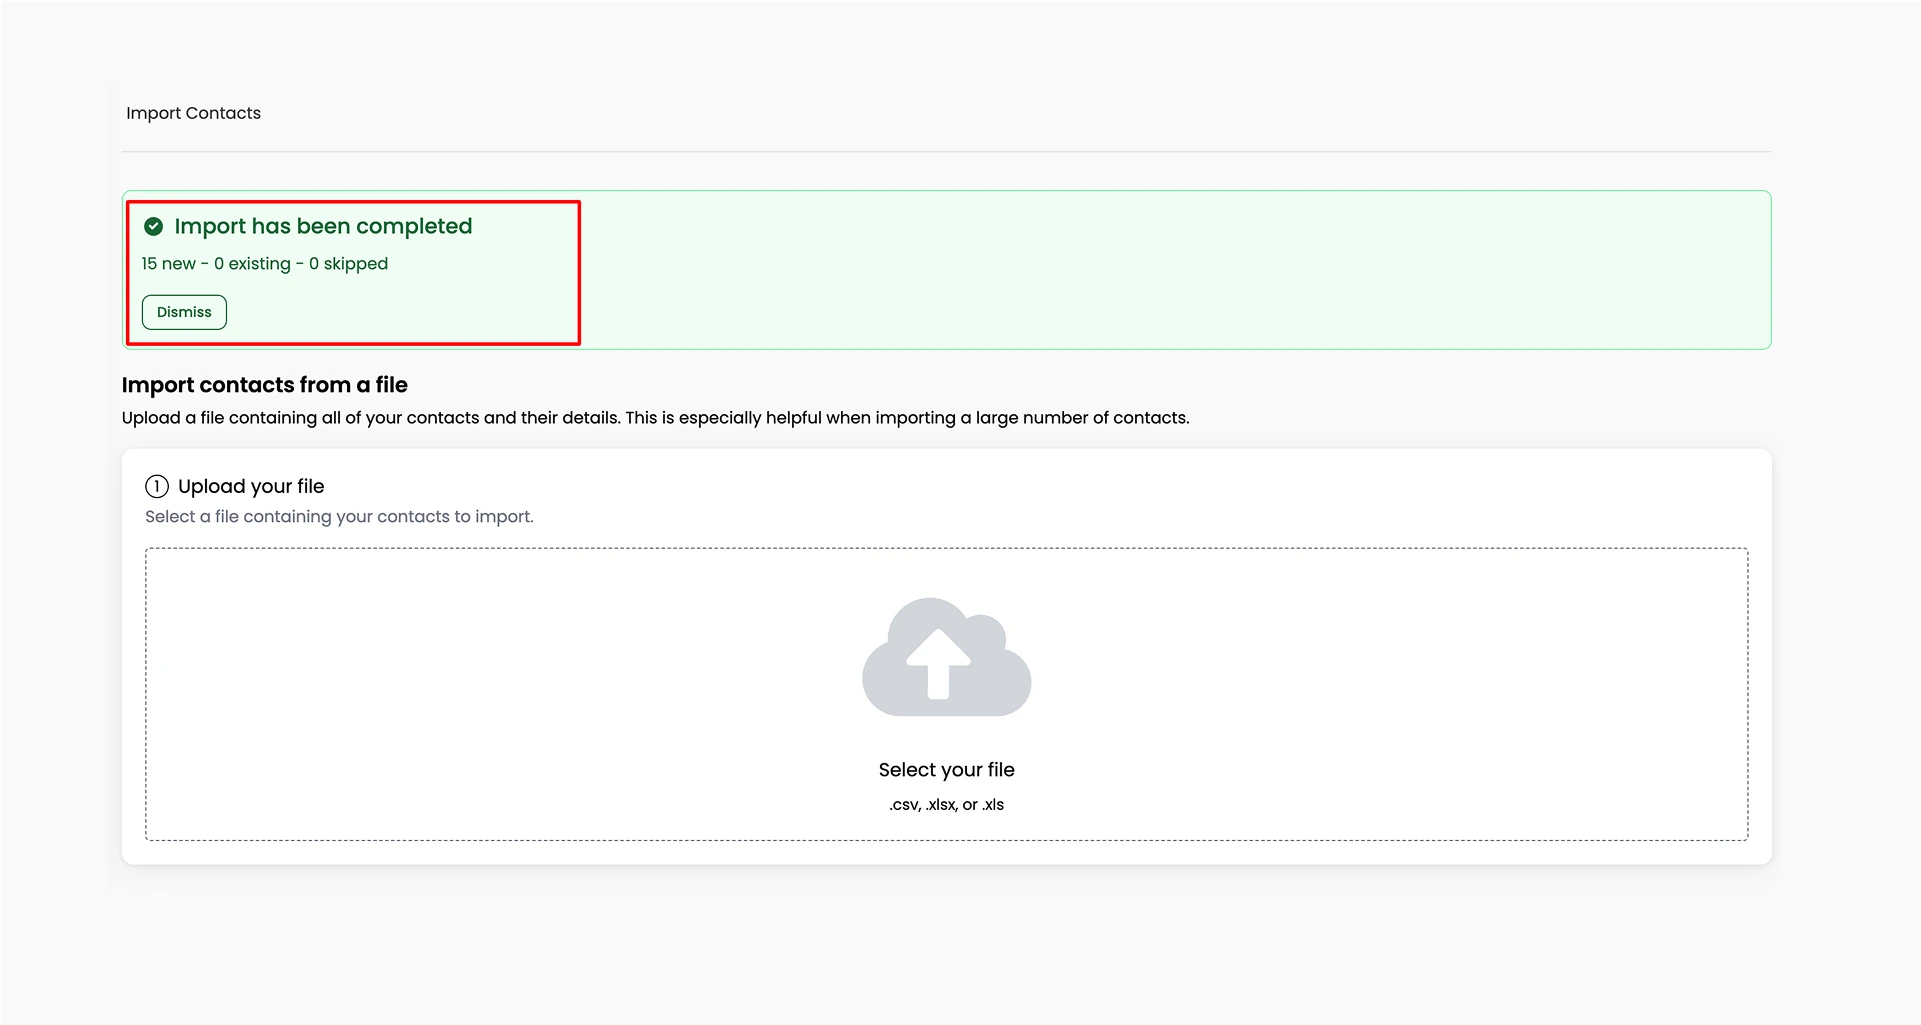
Reflys will now start importing the contacts. The process may take a few minutes depending on the size of your file. A progress bar will show the import status.
What Happens After Import
Once the import is done, you’ll see:
- How many contacts were created
- How many were updated
- How many were ignored
Why Some Contacts May Be Ignored?
Sometimes, a few contacts may not get imported. Common reasons include:
- Missing country code: If a phone number does not have a proper country code, it may not be accepted for WhatsApp use.
- Improper CSV formatting: If your file is not formatted correctly, or if fields were not matched properly during import, the system may not recognize the contacts.
- Field mismatches: If the phone number isn’t matched with the WhatsApp ID field, the system may not connect it to the WhatsApp channel.
Always double-check your CSV file before importing.
Sending Messages to Imported Contacts
To send messages to newly imported contacts on WhatsApp:
- You’ll need to use Message Templates for your first message.
- This is a WhatsApp requirement for messaging users who haven’t yet interacted with your business directly. For more information, you can also explore the article How to use WhatsApp Messages Templates in Reflys.
- Once they reply, you can send regular messages using automation.
This process helps you quickly grow your WhatsApp contact base and ensures that all messaging stays compliant and organized inside your Reflys account.