WhatsApp Widget: Reflys Help Guide
Adding a WhatsApp widget to your site helps your visitors to communicate with you easily. Once click on the button, it opens a WhatsApp conversation with your business. In this guide, we will look at the steps to generate and place a WhatsApp widget on your website with the help of Reflys’ free button tool.
You can personalize the appearance of the button, pre-fill a message, and even add your branding there. So, let’s have a look at them step by step.
How to Create and Add a WhatsApp Widget with Reflys
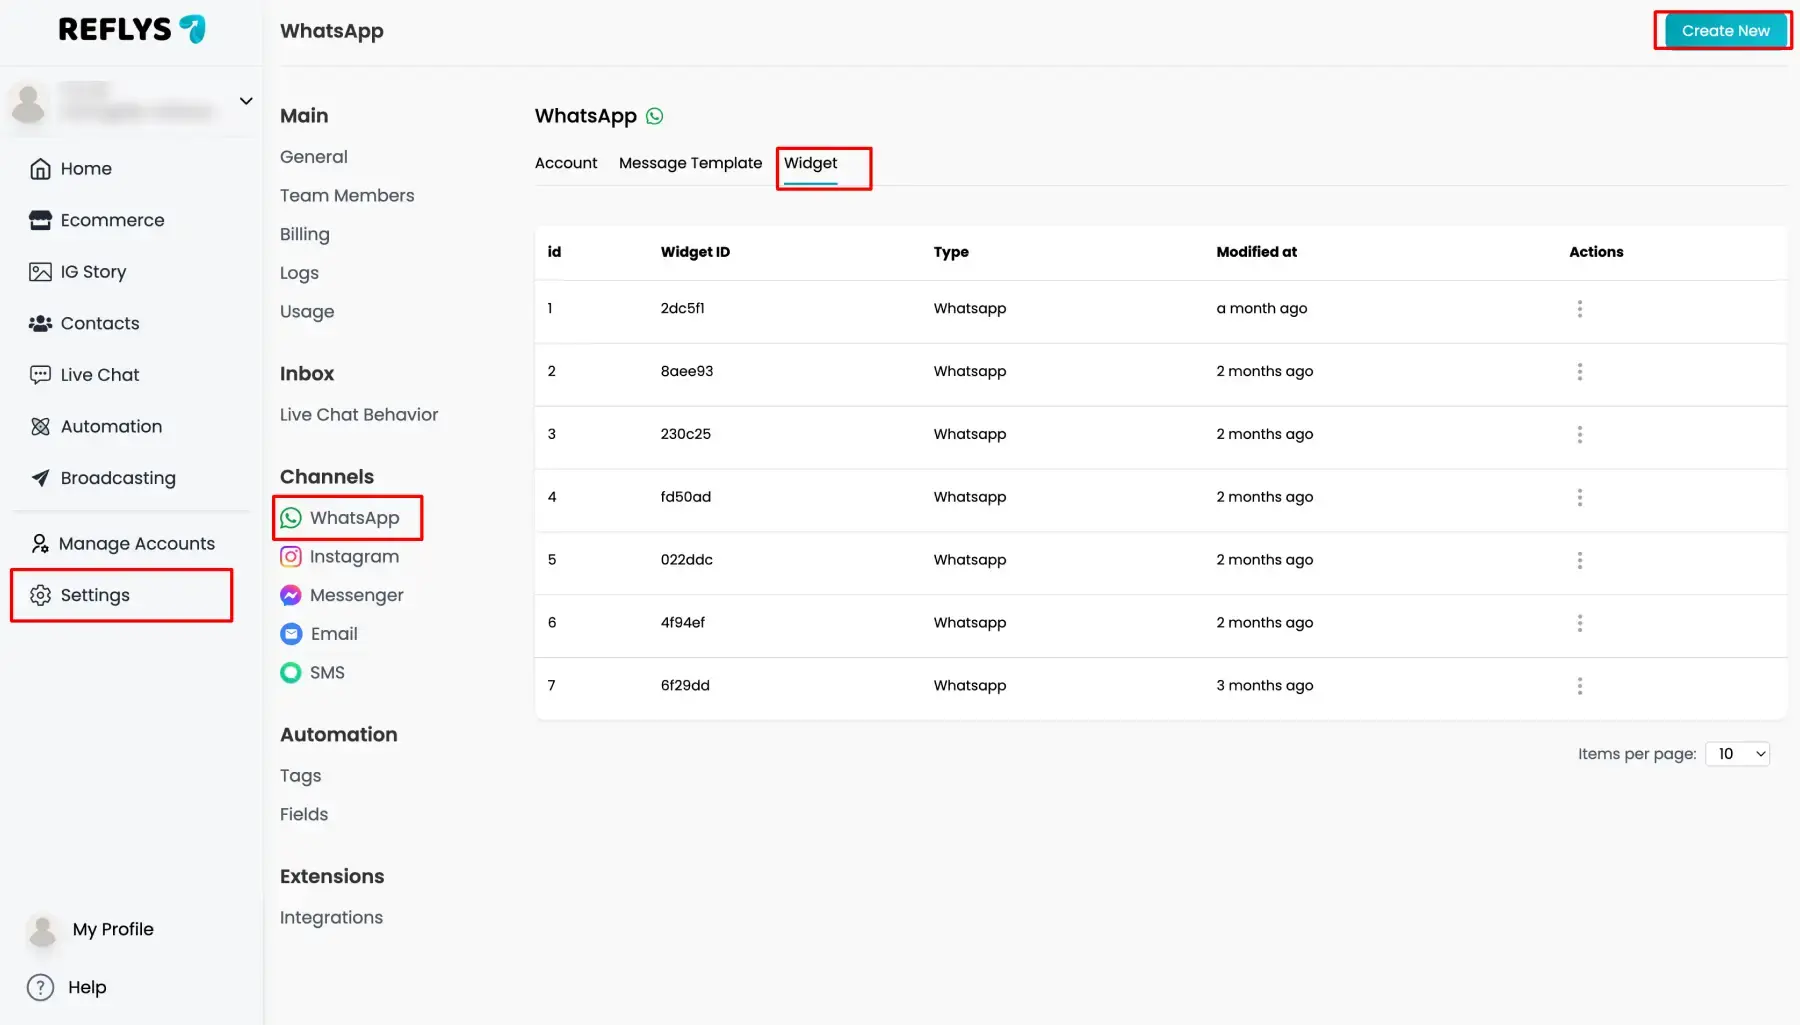
1. Go to Reflys Dashboard
Click the path to use the WhatsApp widget option in the Reflys dashboard.
Settings > WhatsApp > Widget > Create New
2. Enter Your WhatsApp Number
Start by typing your WhatsApp phone number into the field provided. Make sure you include your country’s dialing code.
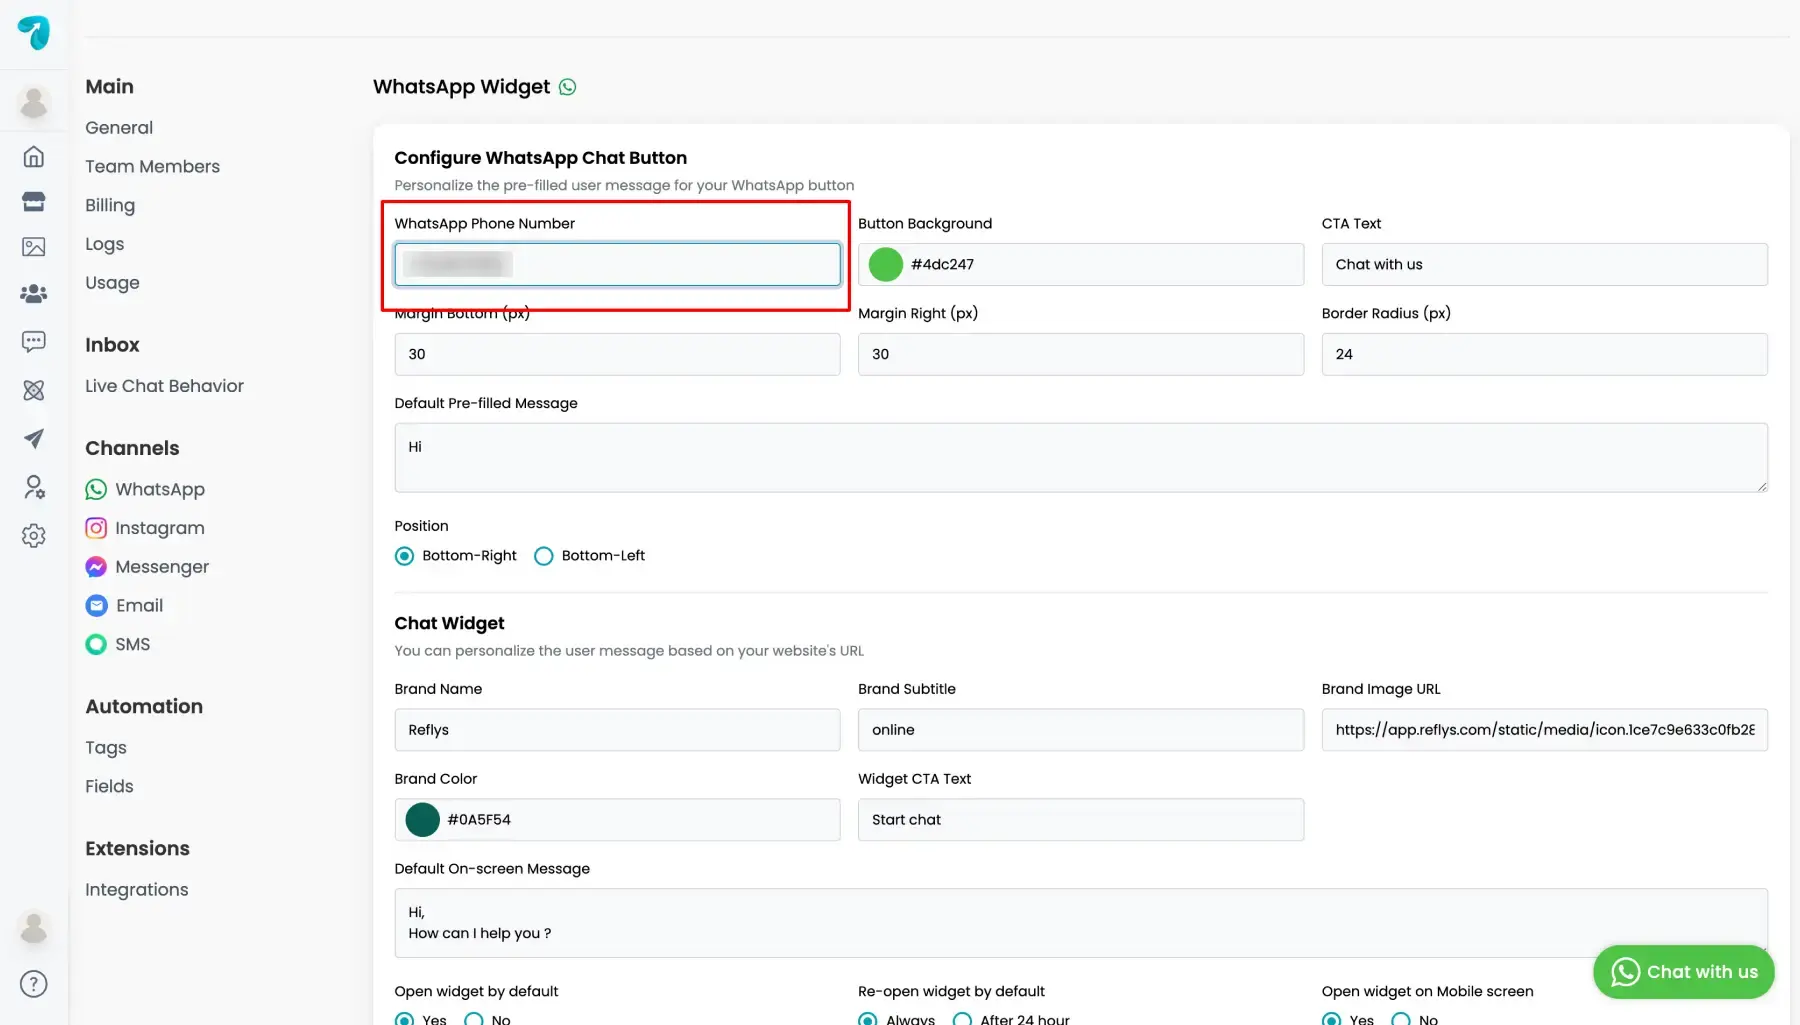
3. Customize Your Button Appearance
You can change how your WhatsApp button looks so that it matches your website’s design. The following options are available:
- Button Background Color: Choose the color code that matches your site. You can enter a hex color code like #4dc247.
- CTA Text (Call to Action): This is the message written on the button. For example, you can write “Chat with us” or “Need help?”.
- Margin Settings: Adjust how far the button appears from the edges of the screen.
- Margin Bottom
- Margin Left
- Margin Right
- Border Radius: This controls how rounded the edges of the button are. A higher number means a more curved.
- Default Pre-filled Message: This is the message that appears in the WhatsApp chat window when a user clicks the button. You can write something like:
Hi, I need help with my order. - You can also use variables like:
- {{page_url}} – shows the page the visitor was on
- {{page_title}} – shows the page title

4. Choose the Button Position
You can select where the WhatsApp button appears on your website:
- Bottom-Right (most common)
- Bottom-Left
Pick whichever works best with your website layout.
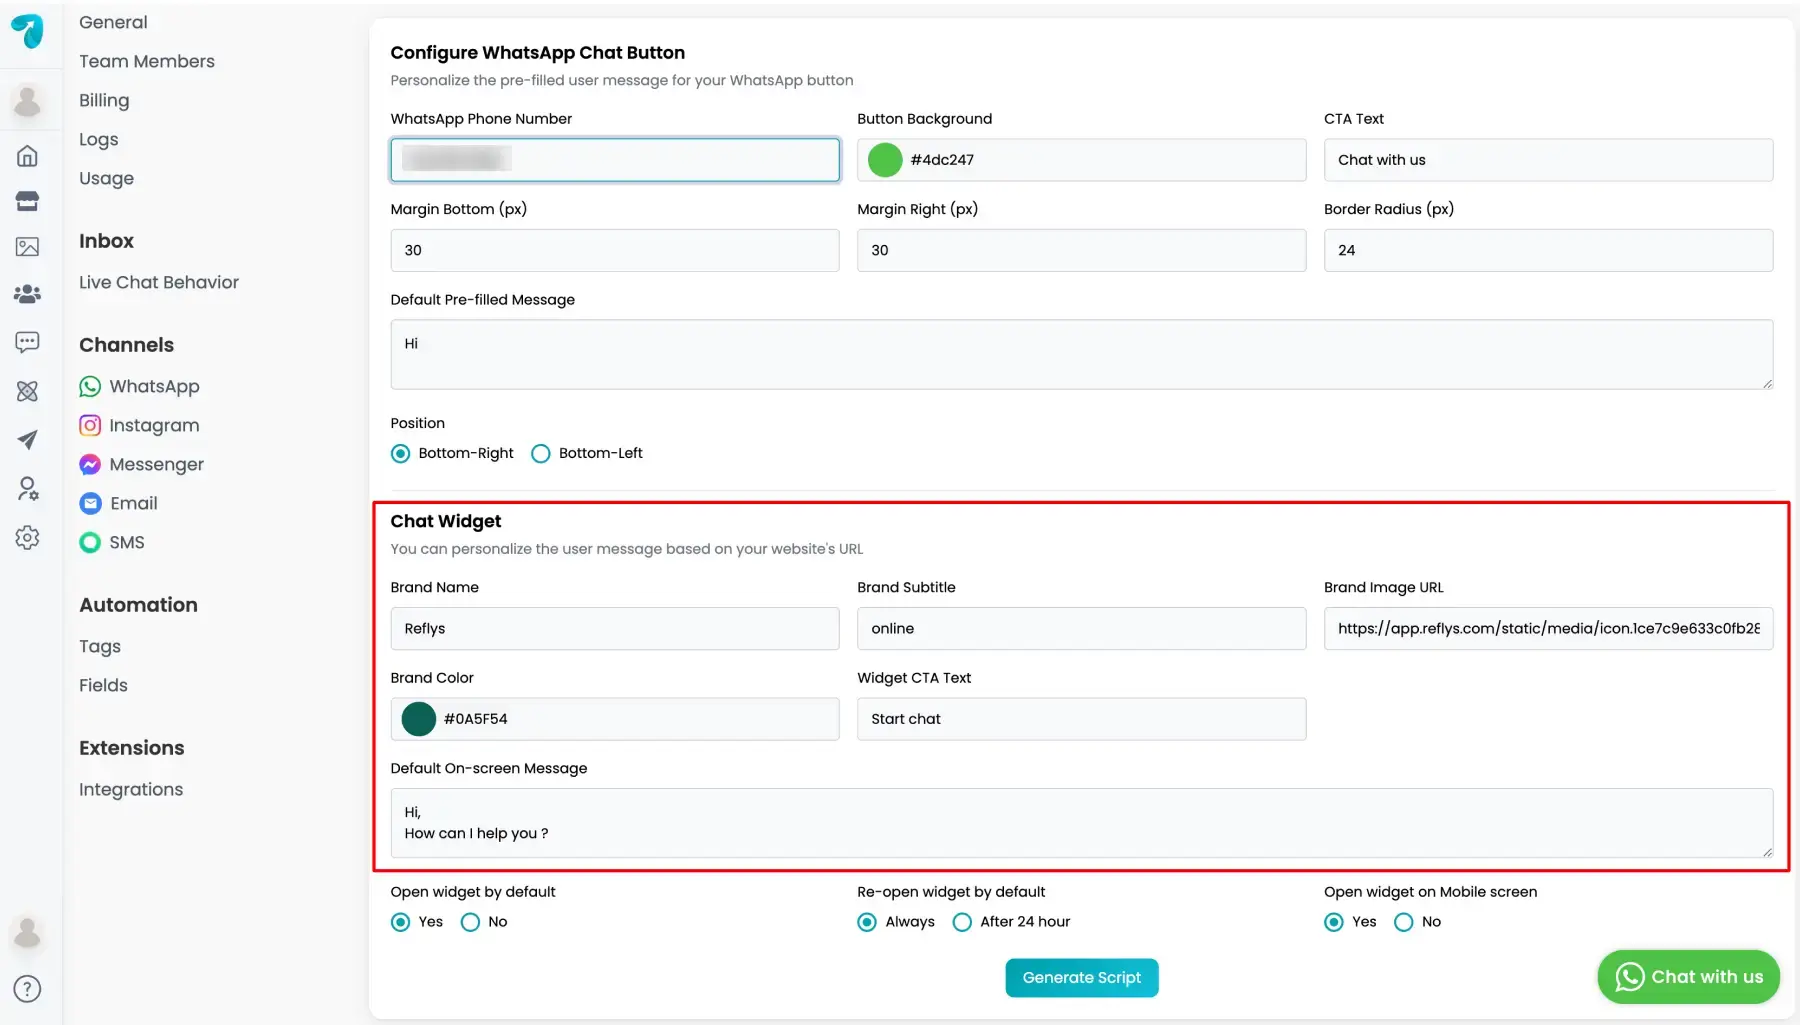
Optional: Add a Chat Widget (Floating Panel)
Besides a basic button, you can also add a small chat widget. This includes more detailed information, such as your brand name and welcome message.
Here’s what you can set:
- Brand Name: Enter the name of your business or website.
- Brand Subtitle: A short line of text like “online” or “usually replies in 5 mins.”
- Brand Color: Select a color for the widget background.
- Brand Image URL: Link to your business logo or image to show in the chat box.
- Widget CTA Text: The message shown inside the widget, like “Start chat.”
- Default On-screen Message: A short welcome text like:
Hi, how can I help you?
You can also decide:
- Whether the widget should open automatically on mobile devices
- Whether it should be open by default or only when the user clicks
Whether the widget should reopen automatically every time, or just once every 24 hours.
5. Generate the Button Code
Once everything is set up:
- Click the “Generate Script” button.
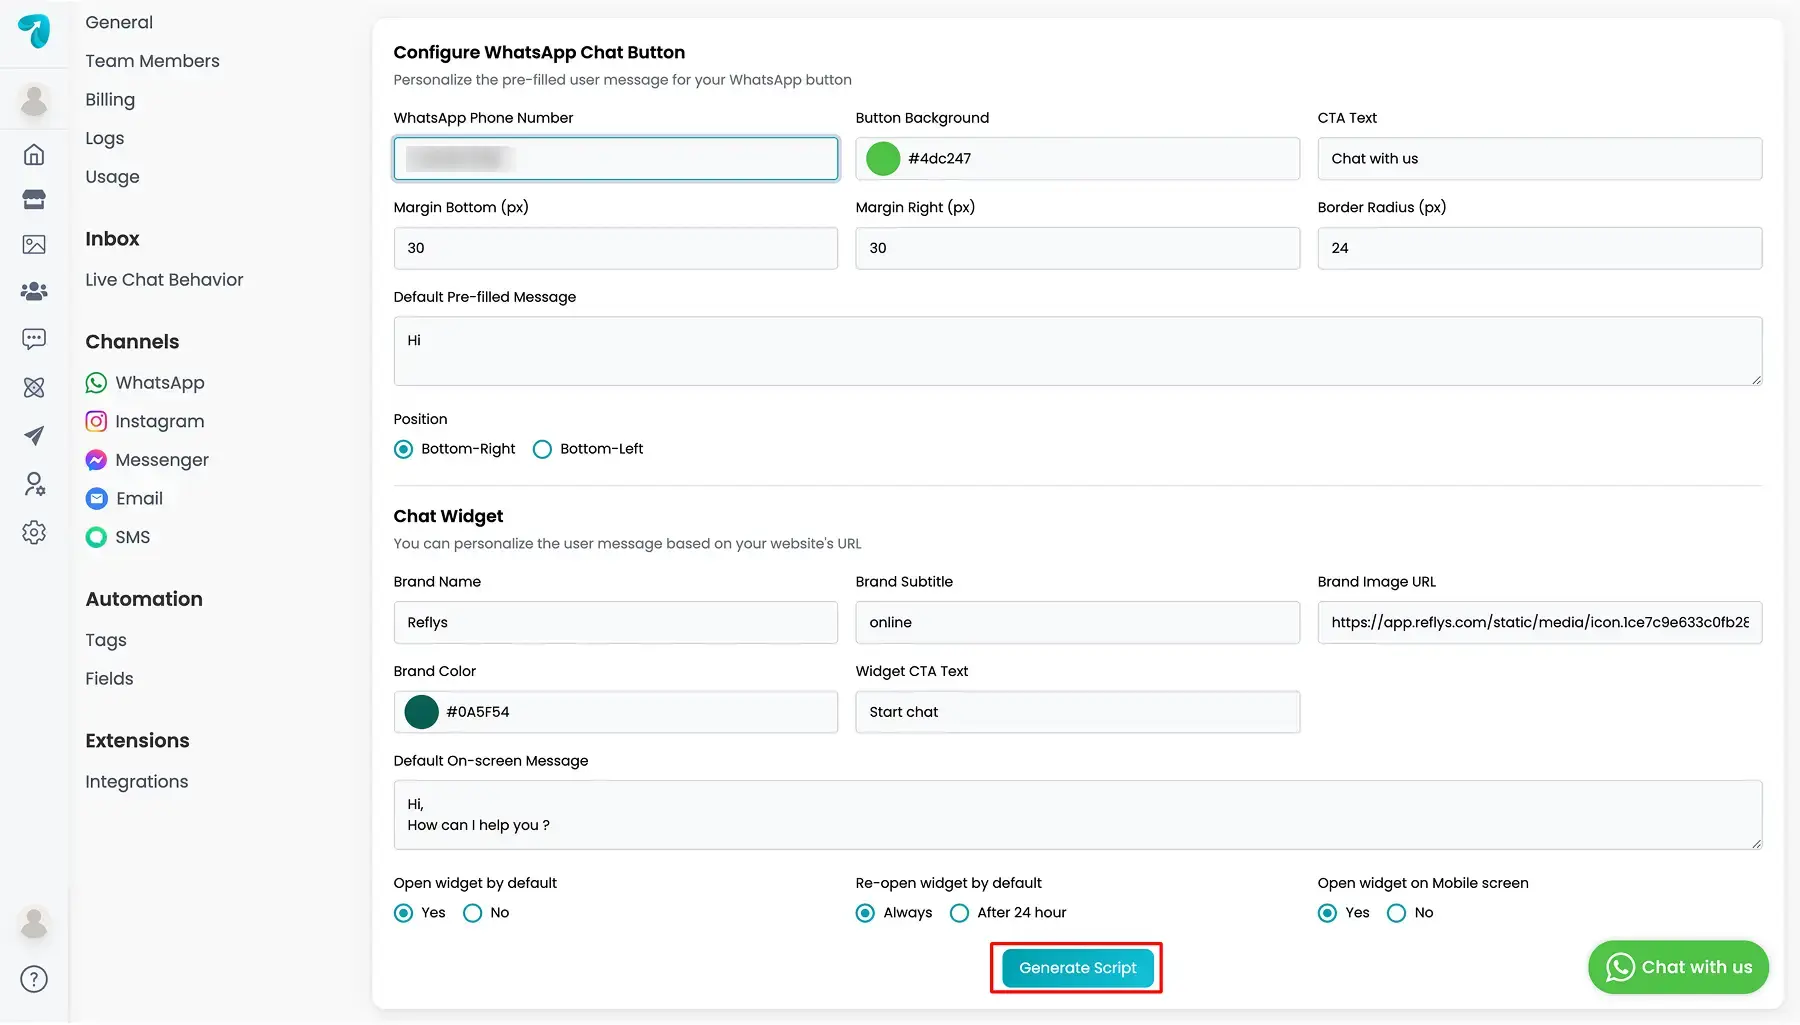
- Copy the code provided.
- Paste this code into your website’s <head> tag or where your developer advises.
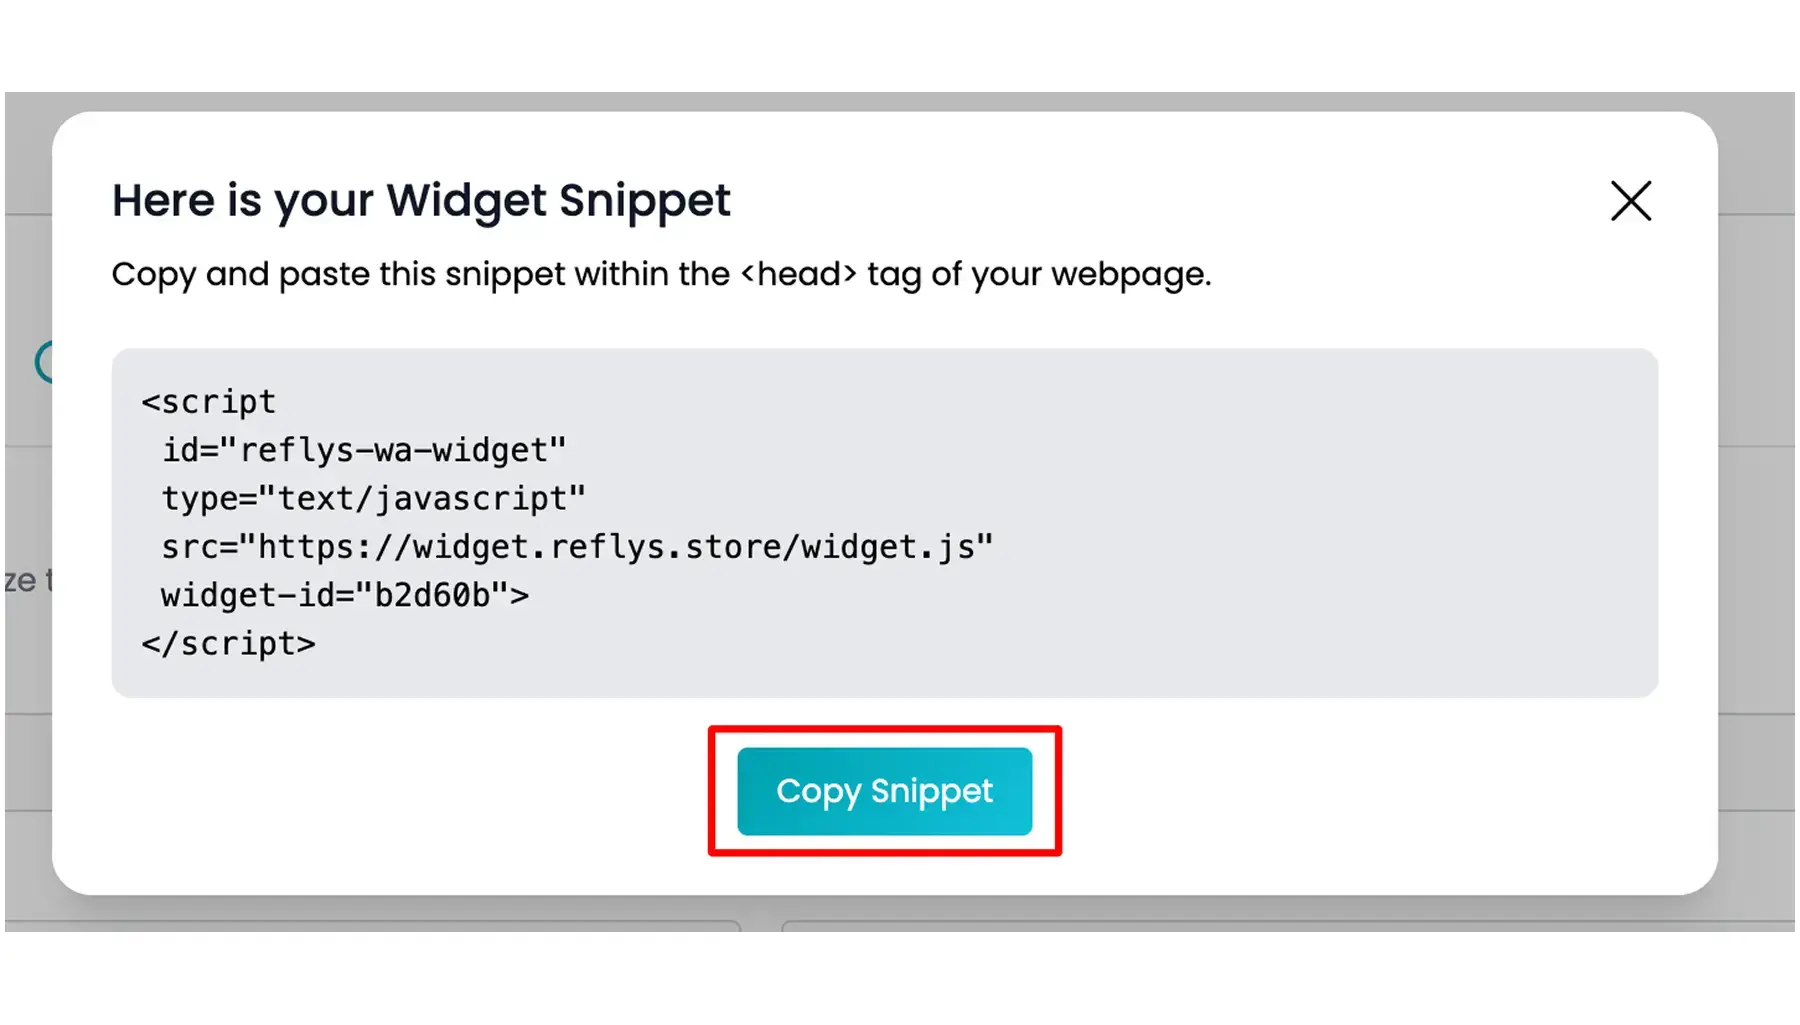
This code will place your WhatsApp button (or chat widget) on the site.
What Happens When Someone Clicks the Button?
- The user is taken to a WhatsApp chat window with your business.
- The pre-filled message is already typed — the user just has to hit send.
- You’ll receive the message on your WhatsApp number.
Benefits of WhatsApp Widget
Adding a WhatsApp button to your site helps users start a conversation easily. It also allows you to:
- Collect the name and number of visitors who contact you.
- Know which page they were on using the pre-filled message.
- Build 1-on-1 conversations using a familiar app.
- Track leads who’ve shown interest through direct contact.
You can use this for:
- Answering customer queries
- Sharing product info
- Taking orders or bookings
- Sending updates or promotions later (after the user opts in)
If you need help with setup or code placement, contact the Reflys support team or consult with your web developer.