How to Add Multiple Accounts on Reflys with a Single Facebook Account
When you run multiple businesses, online stores, or project sites, you might wish to have all these sites in a single position where you do not have to log in and out of various accounts after a few times. Reflys makes this super easy. Now you can use various accounts and manage them using a single Facebook account.
However, the one thing you need to know before adding a new account is:
Note: Every account you create in Reflys must be connected to at least one Meta channel (Messenger, Instagram, or WhatsApp). If your old accounts are not connected, you won’t be able to create a new one.
This guideline will ensure that all your accounts are in-store and are properly integrated to operate smoothly with Meta products.
Step 1: In Reflys Dashboard, Open the Accounts Panel
Look at the left-hand side panel when you log in to Reflys. This is where you will find a list of all the accounts you have created so far (such as My Store 2, My Store 3, My Store 4).
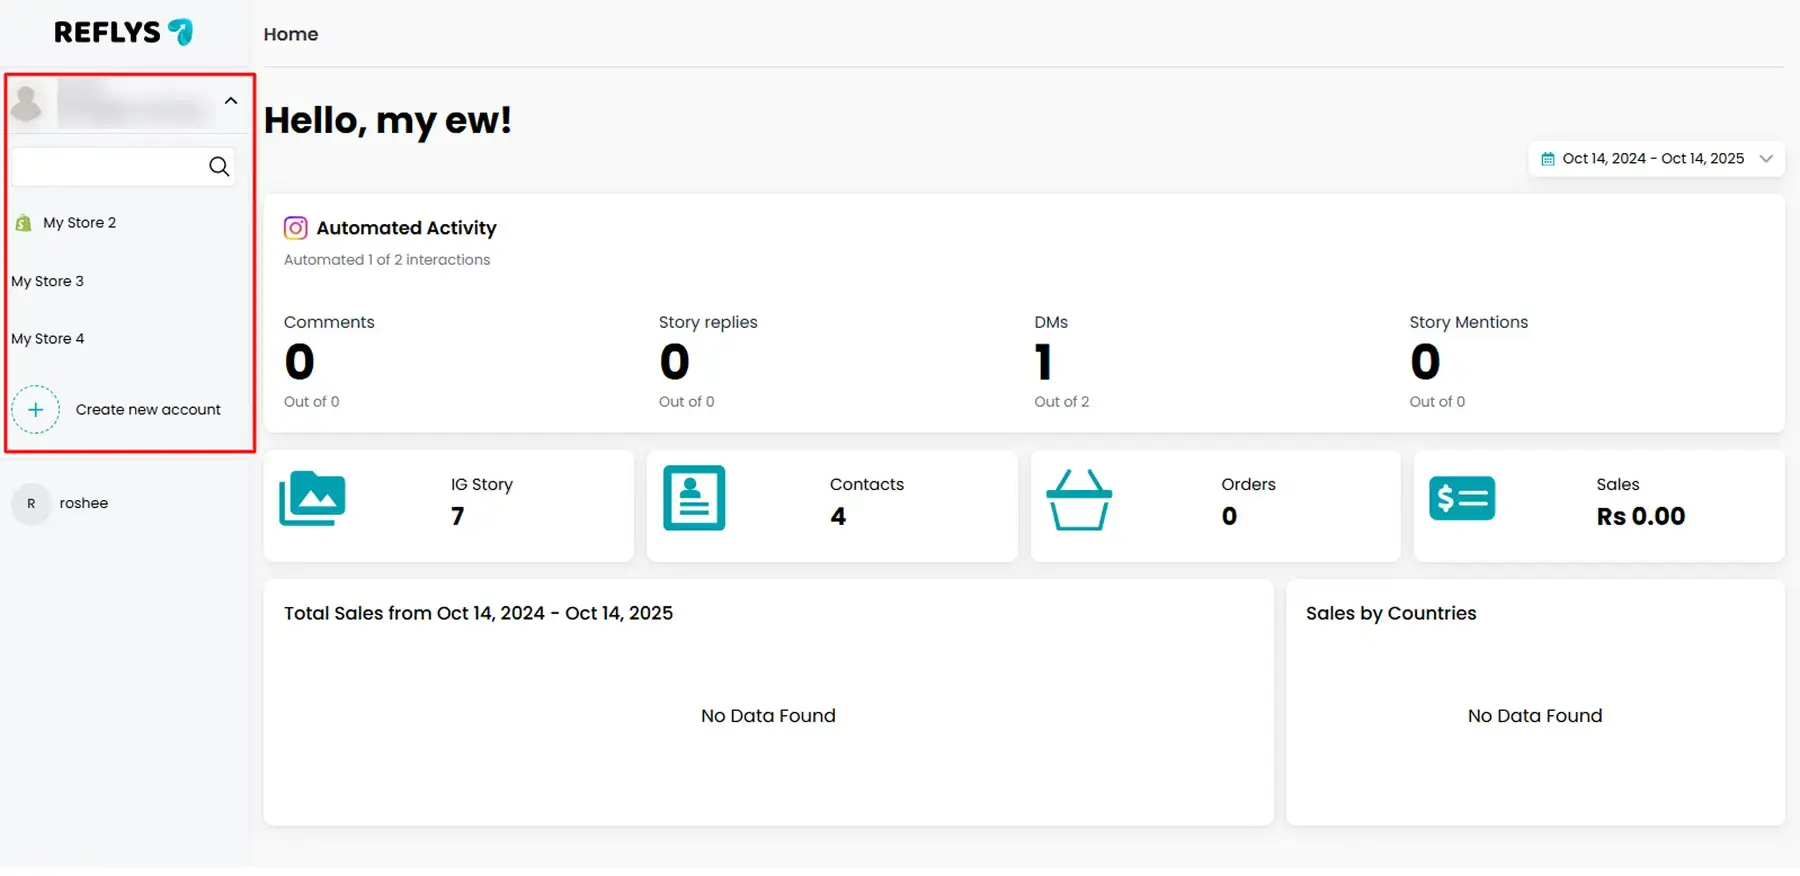
At the bottom of this list, you’ll also see a button called “Create new account”. This is where you can add another account whenever you need.
Step 2: Check Your Existing Accounts
Before clicking on Create new account, you need to make sure your existing accounts are properly set up.
If your accounts are not connected to any Meta channel (Messenger, Instagram, or WhatsApp), a warning message will pop up when you try to create a new one. The message will say something like:
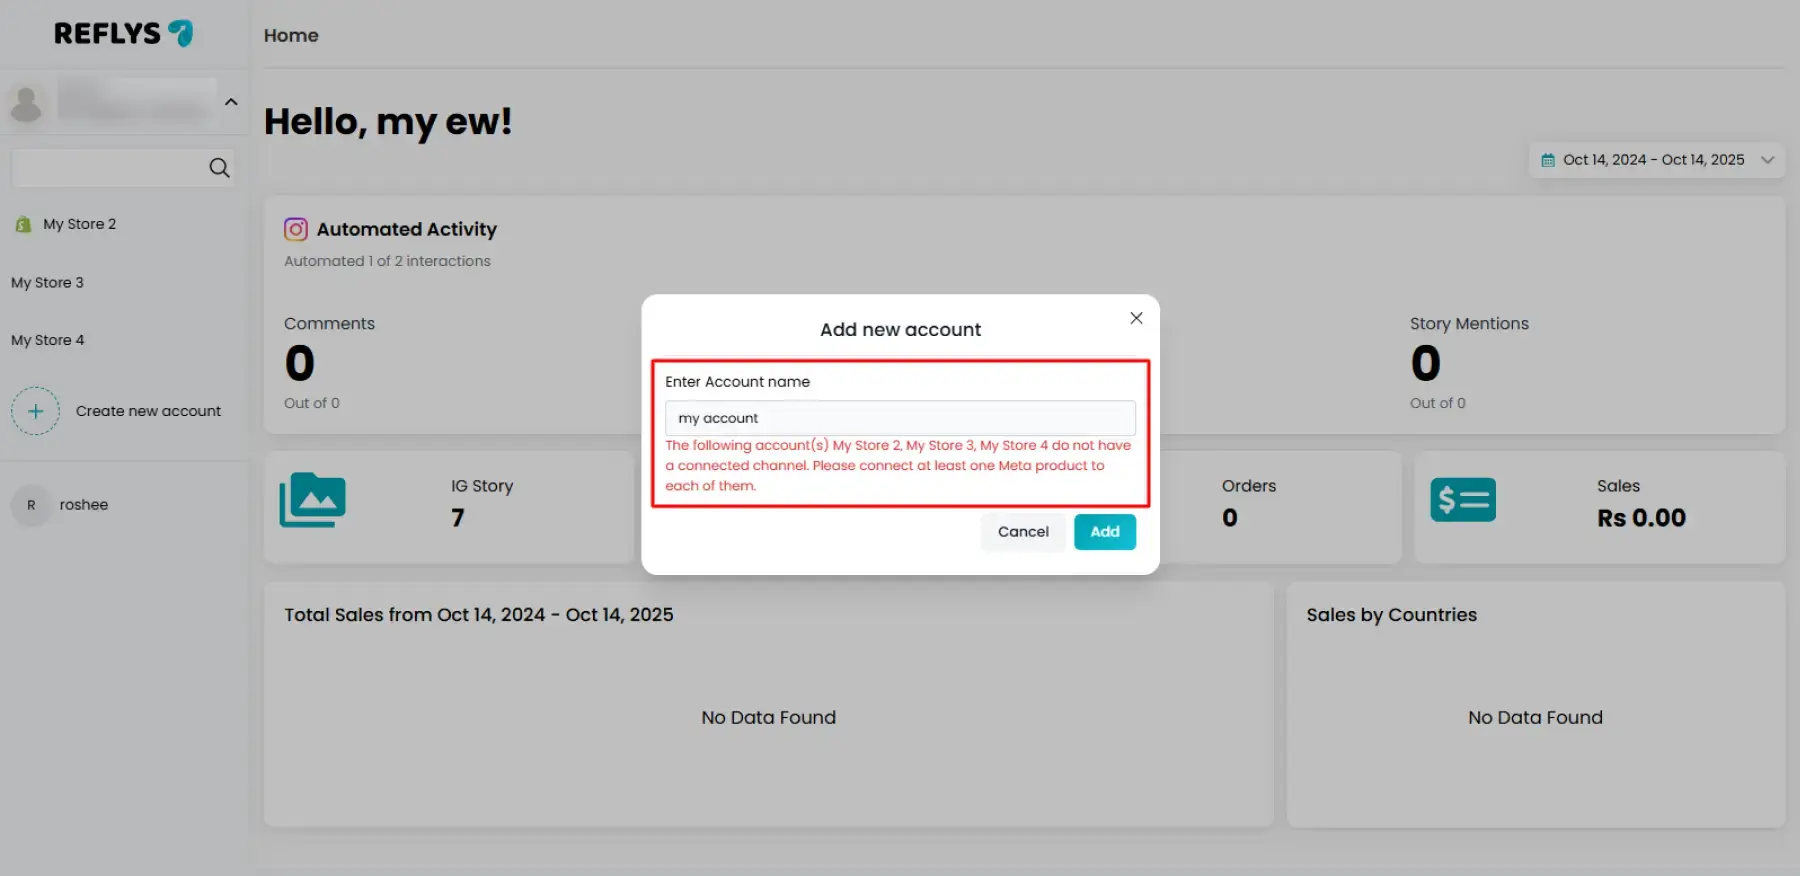
The following accounts do not have a connected channel. Please connect at least one Meta product to each of them.”
This is just a reminder that you should not skip the connection step. However, if you see this, you go back and link your old accounts first.
Step 3: Create a New Account
After connecting, a new account can now be created. Here’s how:
- Click Create new account from the left panel.
- A new window will appear in which you are requested to fill in the Account Name.
- This may be your business name or store name or any name that will identify your business.
- Example: My Clothing Store or Roshee’s Bakery.
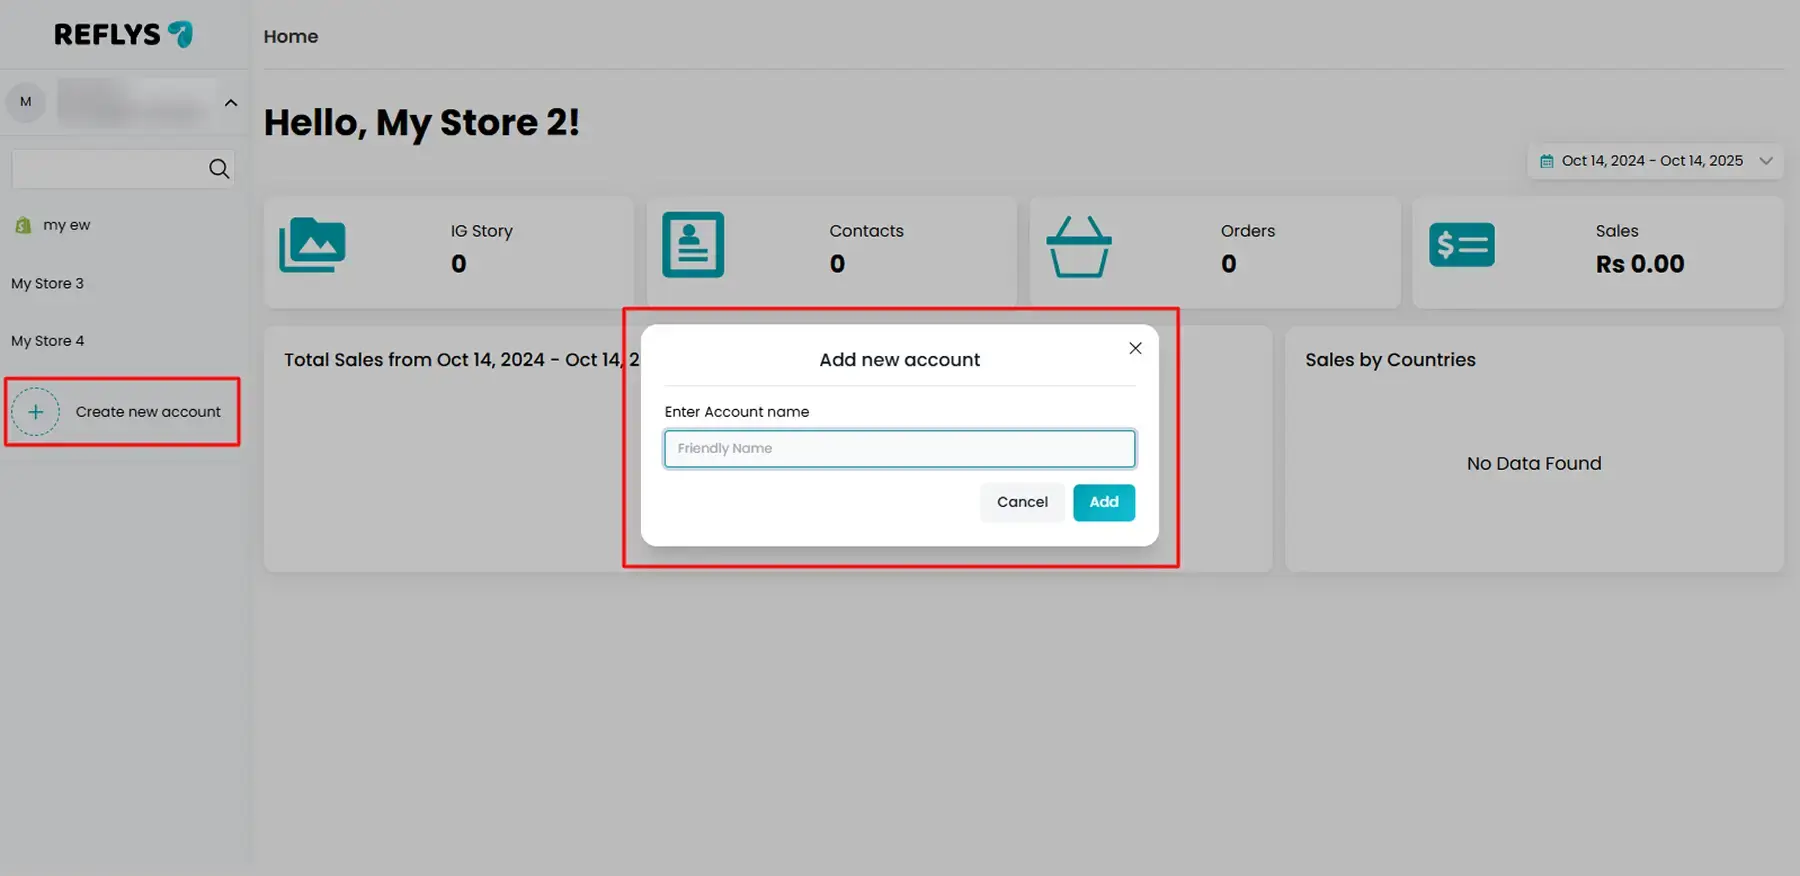
- After typing the name, click Add.
- Your new account can now be viewed in the accounts list on the left.
Step 4: Connect the New Account to Meta Channels
It is not enough to create an account. In order to enable it, you must link at least one Meta channel.
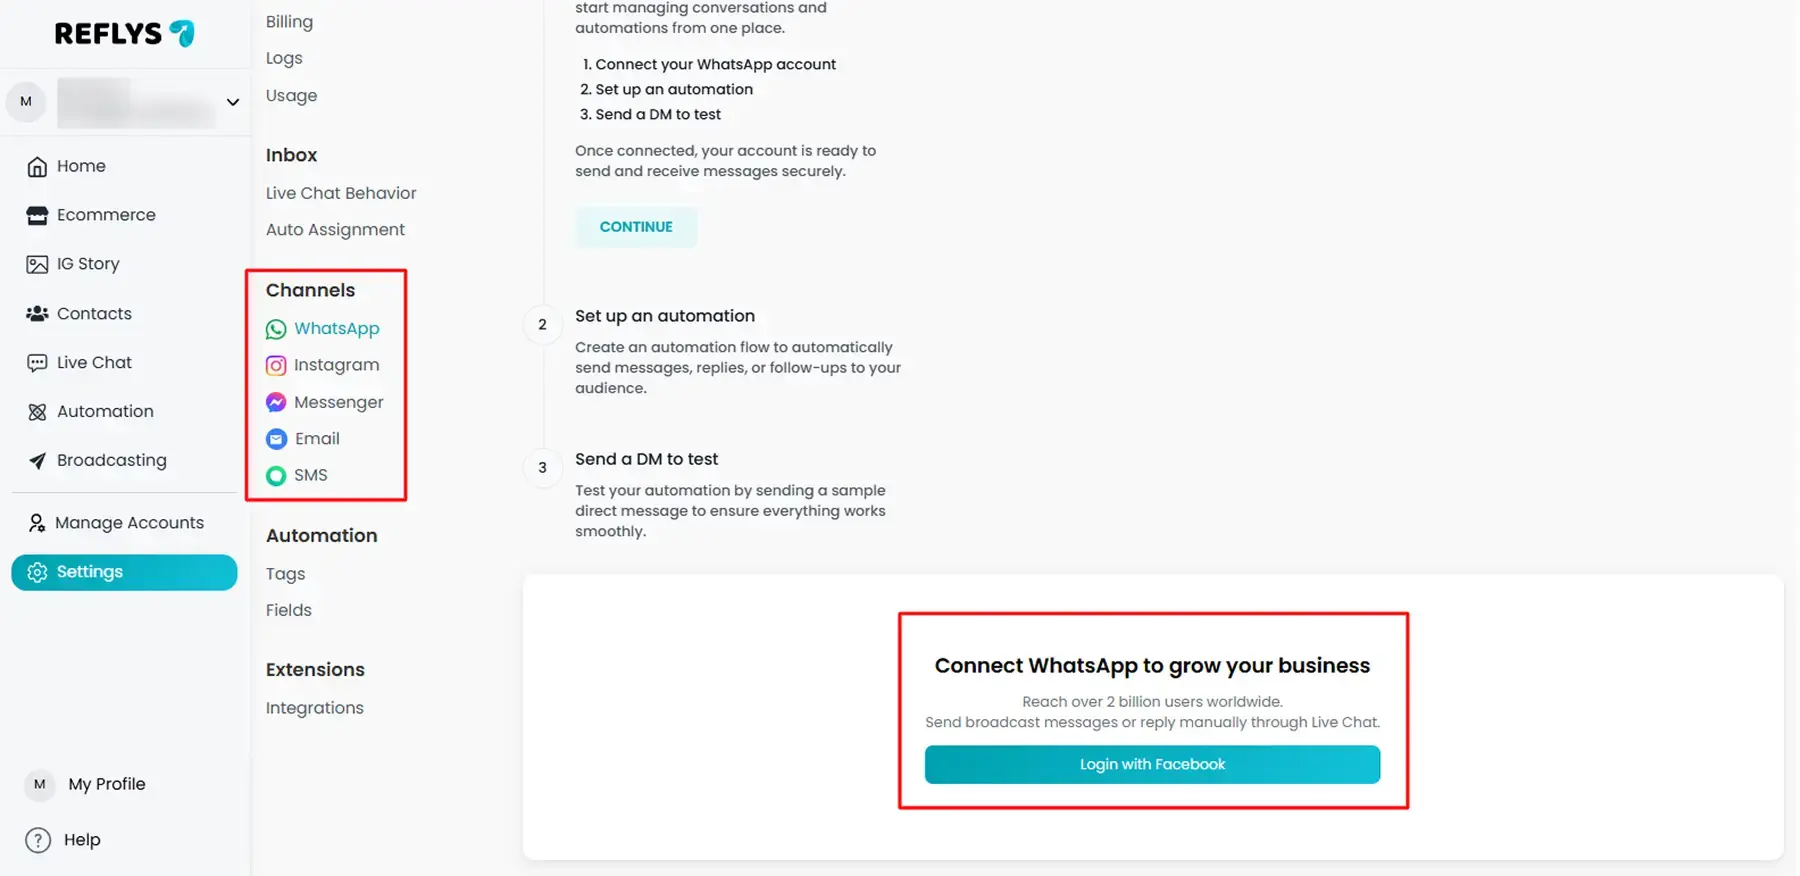
- Choose the account that you have created.
- Go to Settings > Channels
- Choose a channel to connect — Messenger, Instagram, or WhatsApp.
- Choose the connection steps, and when it is done, your account is ready to use.
You can now begin using automation, tracking, and all Reflys features using that account.
Important Things to Keep in Mind
- You are only allowed to create new accounts when your previous accounts are linked to a Meta channel.
- When you attempt to create an account without linking to the former ones, Reflys will not permit it.
- You do not require different Facebook logins for each account; just a Facebook login will work with all accounts.
- You can switch between your accounts easily from the left-side panel anytime.
Tips for Managing Multiple Accounts
- Name your accounts clearly so you don’t mix them up. For example: Store USA, Store UK, Main Brand.
- Connect accounts as soon as you create them. You must not leave them disconnected since you cannot add new ones until they are connected.
- Check connections regularly to make sure Messenger, Instagram, or WhatsApp are still active.
- Download important data separately for each account so that you always have records.
- Use one Facebook login to control everything. No need to juggle between different logins.