How to Change Team Member Roles and Permissions in Reflys
When your business begins to grow, teamwork becomes essential. You can begin to control all things yourself through Reflys: from automating interactions with clients to analyzing reports. “But at some point, you’ll need a few extra hands: a support agent to chat with customers, an editor to design automation flows, or an admin to help you manage billing and team settings.
This is where Reflys’ roles/permissions come into play. By setting the right role for each member, you can ensure a secure account handling while encouraging collaboration without overlapping and knowing who can access what.
In this article, you will learn everything you need to know about modifying team member roles and permissions in Reflys, including a step-by-step guide for controlling access, billing rights, and plan limits.
Why Team Member Roles and Permissions Matter
Imagine giving your customer support agent complete access to billing, or letting your content editor change ownership of your account. That would create confusion and risk.
Instead, Reflys makes it simple to:
- Define what each role can do.
- Update or switch roles as your team grows.
- Grant or remove billing access without changing the main role.
By managing permissions carefully, you stay in control while still giving your team the flexibility they need.
Step 1: Go to Settings in Reflys Dashboard
- Sign in to your Reflys dashboard.
- Navigate to Settings → Team Members.
- You will land on a list of all current team members, their role assignments and billing access.
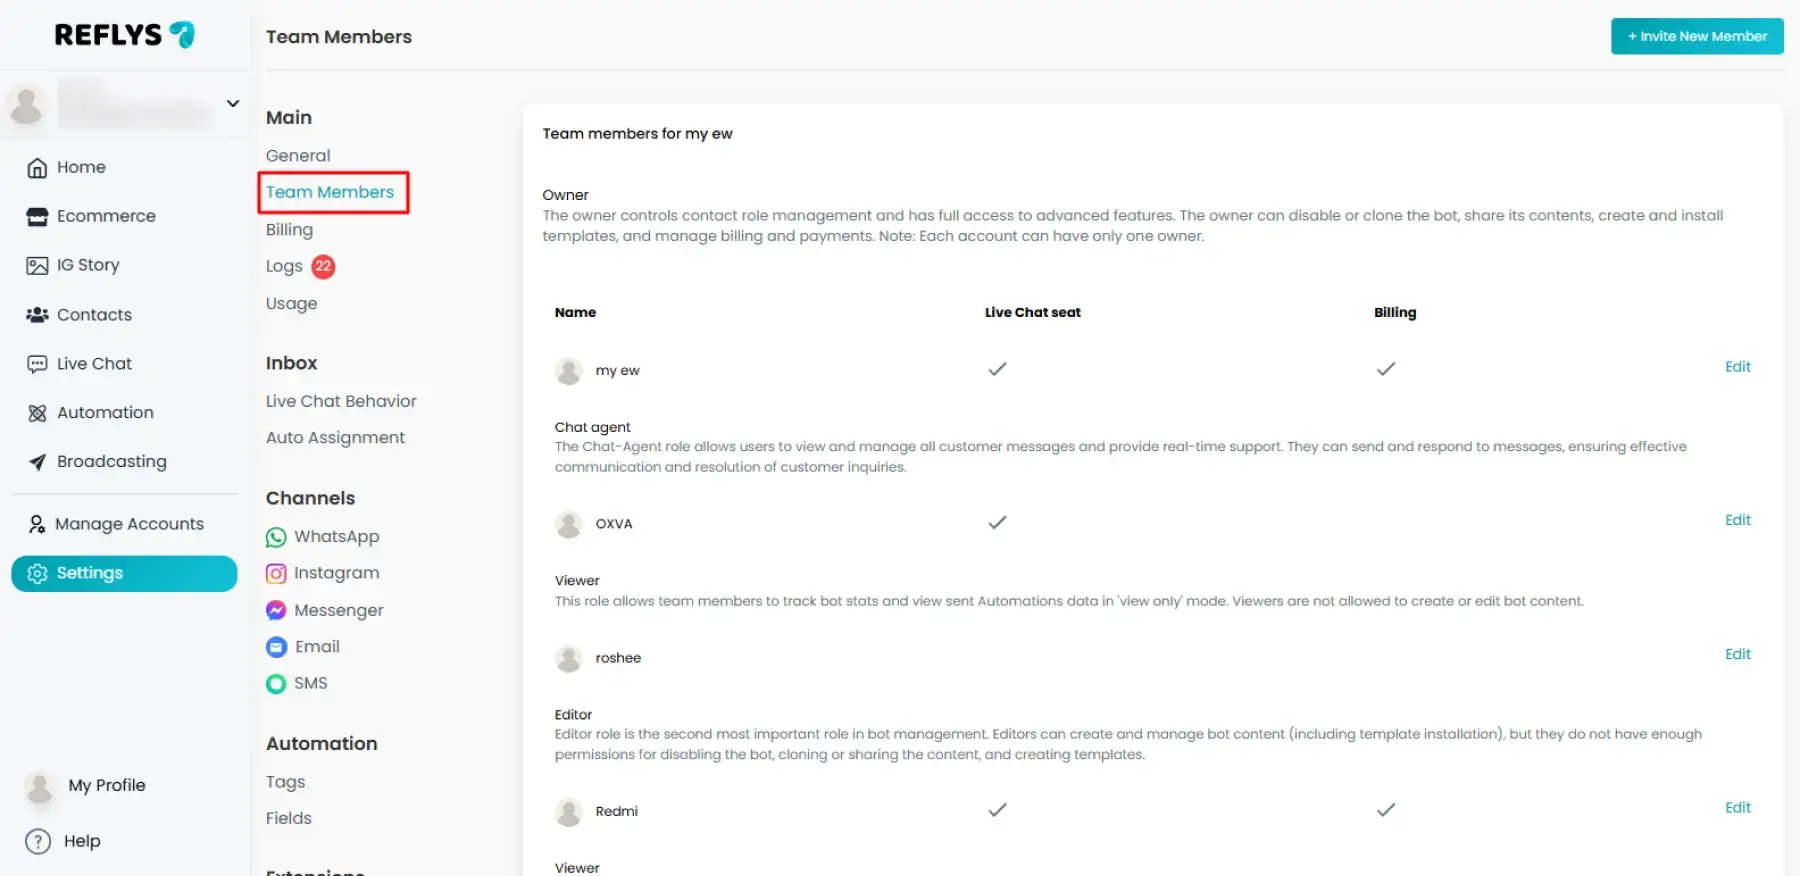
This page is your team management control station for Reflys.
Step 2: Select the Team Member to Update
- Find the team member whose role or permissions you want to modify.
- Click Edit next to their name.
- A panel will appear, displaying their current role and billing access toggle.
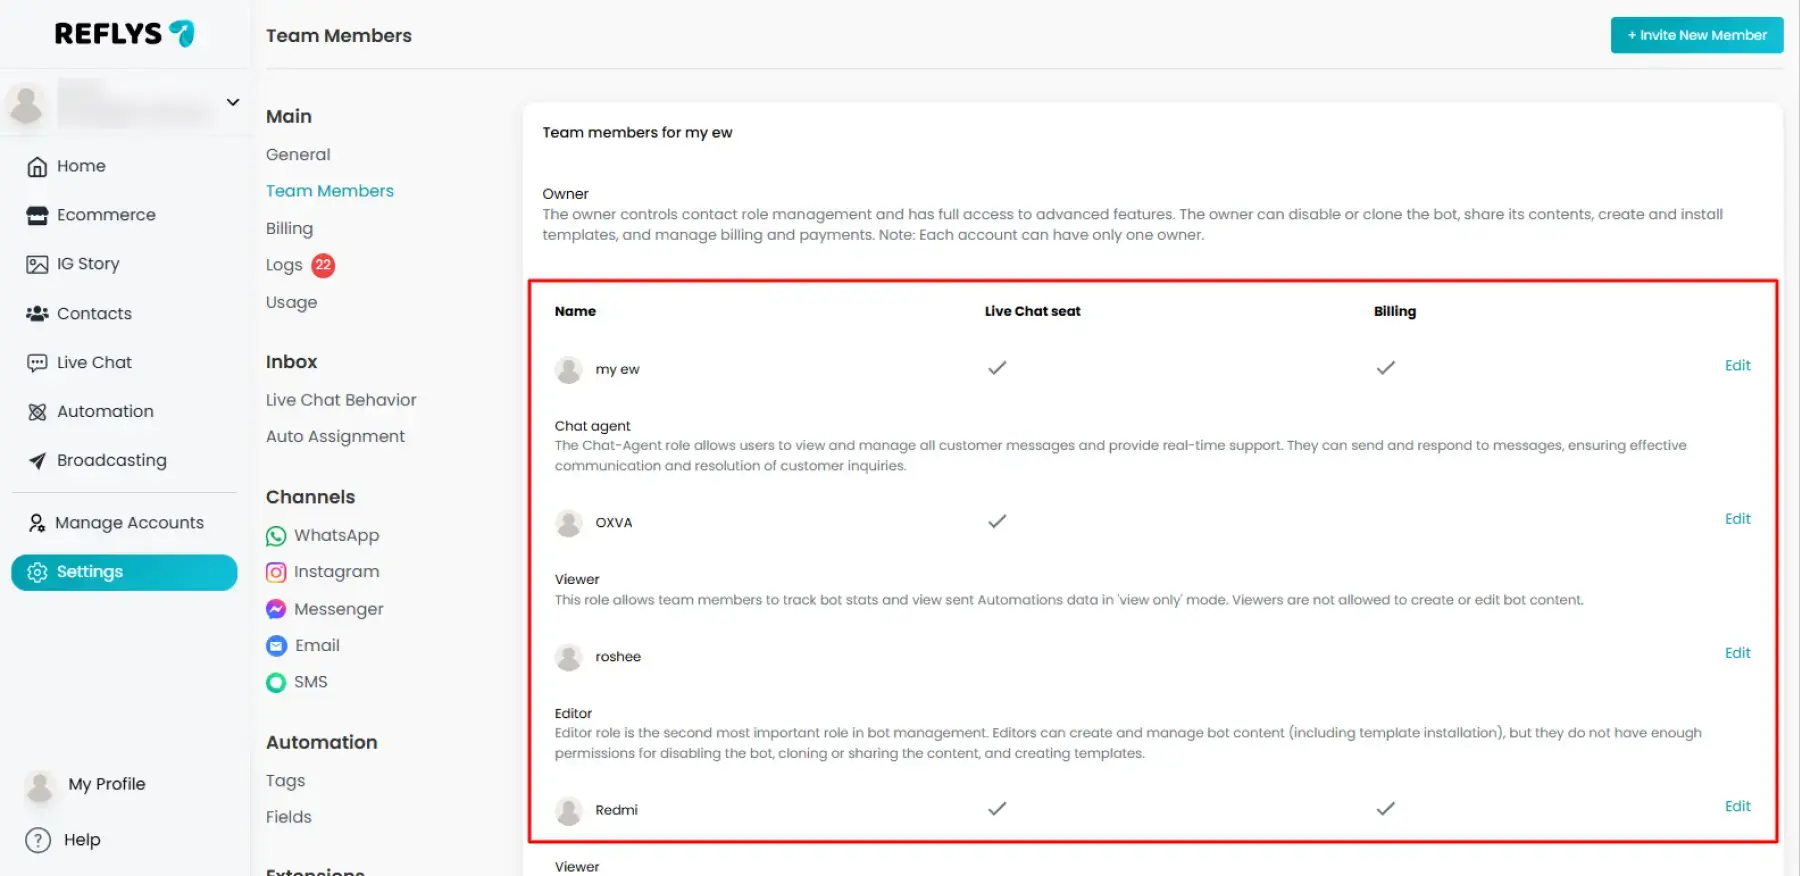
Note: Only the owner of the account has access to change the role of team members in the account.
Step 3: Change the Role
From the dropdown list, choose the role you want to assign:
- Owner → Full control of the account (limited to one owner per account).
- Admin → Manage practically everything, including billing.
- Editor → Can create and edit automations, but cannot access billing.
- Live Chat Agent → Control conversations, tags and API details.
- Viewer → Can only view analytics and reports.
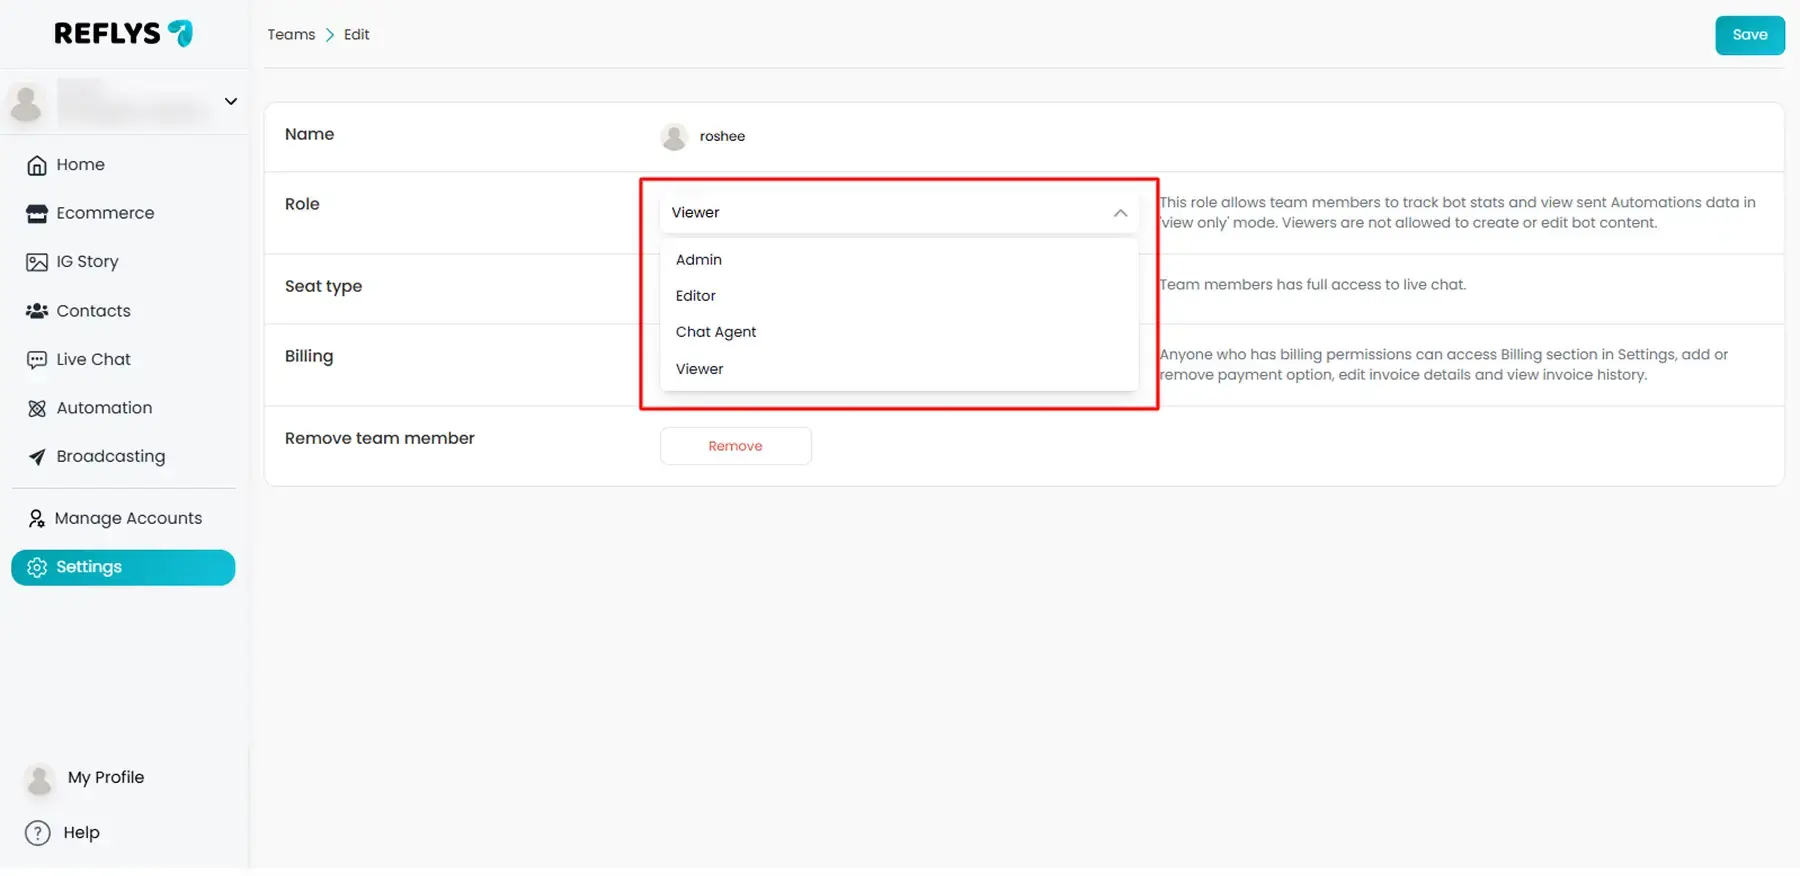
Click Save changes once you’ve selected the new role.
Important: The teammate’s permissions are updated instantly.
Step 4: Manage Seat Type
Along with roles and billing, you can also control how a team member uses their seat type in Reflys. This is especially crucial while signing roles to team members.
- You will find the Seat Type option in the team member’s profile.
- You’ll see the setting Live Chat Seat.
- Once activated, the team member will be able to access live chat and join conversations, respond to customers, create tags or update user details.
- If you do not want a member to access a live chat seat, just turn it off.
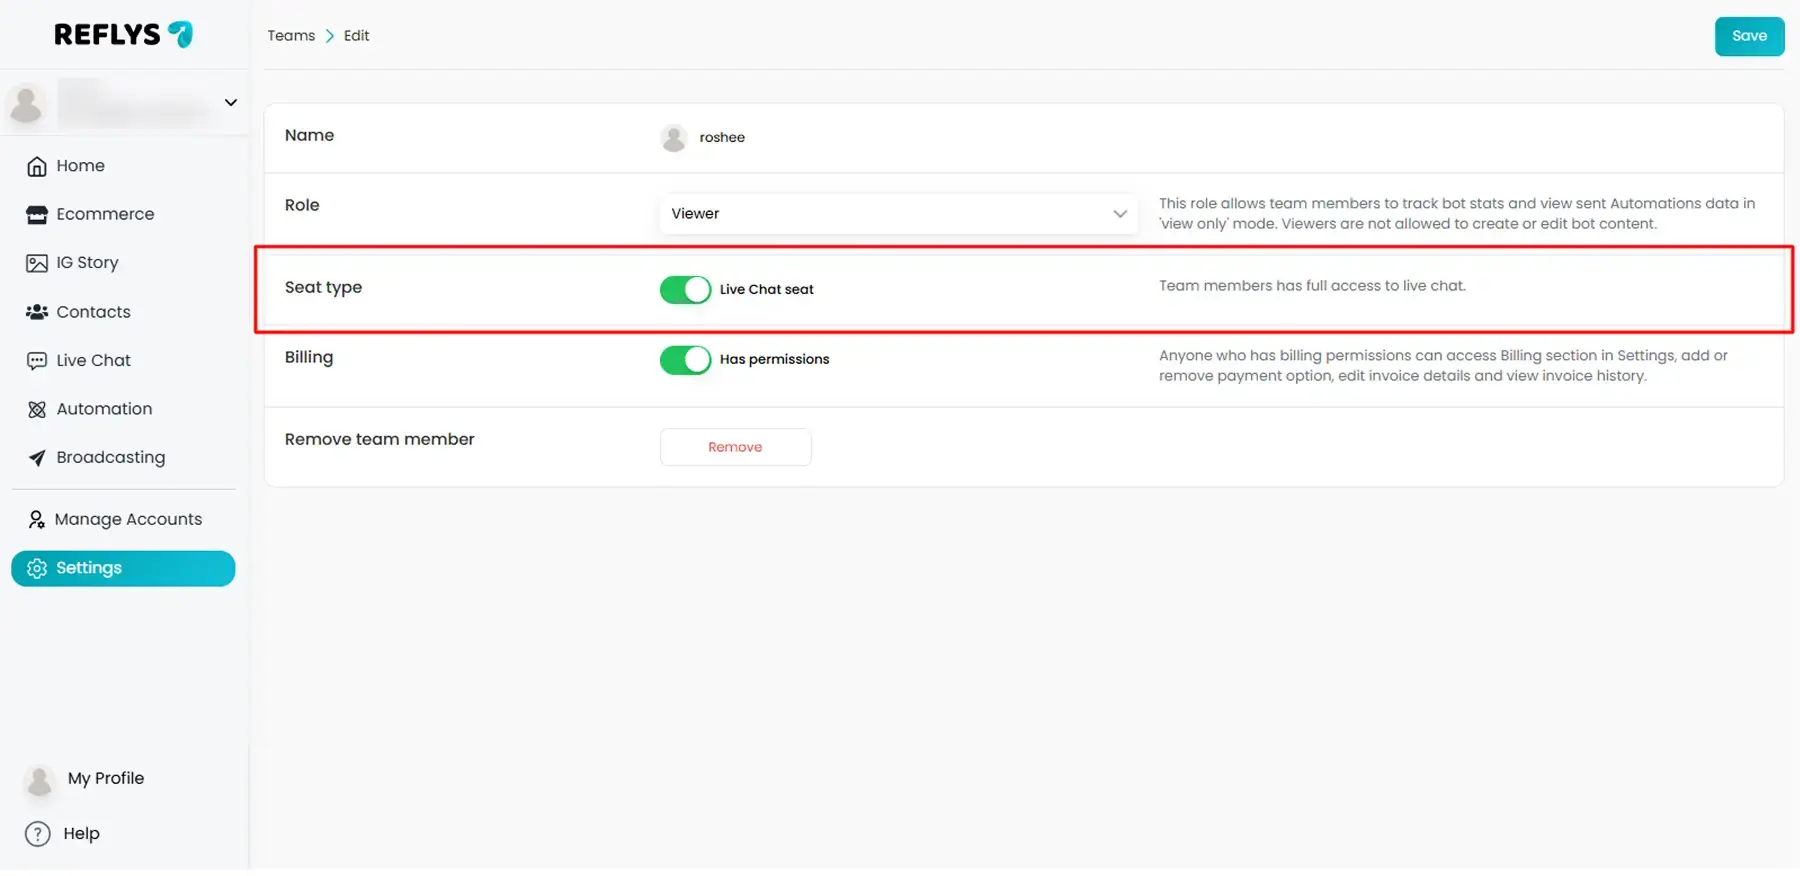
This toggle makes sure that only the right people are utilizing Live Chat Seats, and streamlines your team setup to be in line with what you’re paying for.
Step 5: Update Billing Access
Sometimes, it’s a team member with whom you want to share invoice or payment details, but not grant them full Admin access. So, you can do it by the billing access switch.
- On the profile for your team member, you will see a toggle for Billing Access.
- Switch it ON to grant billing permissions, or OFF to remove them.
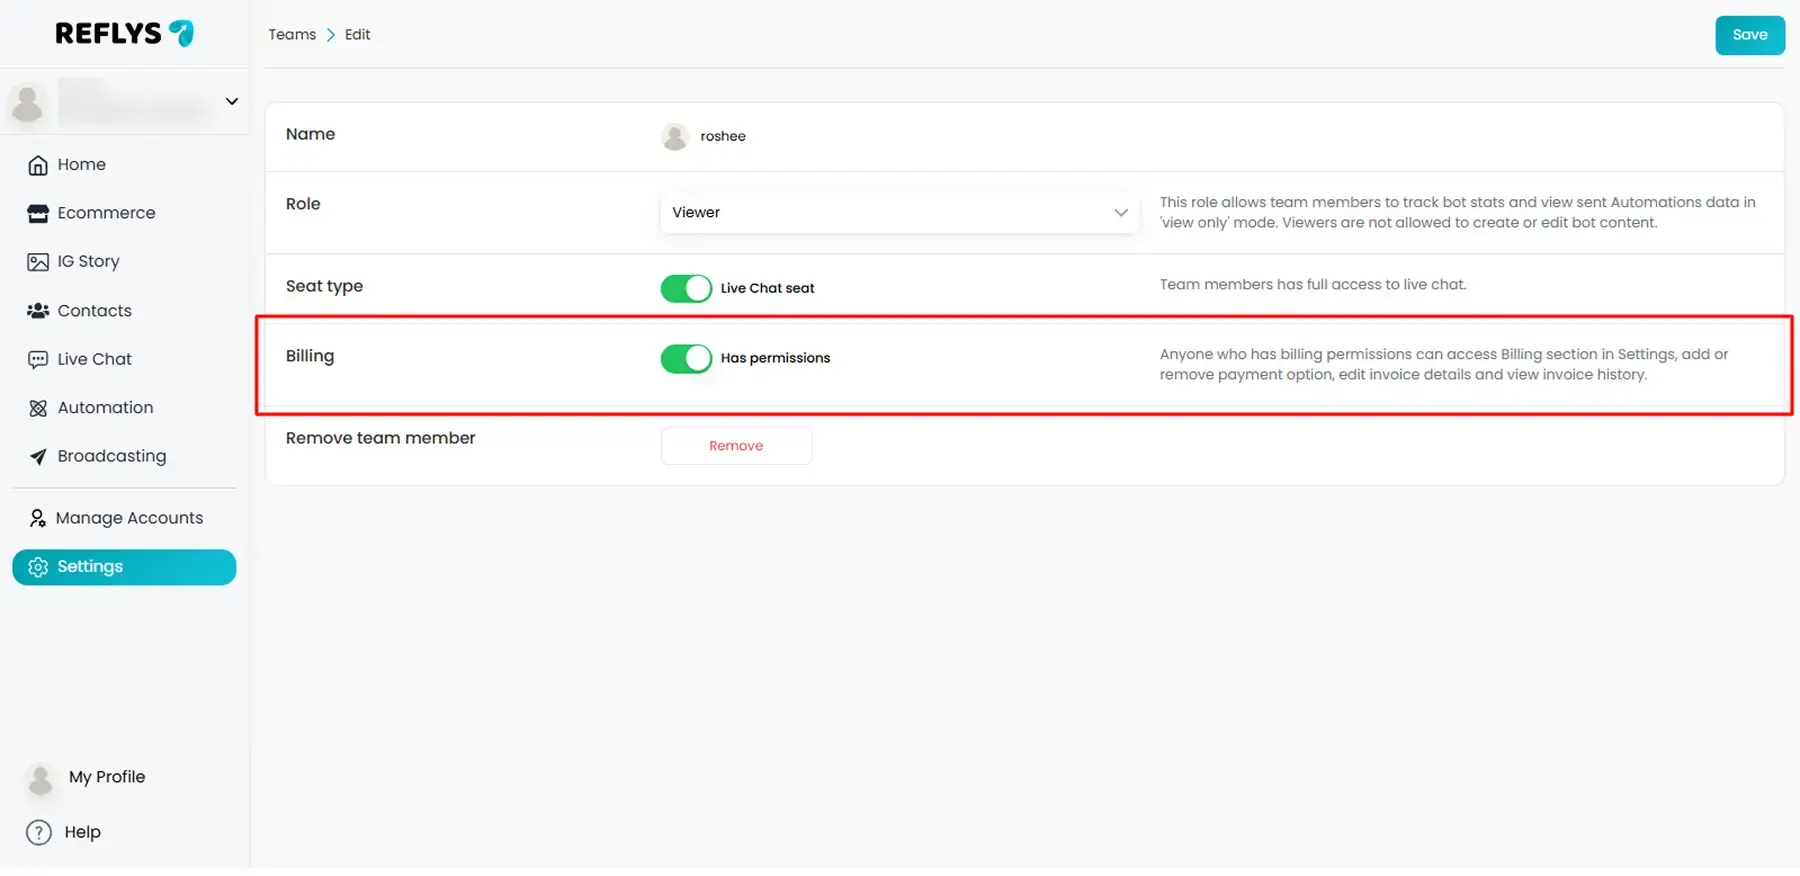
This gives you the flexibility to assign financial responsibility independently of your full account settings.
Note: Users with permission to bill can also view the Invoicing history, add or remove payment methods, edit billed-to details and do anything in the billing section of settings.
Plan Limitations for Team Members
Your Reflys subscription plan determines how many teammates you can invite:
- Free Plan → No additional users; only the owner can access the login.
- Pro Plan → 1 extra team member may be added, ideal for small teams.
- Business Plan → Add up to 5 members. Ideal for larger organizations.
Note: If you try to add more team members than your plan allows, you’ll need to upgrade or remove another team member.
Final Thoughts
There’s more to managing roles and permissions in Reflys than simply providing or restricting access – it’s your chance to make sure your account is secure, organized, and scalable.
Whether you need to:
- For Reflys, change the role of a teammate,
- Control access to certain tasks, or
- Billing access without the main role switch,
Therefore, the method is easy to use, flexible and efficient.
Take a moment to review your current team setup. Give the right people the right roles, today, so your business can scale tomorrow — without compromising security or clarity.