How to Export your Contacts in Reflys
You can also export your contacts in Reflys, saving your customer data so you can use it outside the platform. You can download your contacts in various formats of files or even export certain groups through filters. In Reflys, exporting your contacts is easy. Follow the following steps.
Step 1: Log in to Your Reflys Dashboard
- Go to Reflys Dashboard and log in using your account credentials.
- Once you’re logged in, you’ll see your main dashboard.
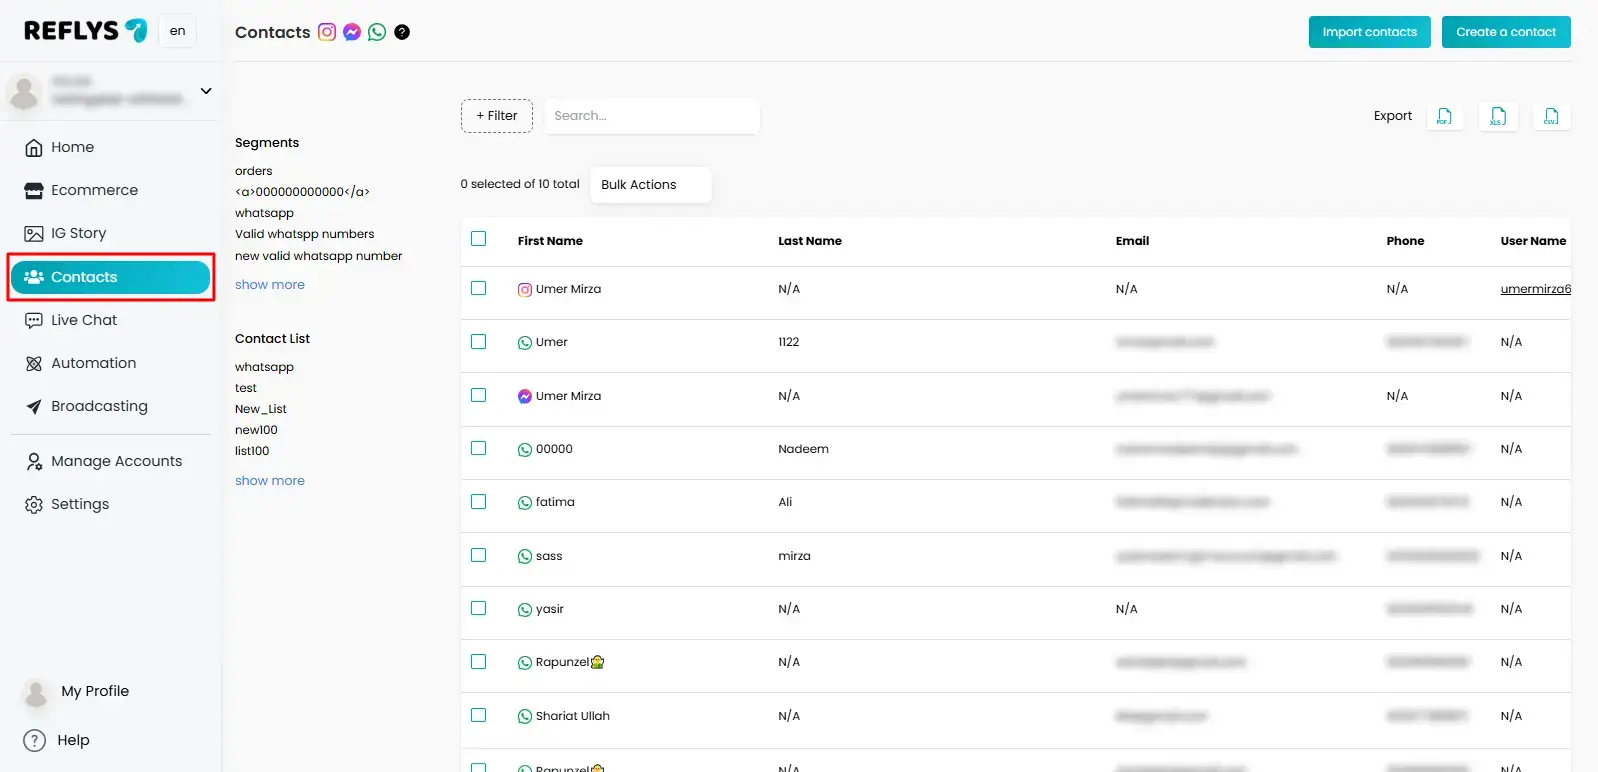
Step 2: Navigate to the “Contacts” Section
- Select Contacts on the left-hand sidebar menu.
- All of your saved contacts are presented in this section and have all of their details, including name, phone number, last name and username.
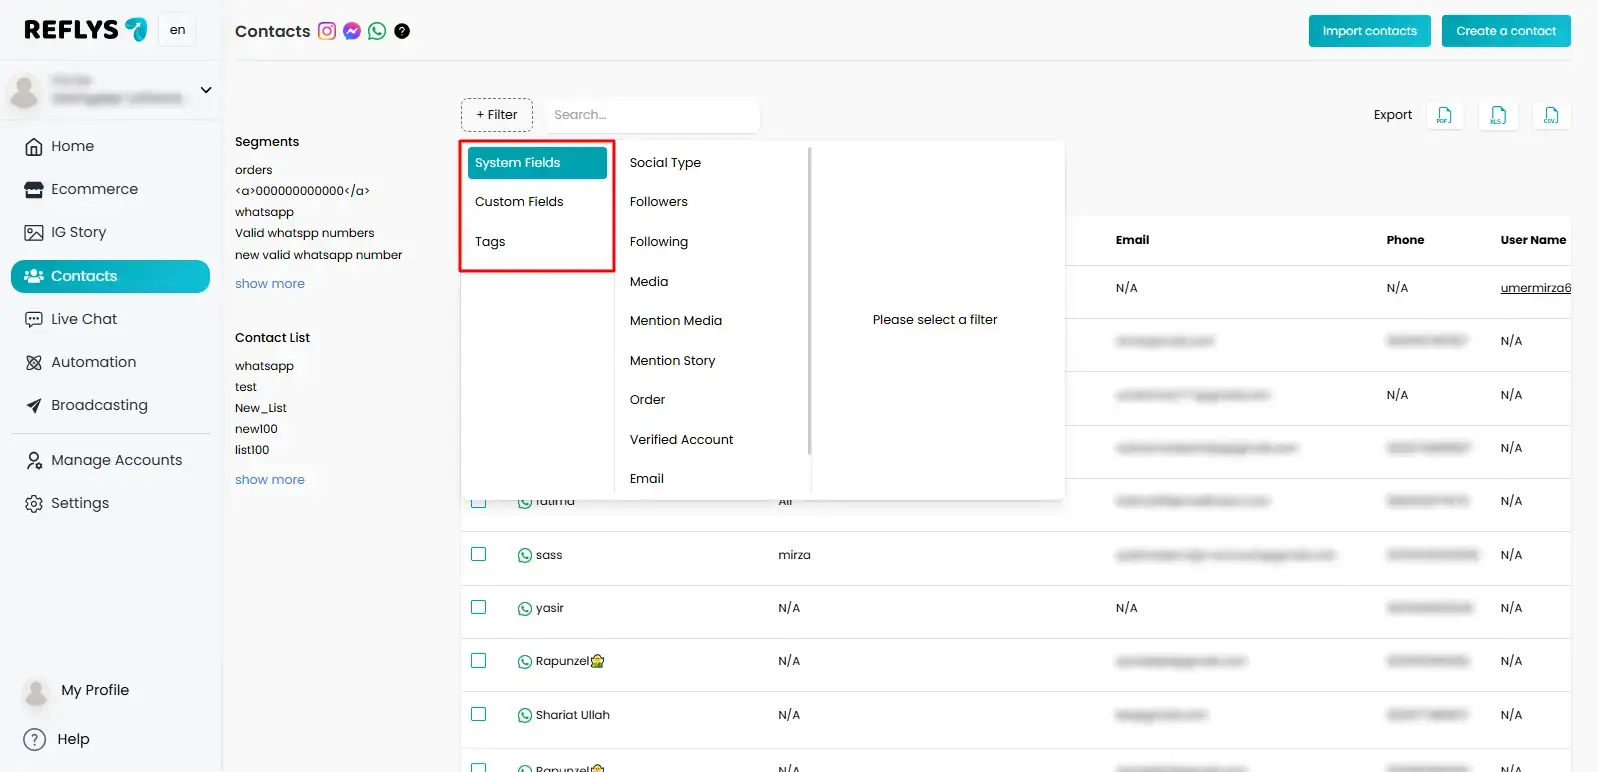
Step 3: Apply Filters to Export Specific Contacts (Optional)
You have an option of exporting all the contacts or just a select few by using filters.
While applying a filter in contacts, you will find a filter option at the top.
Select the criteria to be used:
- System Fields: Filter records on default fields like name, cell phone number or creation date.
- Custom Fields: Filter contacts by the custom fields you have added (e.g. city, campaign or source).
- Tags: Simulate filters on tags assigned to campaigns or categories.
Once you have filtered your results, using the results you have selected, you can use the Apply button to limit the results to those contacts that satisfy your search requirements.
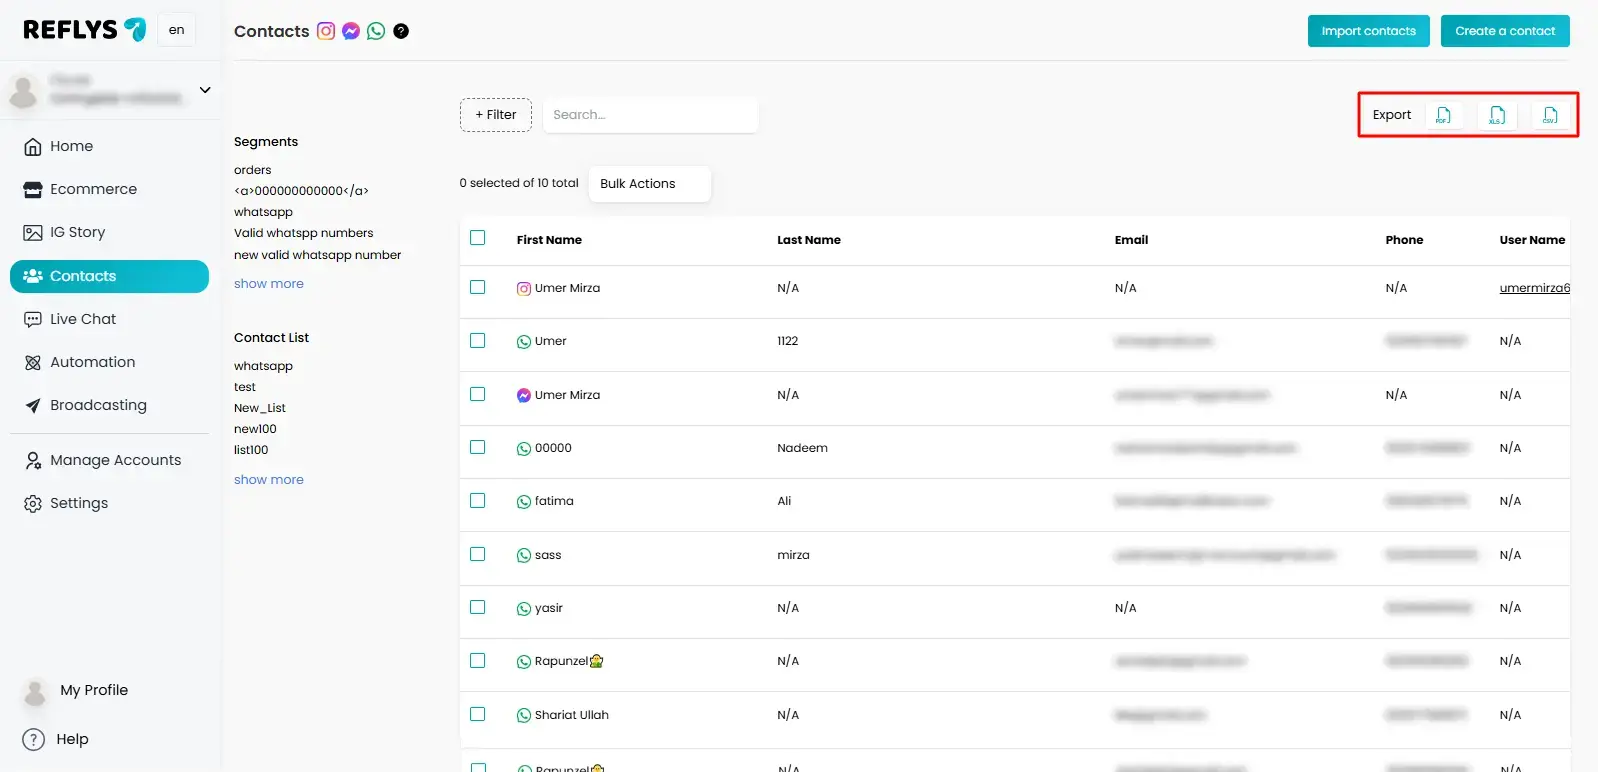
Step 4: Export Your Contacts
After you have prepared your contact list (filtered or full list):
- Go to the Export button on the upper right-hand side of the Contacts page.
- At the top right corner, you will see a list of export formats.
- You have the following options for file format:
- PDF: To have a quick printable list of your contacts.
- XLS (Excel): To be easily edited and analyzed in Microsoft Excel or Google Sheets.
- .csv: To import contacts to other tools or platforms.
- The export will automatically start when you click on the format you would prefer to use.
Step 5: Save the Exported File
Once the export is complete:
- Your file will start downloading automatically.
- Save it in the location of your choice on your computer for future use.
Tips
- If you only need certain contacts (for a campaign or report), filter first and then export.
- The CSV format is best suited when you intend to import contacts to other marketing tools.
- Make sure your contact data is up to date before exporting for accurate reporting.